画像1/1: ‘漫画:ある博士課程の学生が「FINAL.doc」を指導教員に送ったが、どんどん増えていくコメントや修正を何度も直した挙句、「FINAL_rev.22.comments49.correction.10.#@$%何故大学院に入ったのか分からない?.doc」というファイルで終わる。’
画像1/1: ‘A diagram demonstrating how a single document grows as the result of sequential changes’
画像1/1: ‘A diagram with one source document that has been modified in two different ways to produce two different versions of the document’
画像1/1: ‘A diagram that shows the merging of two different document versions into one document that contains all of the changes from both versions’
画像1/1: ‘A diagram showing how "git add" registers changes in the staging area, while "git commit" moves changes from the staging area to the repository’
画像1/1: ‘A diagram showing two documents being separately staged using git add, before being combined into one commit using git commit’
図の1
画像1/1: ‘以下の図は、git restoreを使って2つのファイルの前のバージョンを復元する方法を示しています’
図の2
画像1/1: ‘以下の図は、Gitの全体的なワークフローを示しています。ローカルでの変更は、git addを使ってステージングされ、git commitでローカルリポジトリに反映されます。また、git checkoutを使用することで、リポジトリから変更を元に戻すことができます。’
画像1/1: ‘The first step in creating a repository on GitHub: clicking the "create new" button’
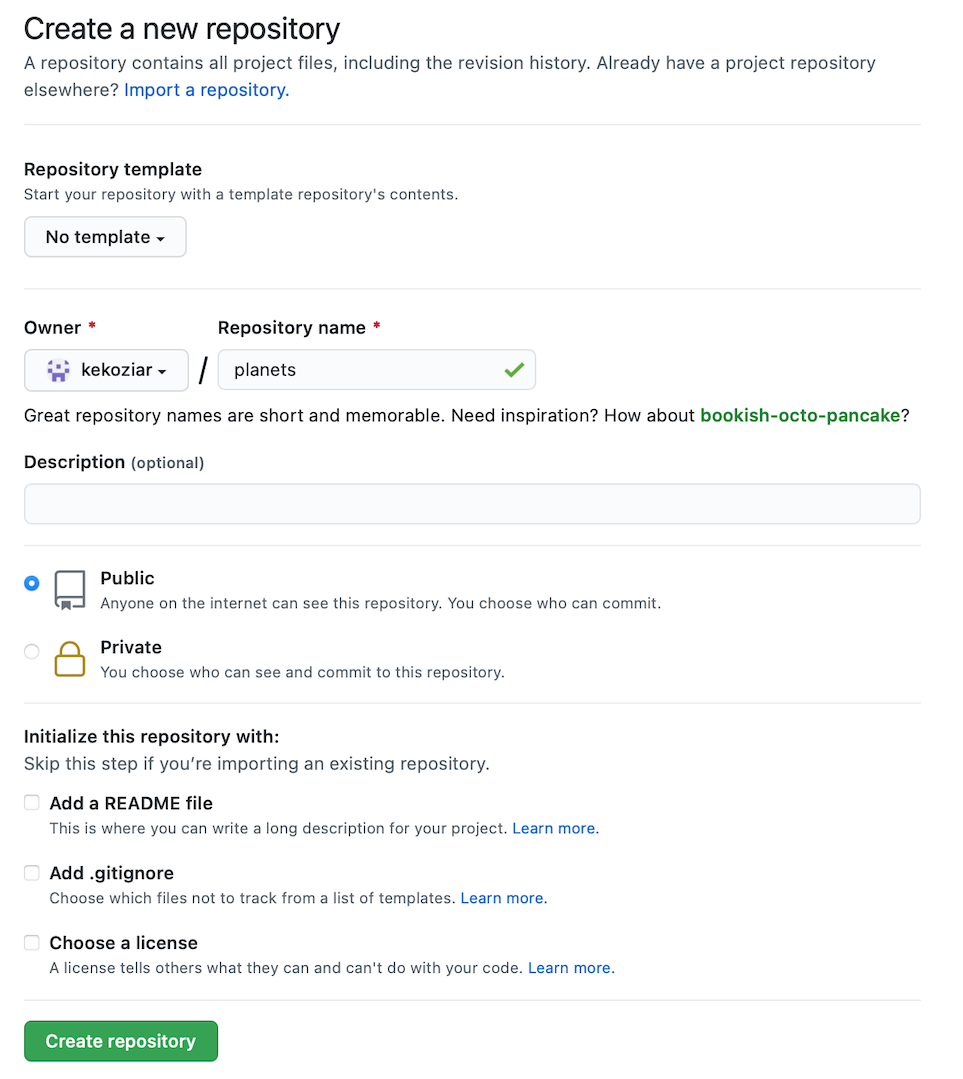
画像1/1: ‘The second step in creating a repository on GitHub: filling out the new repository form to provide the repository name, and specify that neither a readme nor a license should be created’
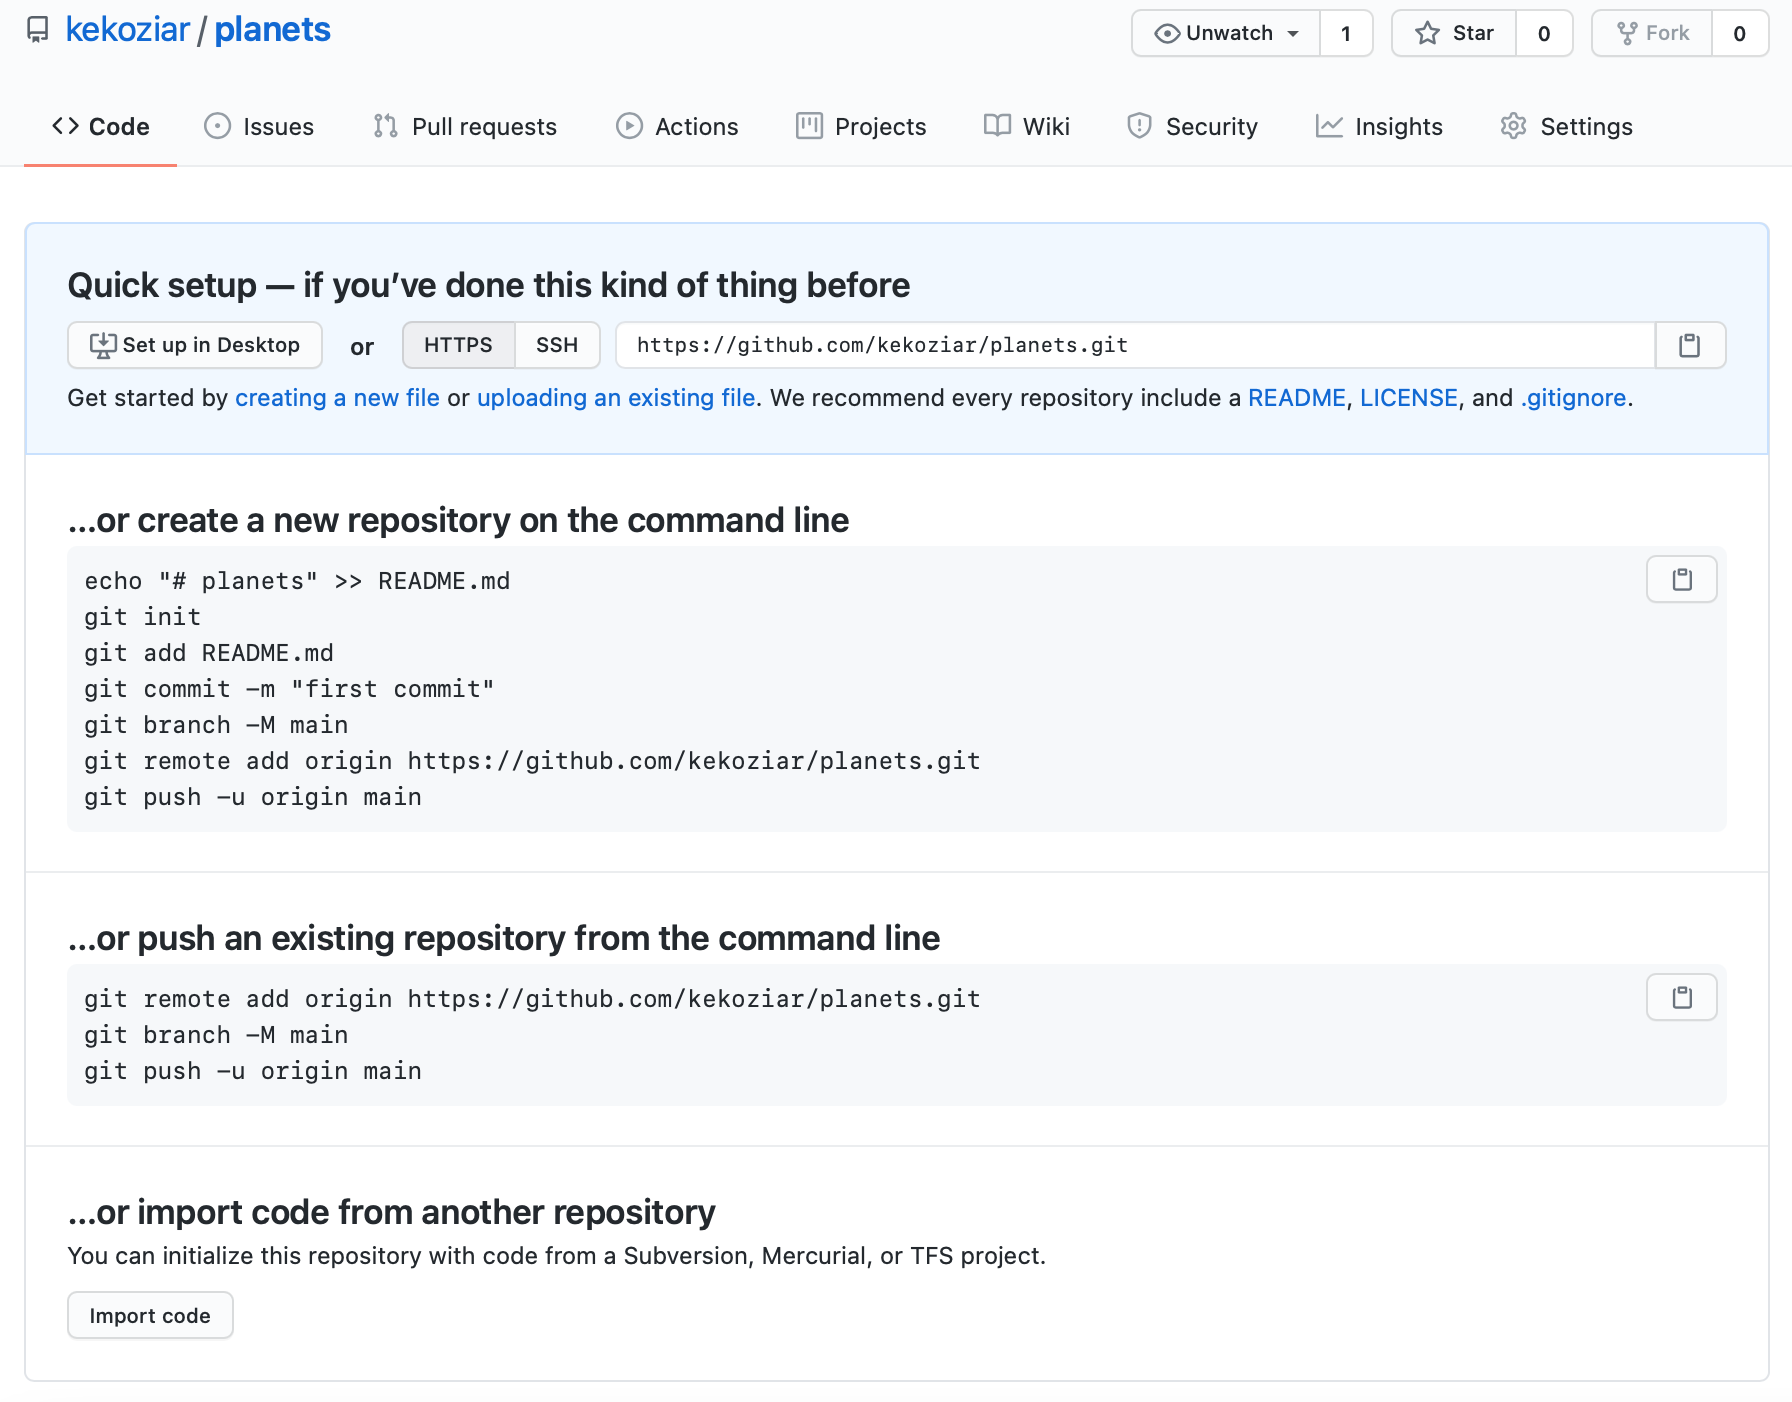
画像1/1: ‘The summary page displayed by GitHub after a new repository has been created. It contains instructions for configuring the new GitHub repository as a git remote’
画像1/1: ‘「git add」で変更がステージングエリアに登録され、「git commit」でステージングエリアからリポジトリに変更が移動する様子を示した図’
画像1/1: ‘GitHubの「planets」リポジトリが、ローカルリポジトリと同様にgitリポジトリであることを示す図。ただし、現在は空の状態。’
画像1/1: ‘GitHubでリポジトリのURLを取得するために「Copy to Clipboard」ボタンをクリックする様子’
画像1/1: ‘「SSH」をクリックすると、GitHubがリポジトリのHTTPS URLの代わりにSSH URLを提供する様子’
画像1/1: ‘「git push origin」でローカルリポジトリの変更をリモートにプッシュし、リモートリポジトリがローカルリポジトリの正確なコピーになる様子’
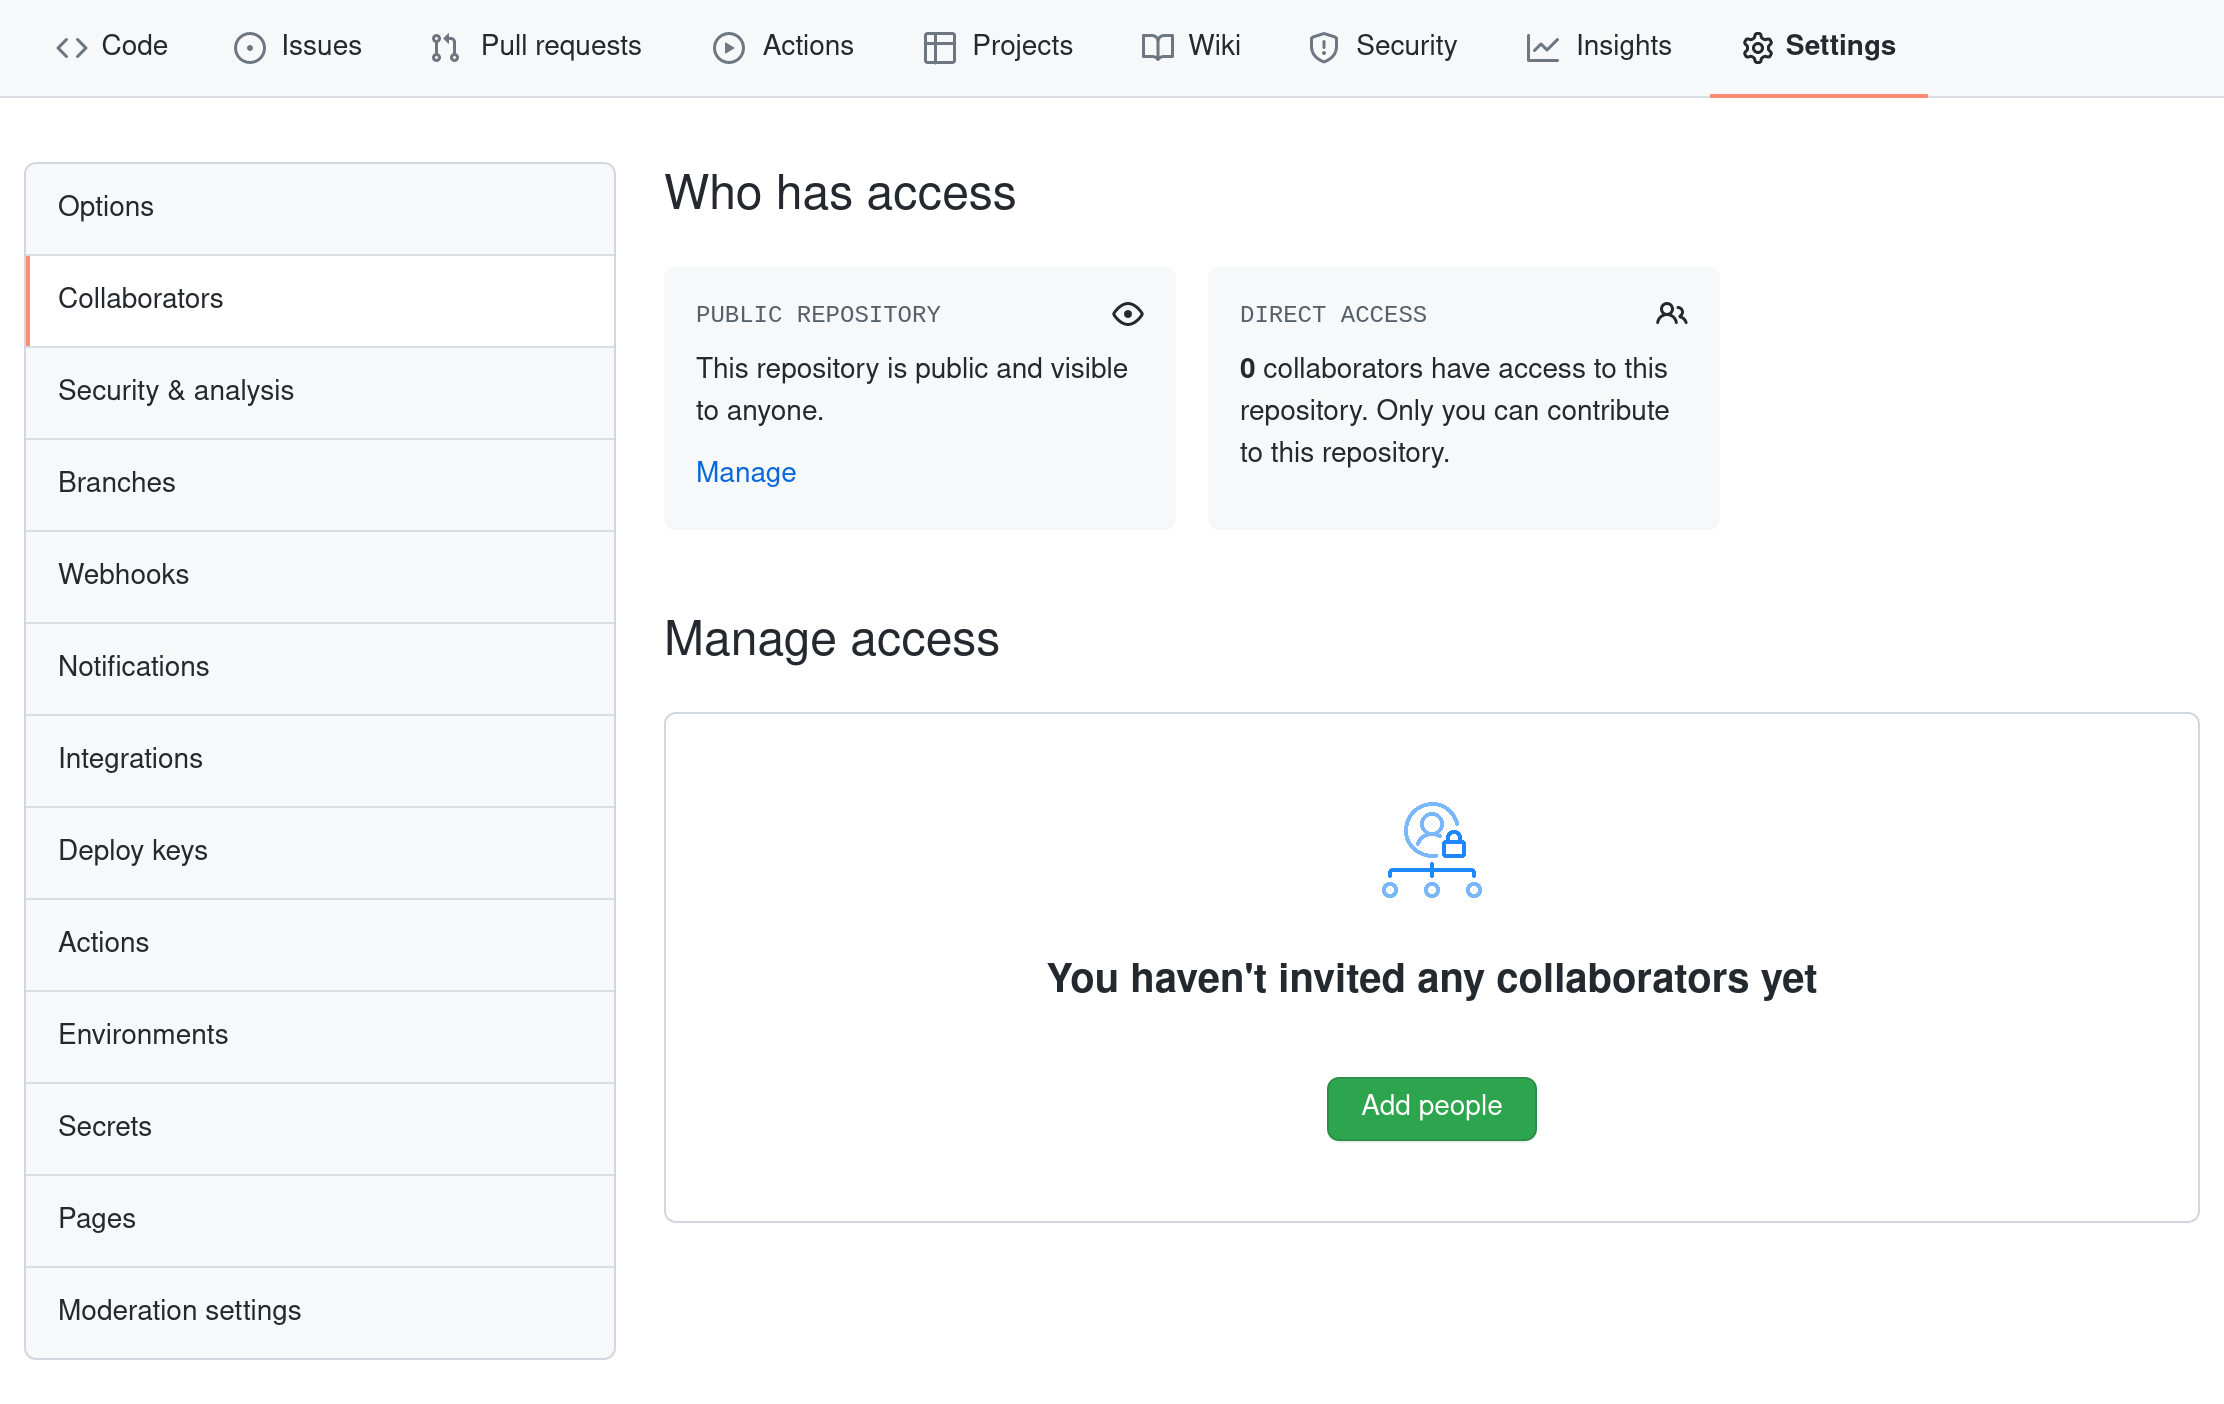
画像1/1: ‘GitHubのCollaborators設定ページのスクリーンショット。「Settings」をクリックし、「Collaborators」を選択してアクセスします’
画像1/1: ‘「git clone」を使用してリモートGitHubリポジトリのコピーを作成し、別の人がローカルリポジトリを作成して変更を加えられるようにする方法を示す図’
画像1/1: ‘2つの独立した変更がマージされる際に発生する可能性があるコンフリクトを示す図’
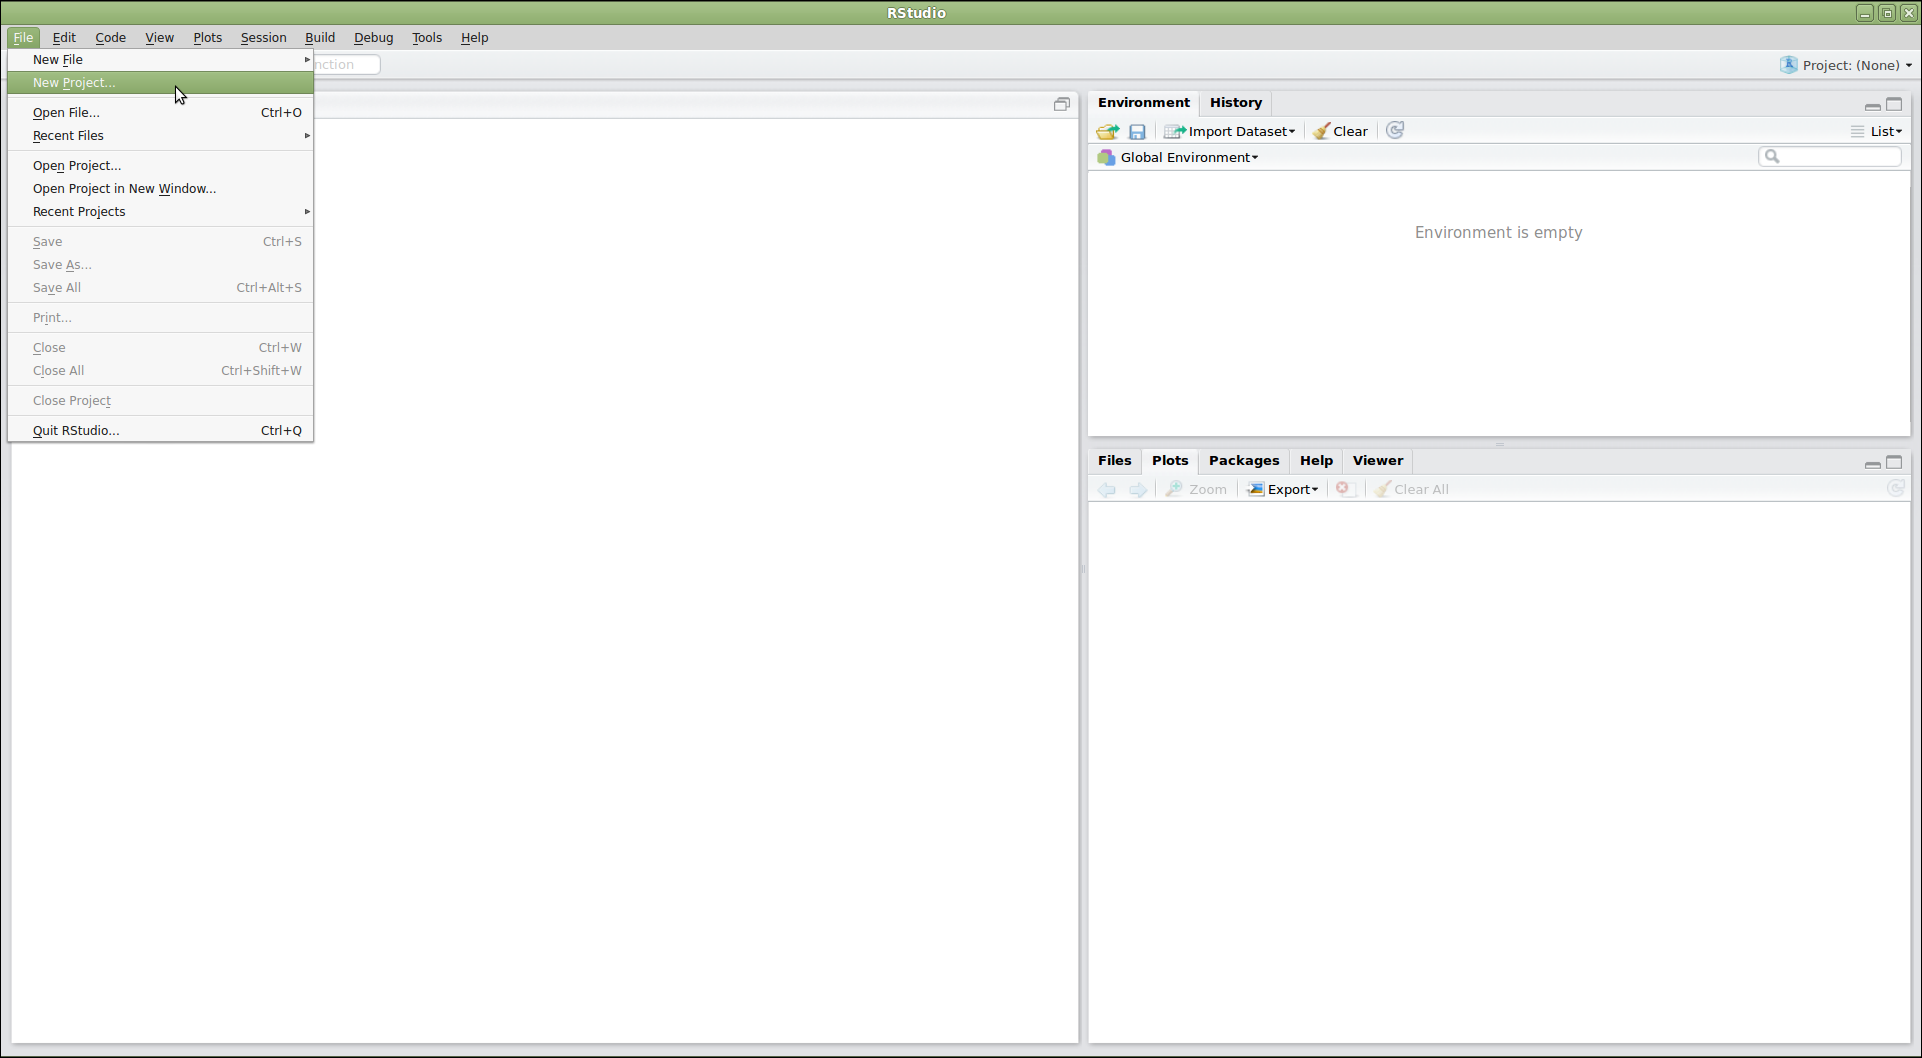
画像1/1: ‘RStudio のスクリーンショット。「New Project...」が選択されたファイルメニュードロップダウンを表示’
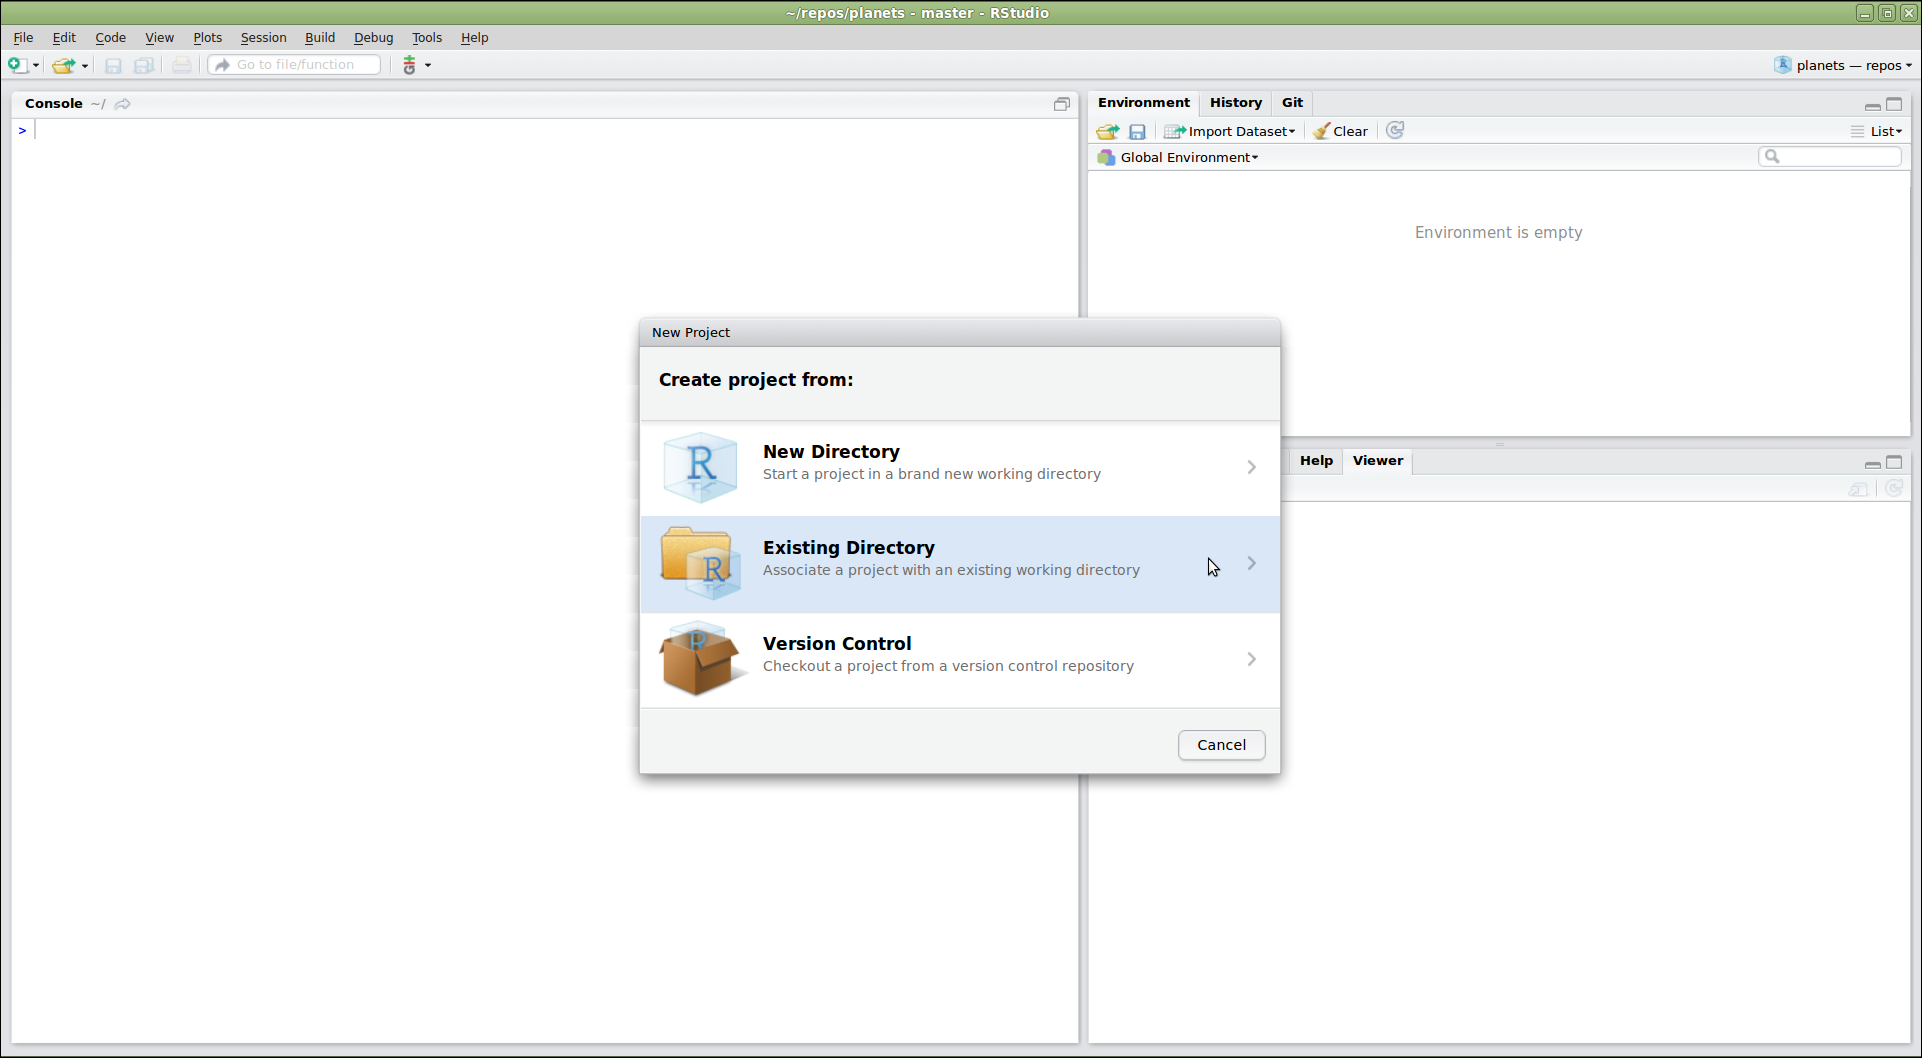
画像1/1: ‘RStudio のスクリーンショット。「Create project from existing directory」が選択された New Project ダイアログウィンドウ’
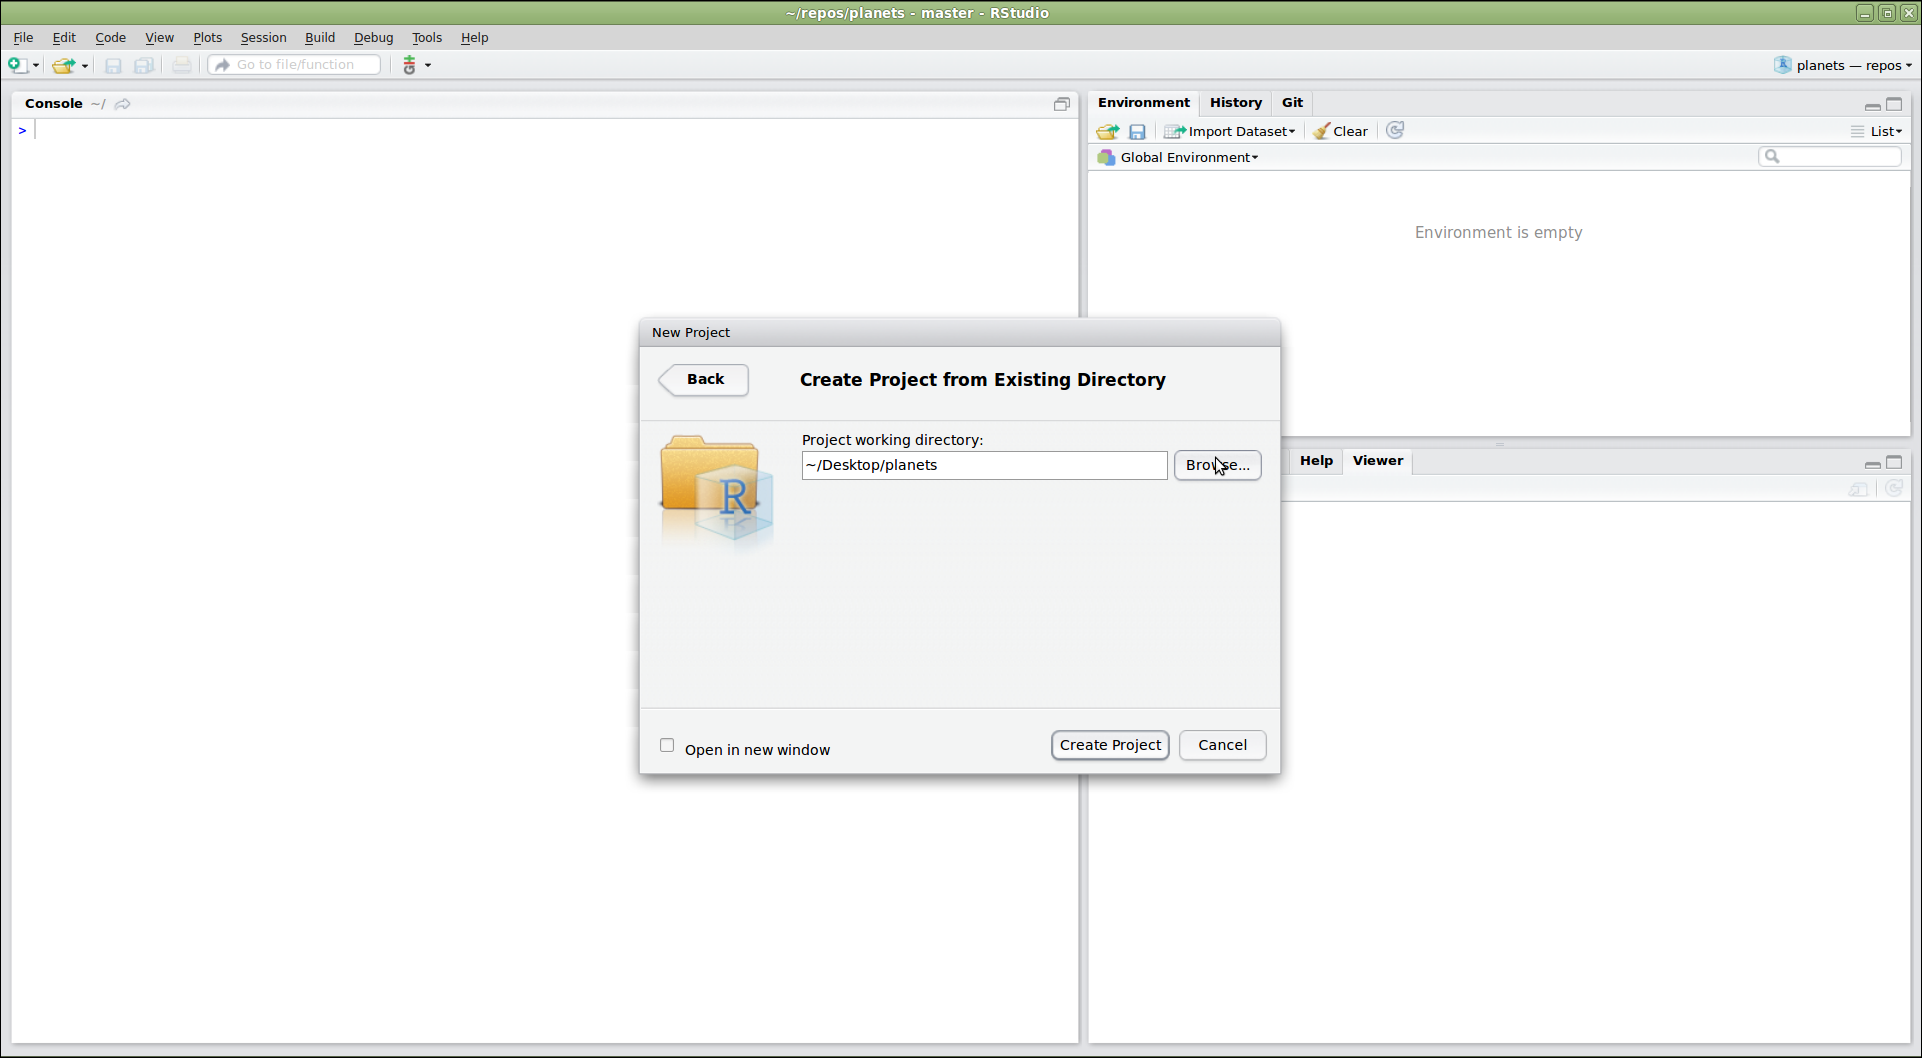
画像1/1: ‘「Create Project From Existing Directory」ダイアログを表示した RStudio ウィンドウ。ダイアログでは、プロジェクトの作業ディレクトリが "~/Desktop/planets" に設定されています’
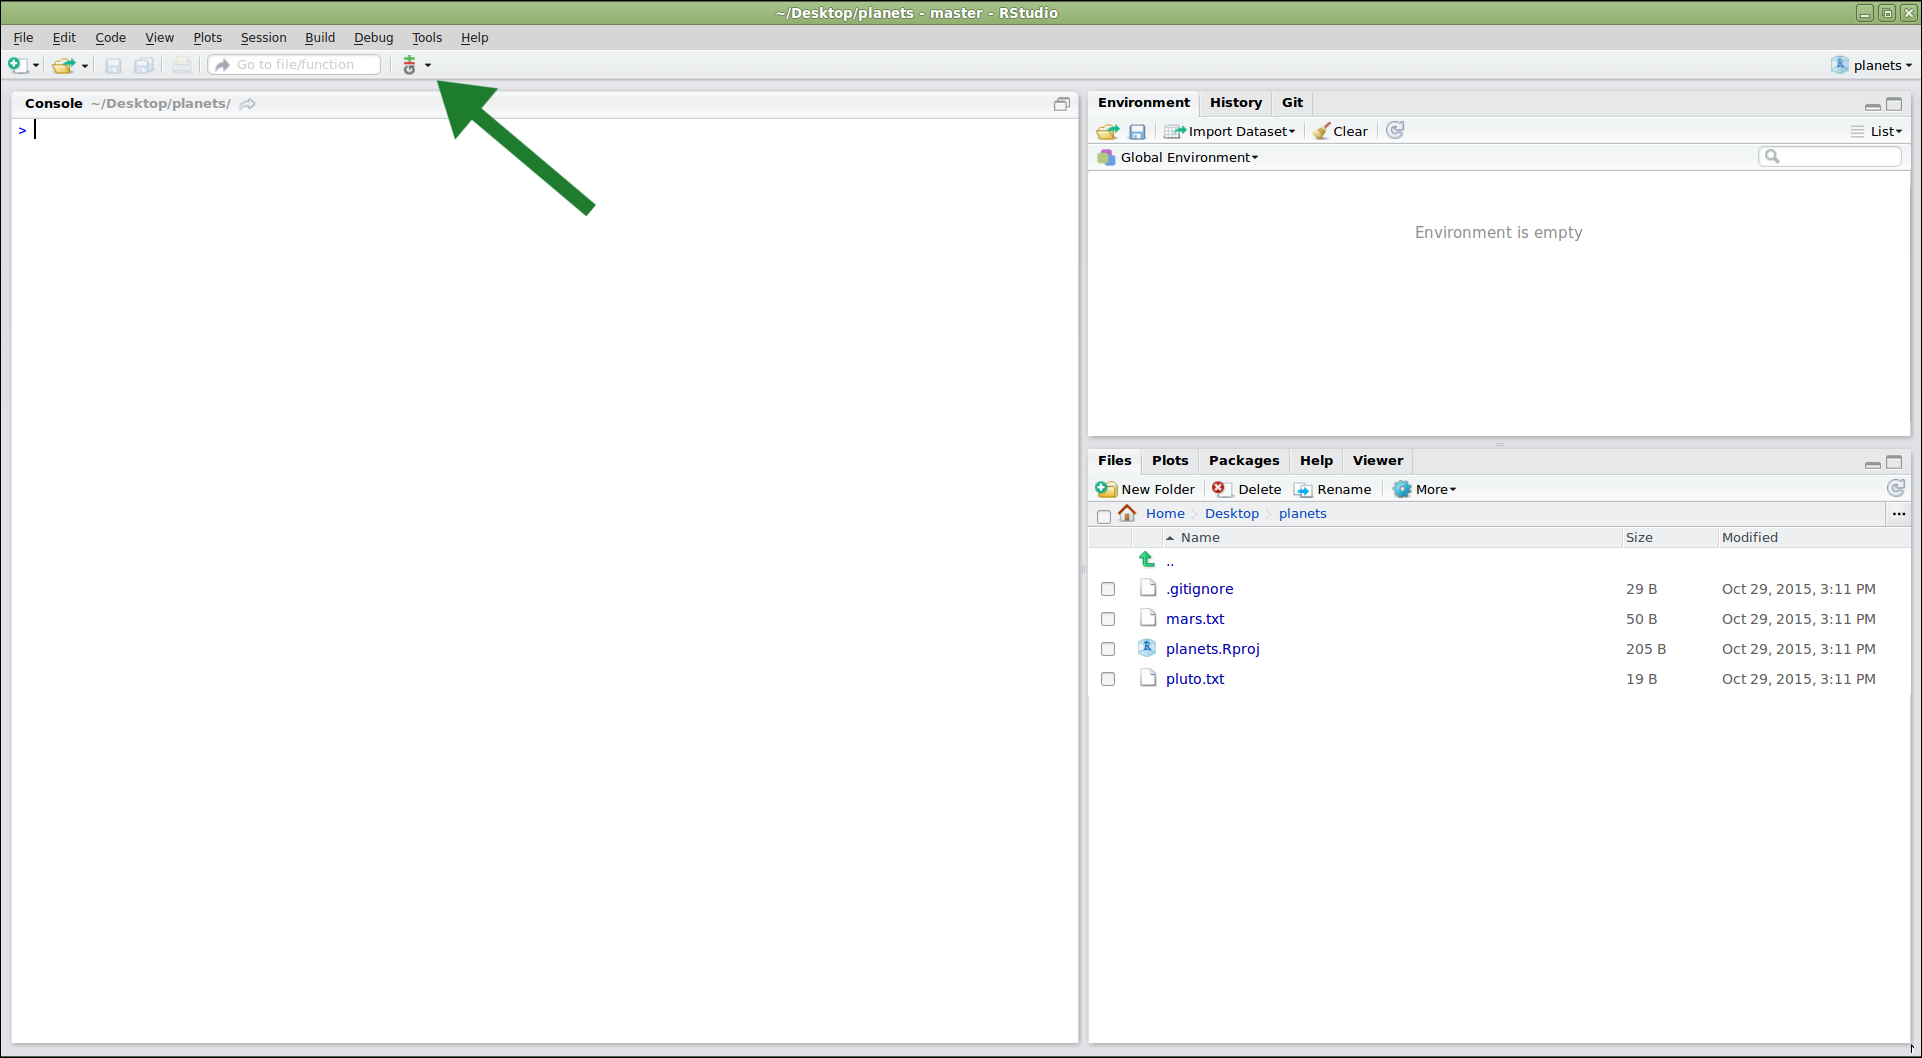
画像1/1: ‘新しいプロジェクト作成後の RStudio ウィンドウ。縦型 Git メニューバーを指す矢印が表示されている’
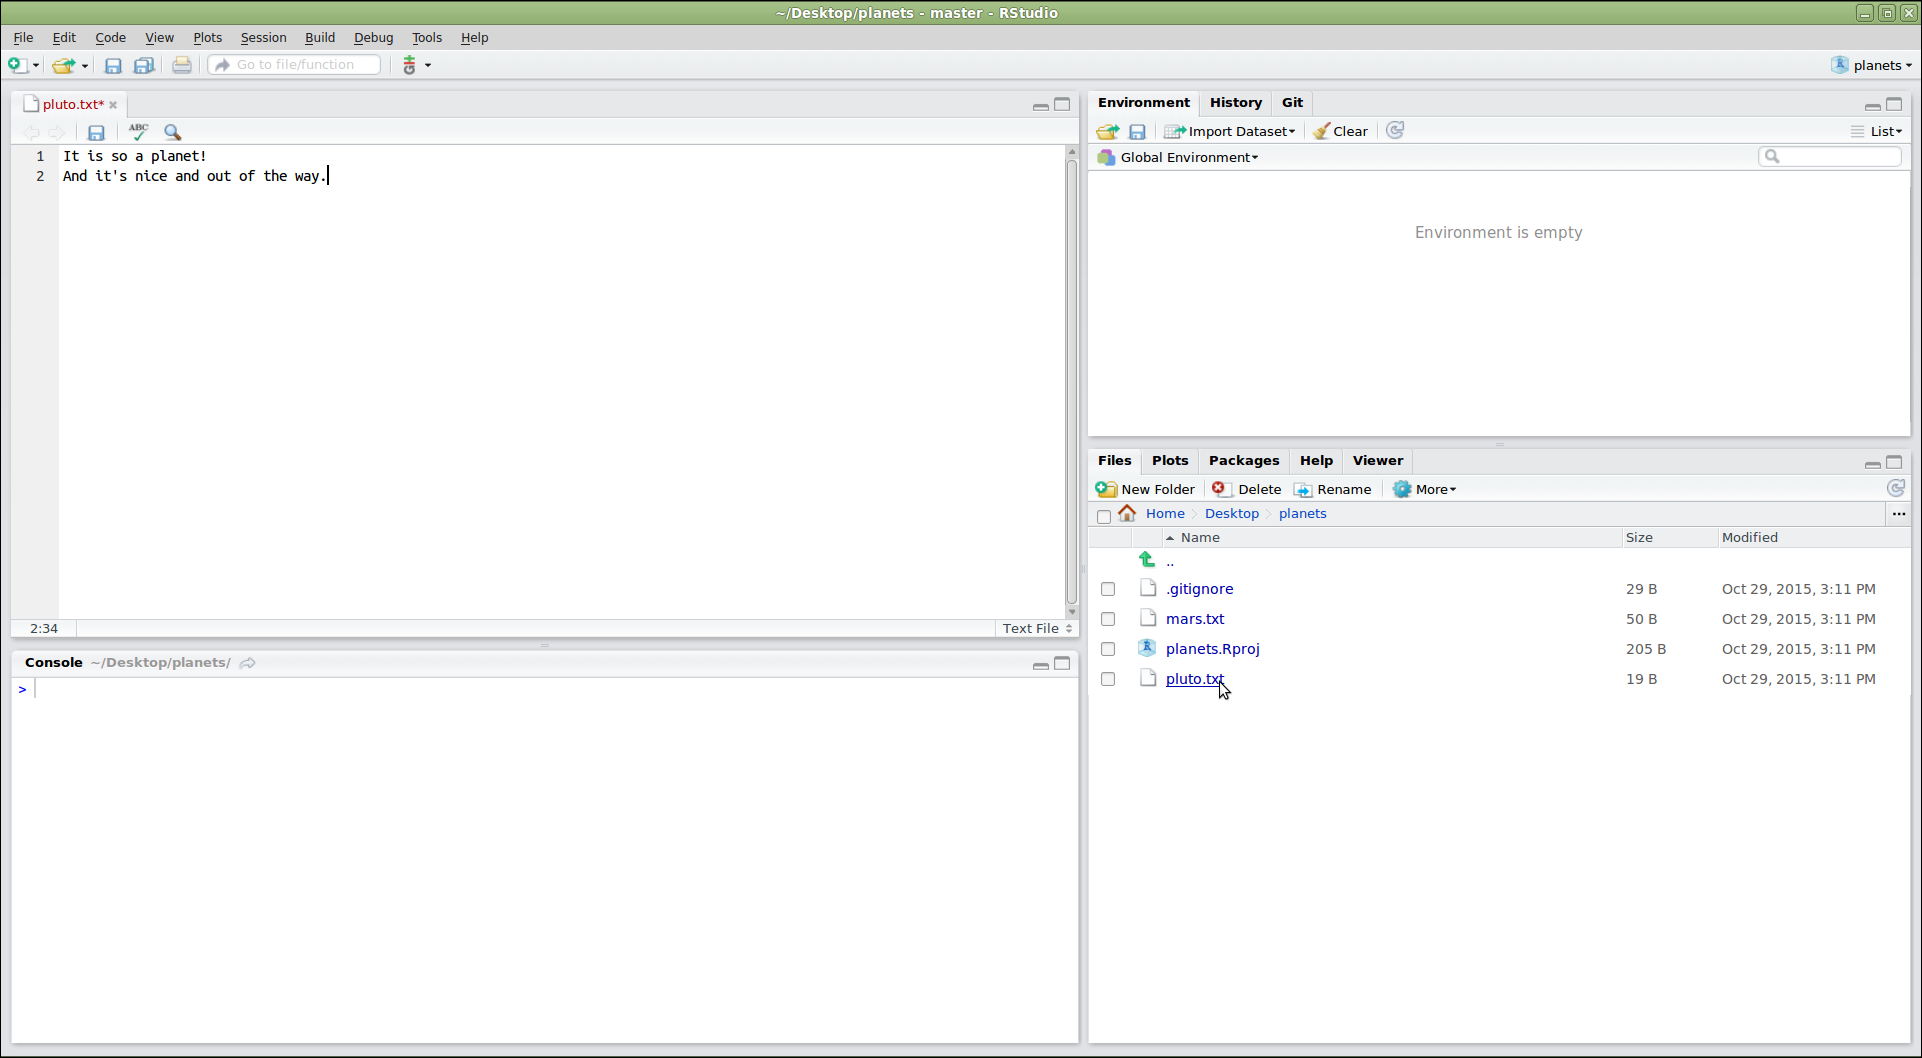
画像1/1: ‘「pluto.txt」ファイルを編集するためにエディタパネルを使用している RStudio ウィンドウ’
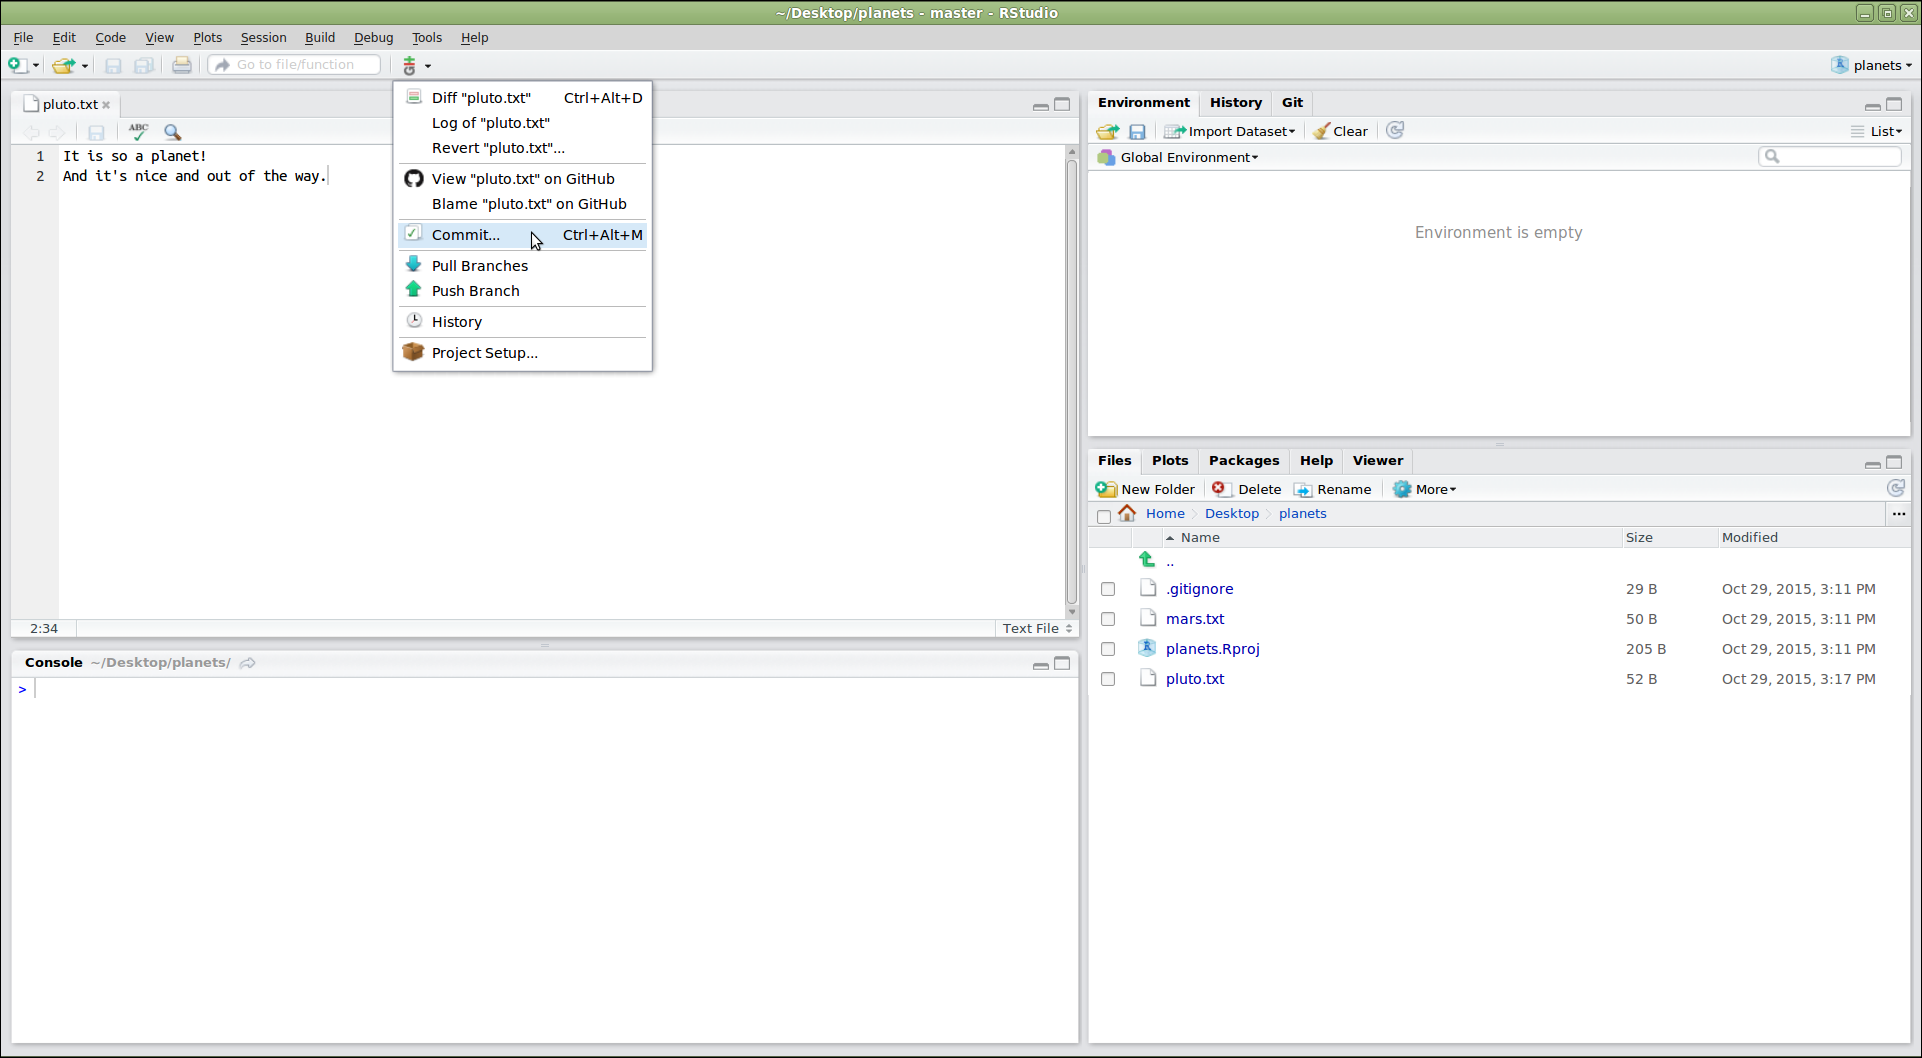
画像1/1: ‘「Commit...」オプションが選択された Git メニュードロップダウンを表示した RStudio のスクリーンショット’
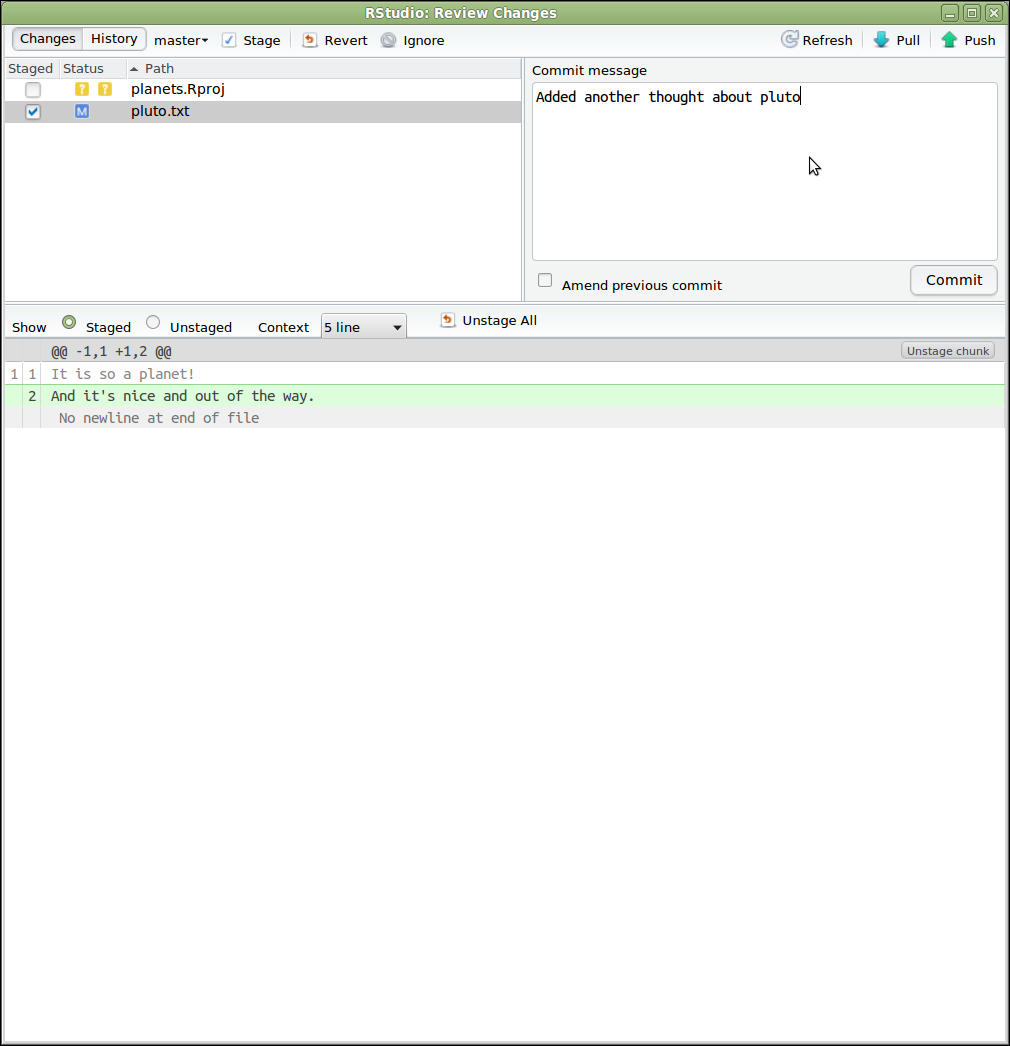
画像1/1: ‘「Review Changes」ダイアログを表示した RStudio スクリーンショット。左上パネルにはコミットに含めるか除外するファイルのリストが表示され、右上パネルではコミットメッセージが入力されています。下部パネルには、左上パネルで選択されたファイルに関する情報が表示されています’
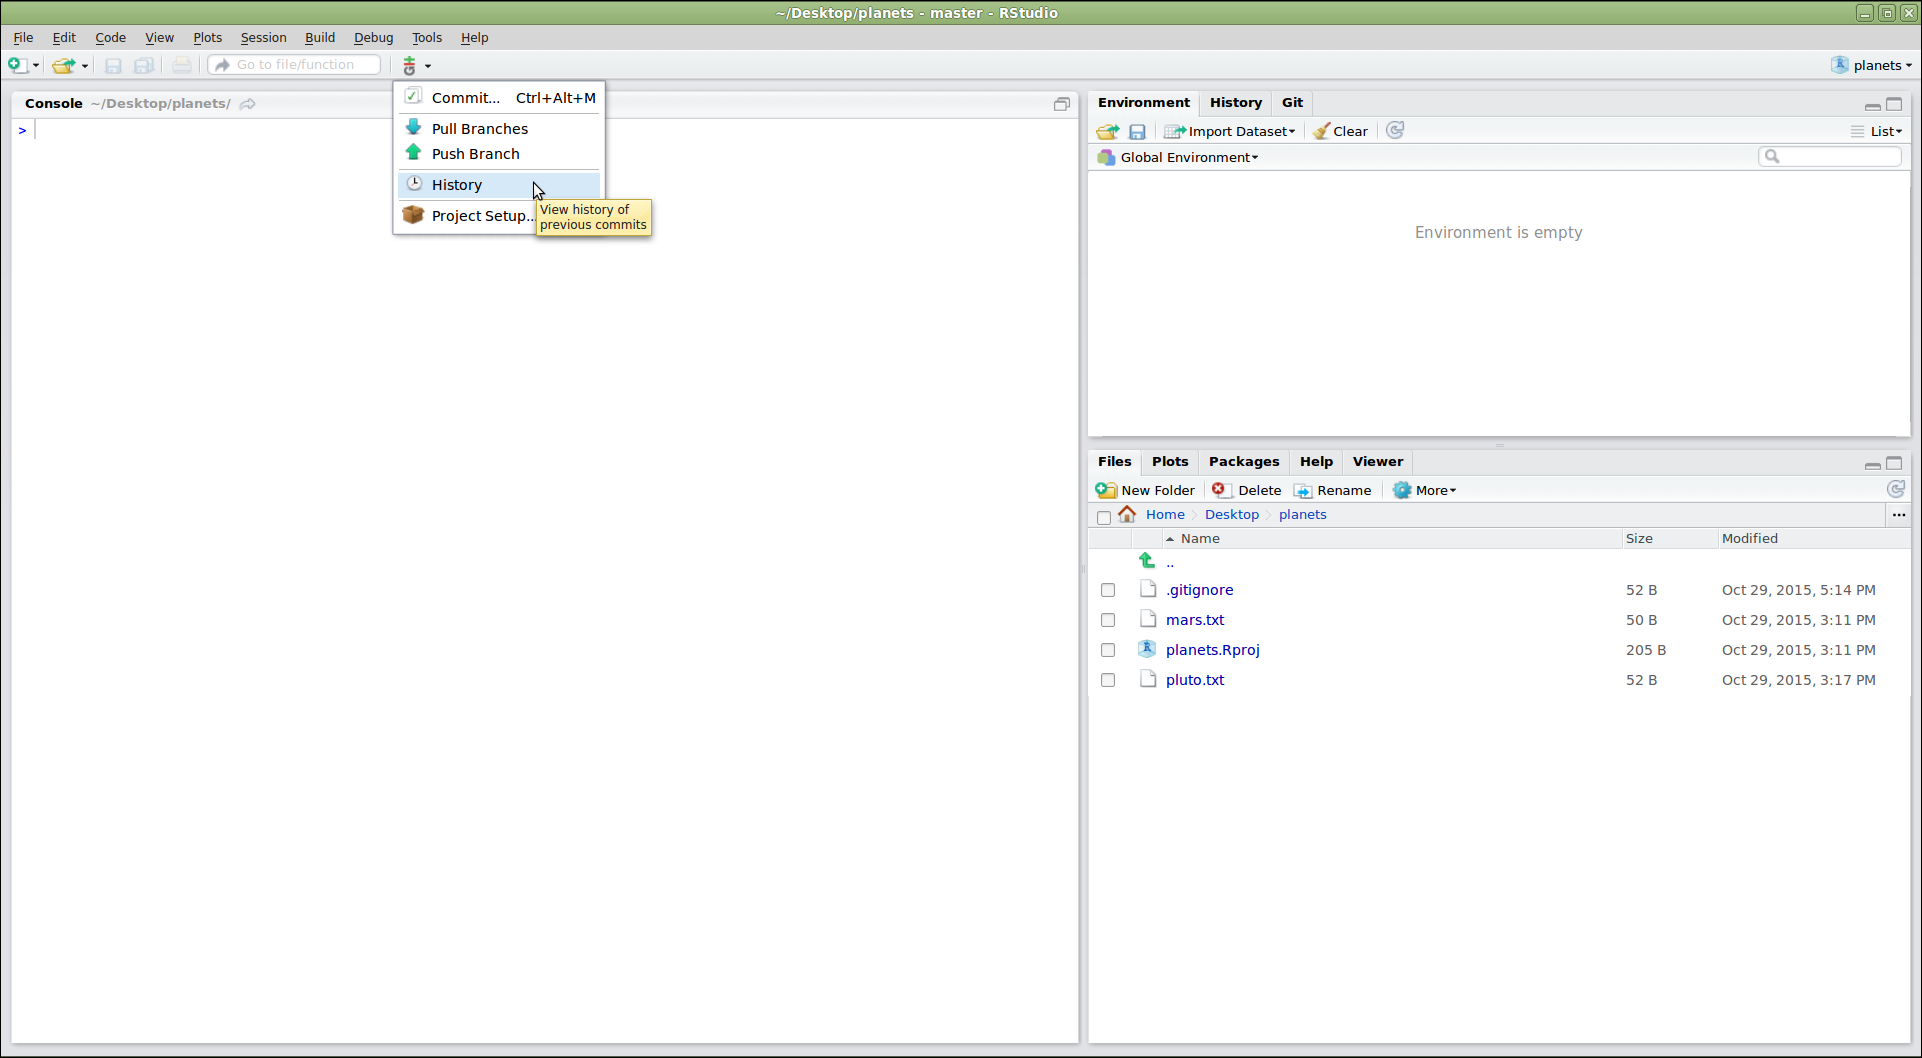
画像1/1: ‘「History」オプションが選択された Git メニュードロップダウンを表示した RStudio のスクリーンショット’
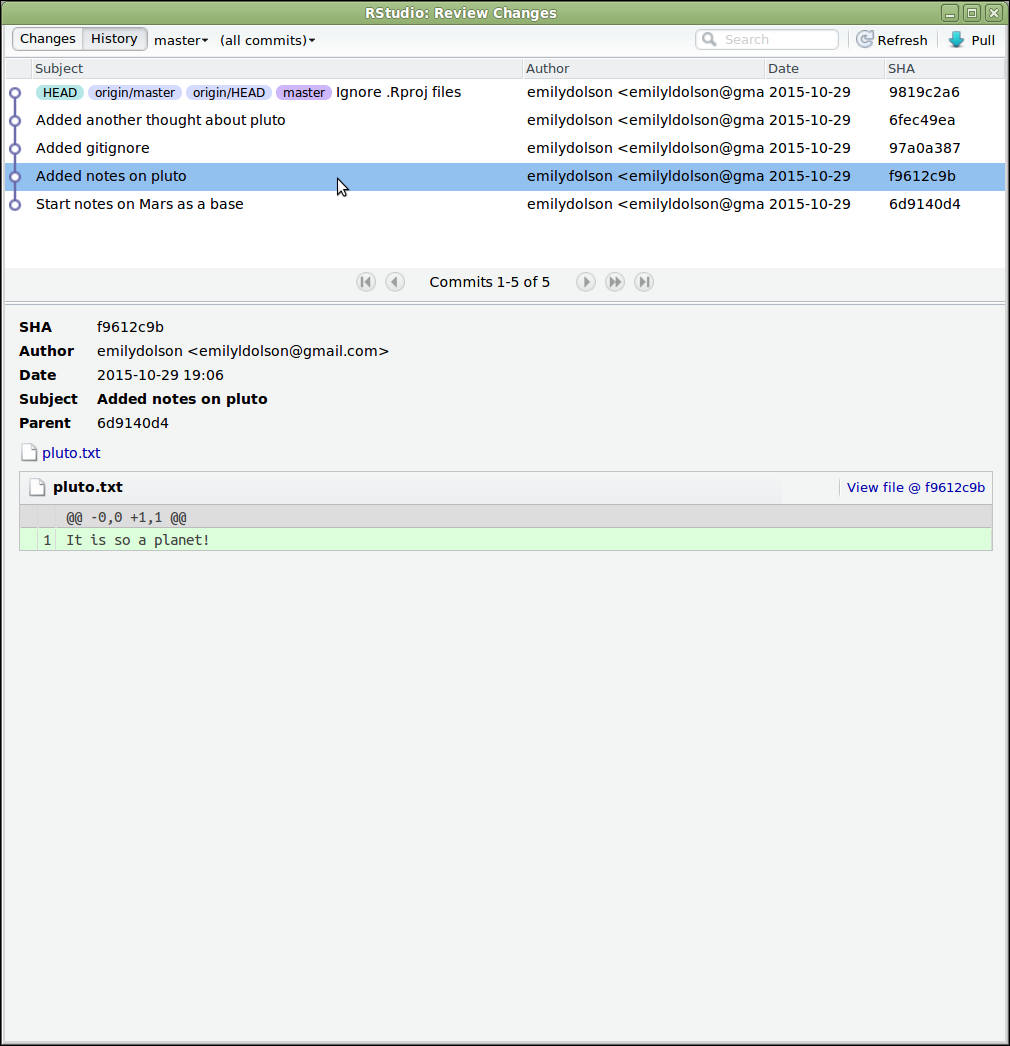
画像1/1: ‘「History」ボタンを押した後に表示される「Review Changes」ダイアログを表示した RStudio のスクリーンショット。上部パネルにはリポジトリ内のコミットがリストされており、下部パネルには選択されたコミットに含まれる変更が表示されている’
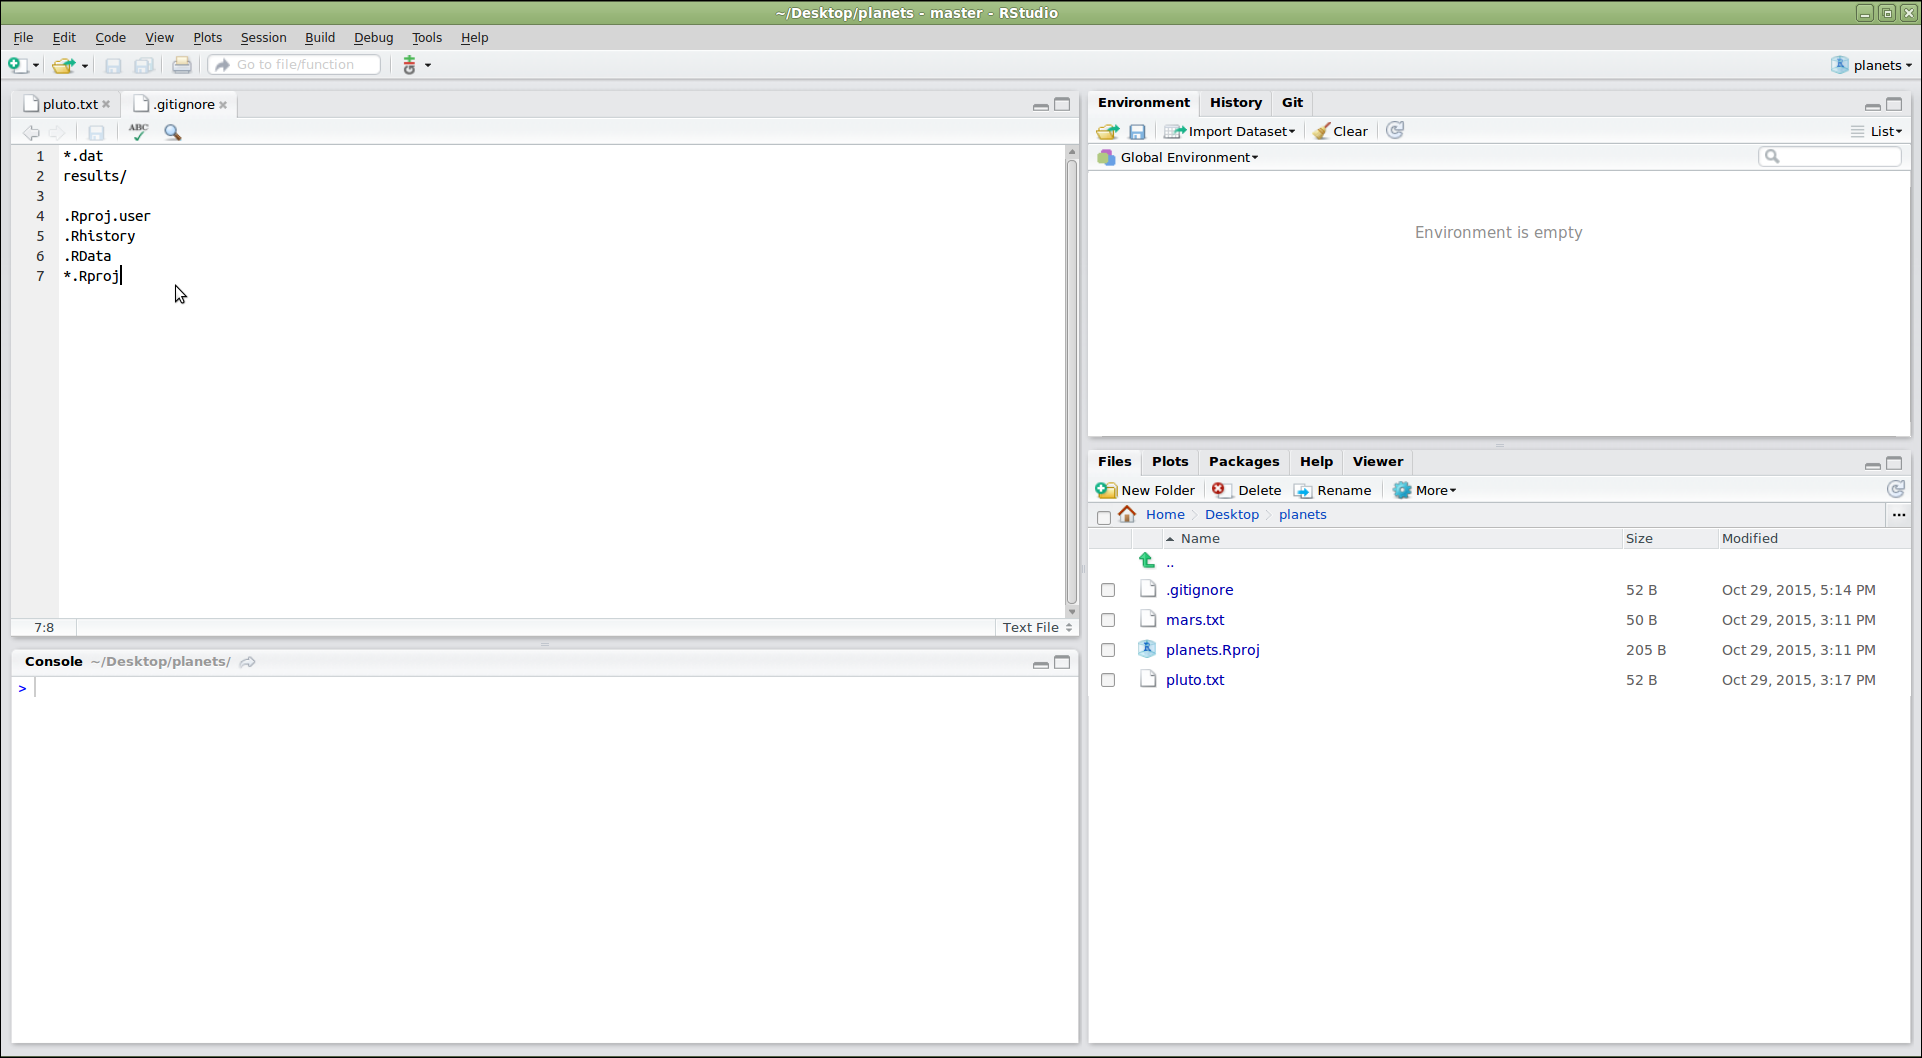
画像1/1: ‘.gitignore がエディタペインに表示され、末尾に .Rproj.user, .Rhistory, .RData, *.Rproj が追加されている RStudio のスクリーンショット’

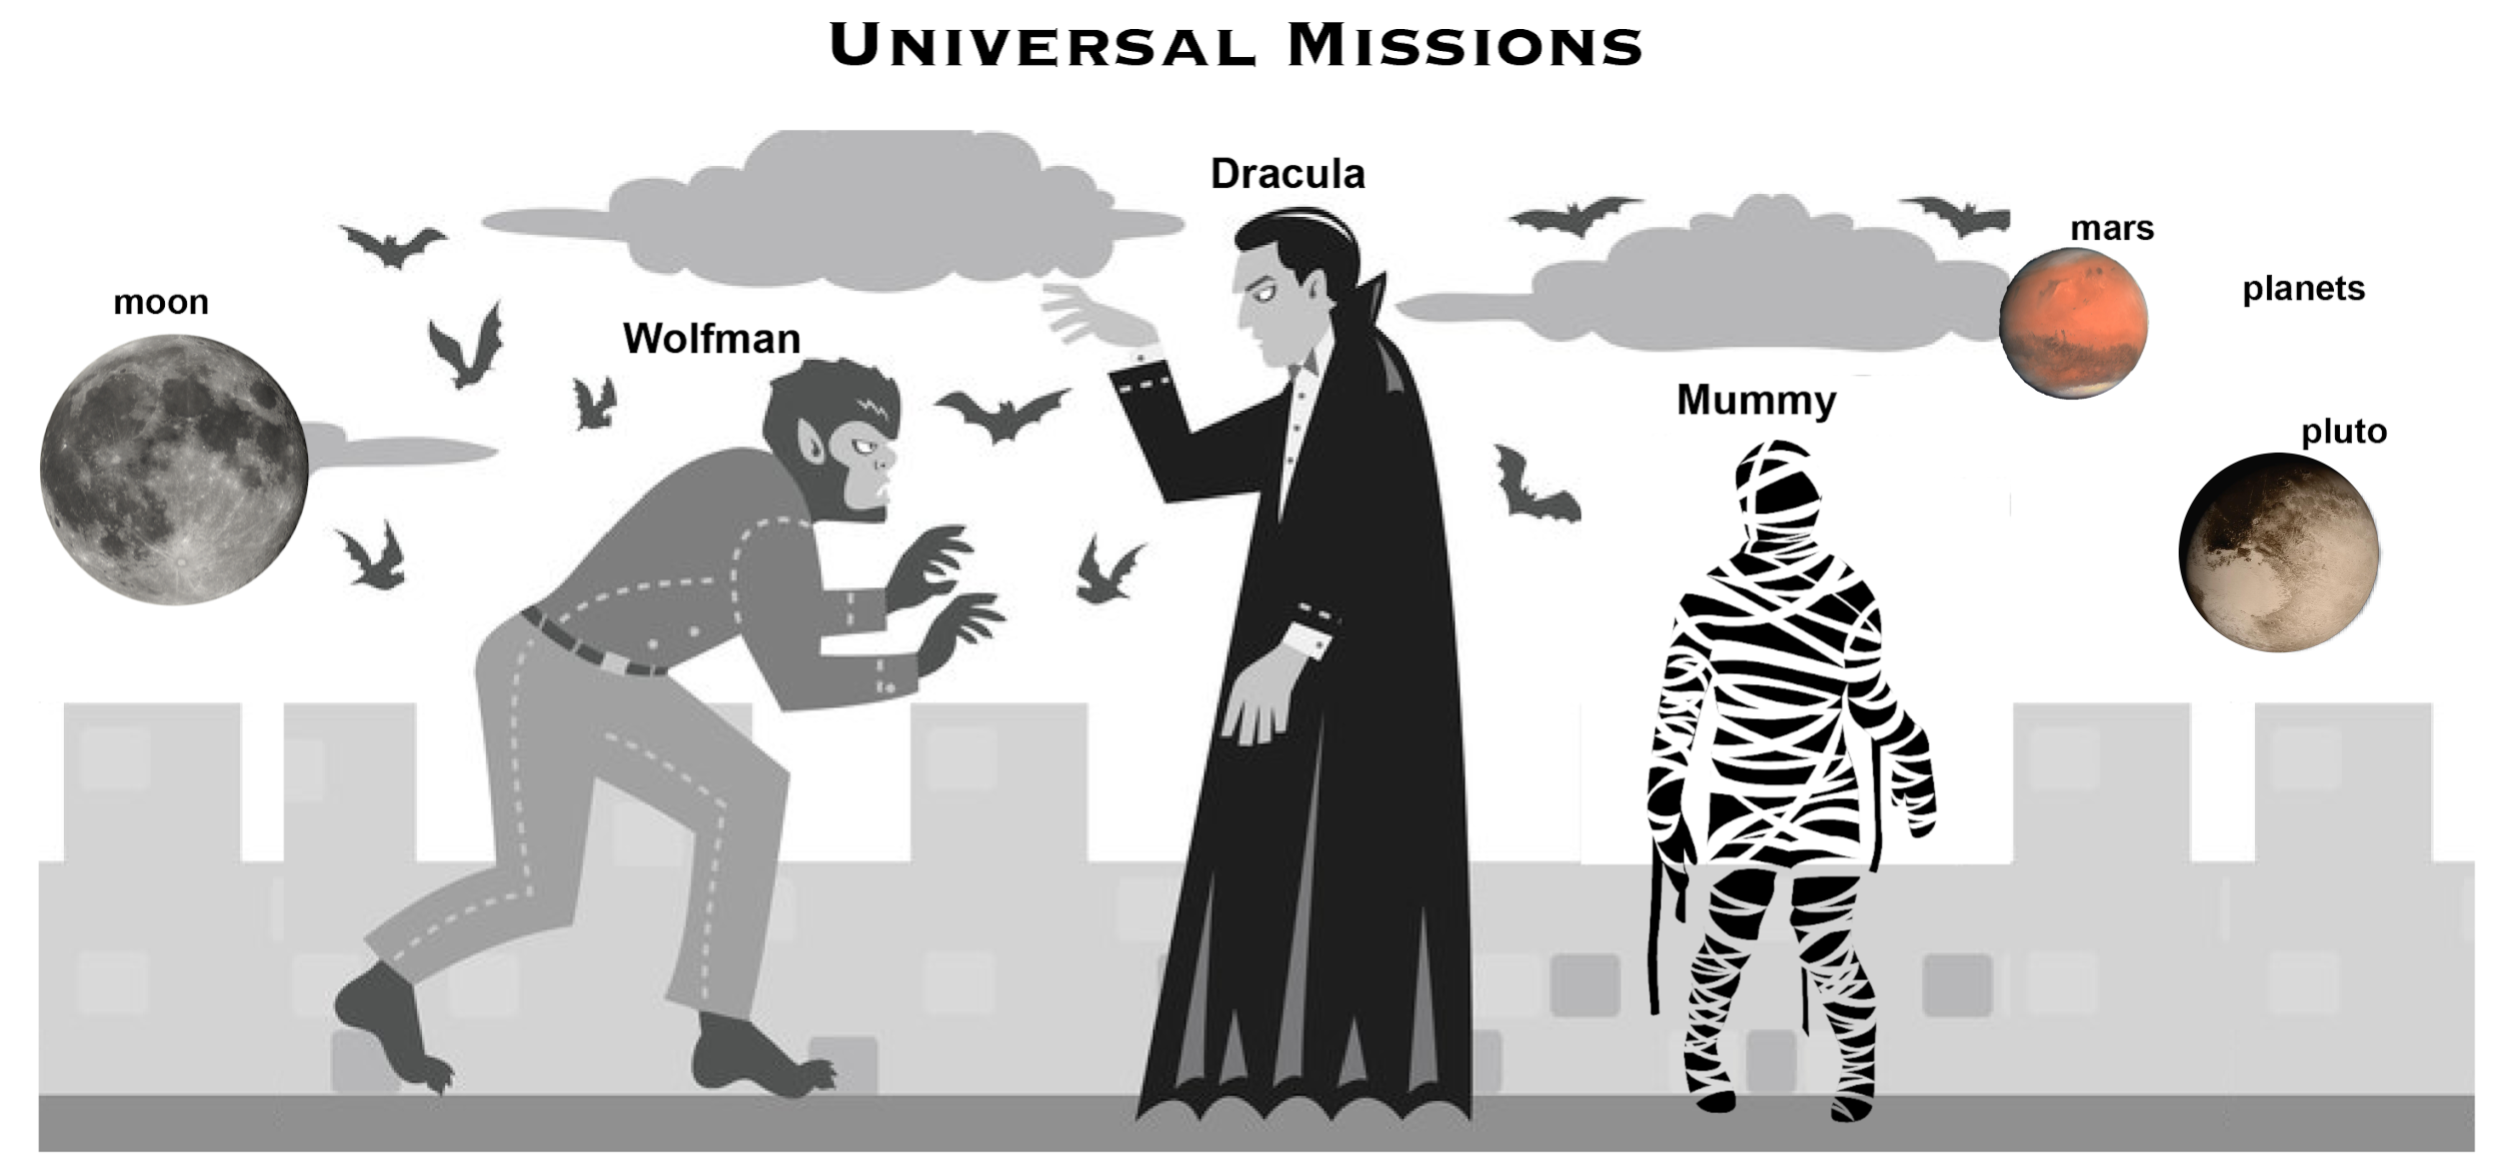 Werewolf
vs dracula by b-maze
/ Deviant Art. 火星
by European Space Agency / CC-BY-SA 3.0
IGO. 冥王星
/ Courtesy NASA/JPL-Caltech. ミイラ
© Gilad Fried / The Noun
Project / CC BY
3.0. 月 © Luc
Viatour / https://lucnix.be / CC BY-SA
3.0.
