Content from 自動的なバージョン管理
最終更新日:2024-11-24 | ページの編集
概要
質問
- バージョン管理とは何で、なぜそれを使うべきなのでしょうか?
目的
- 自動バージョン管理システムの利点を理解しましょう。
- 自動バージョン管理システムの仕組みの基本を理解しましょう。
それではまず、どのようにしてバージョン管理システムが 「いつ」、「何」を、「誰」が編集したのかを記録・管理しているかを見ていきましょう。 他の人と共同作業をしていなくても、 以下の状況に陥るより、自動的なバージョン管理を使うほうが大分良いはずです:

皆さんもこんな経験をされたことがあるはずです。複数の、(それもほとんど 内容が同じの)文書のコピーを保存しておくのは馬鹿げたことです。 文書作成ソフトの中には、例えばMicrosoft Wordの変更履歴、Google Docsのバージョン履歴、LibreOfficeの変更の記録・表示、こういった状況にある程度うまく対応できるものもあります。
バージョン管理システムは、基礎となるドキュメントを元に、 加えられた全ての変更点を記録していきます。 バージョン管理システムは、基礎となるドキュメントを元に、 加えられた全ての変更点を記録していきます。ドキュメントの 進歩を記録していると考えてもらって構いません。変更点を最初の状況まで 戻してから、最新版になるまでの変更を一つずつ再現していくことができます。

「変更点」と「ドキュメント」を別々の物として考えてみると、基礎となるドキュメントに 異なる変更点を「再現」する事によって、結果的に違ったバージョンのドキュメントを 作る事が可能だという事が分かります。 例えば、下の図のように二人のユーザーが同じドキュメントに違った編集を加えた場合です。

変更点の衝突(コンフリクト)が無ければ、二つ以上の違った変更点を基礎ドキュメントに加えることさえできます。

バージョン管理システムは、ユーザーがドキュメントに加えた変更点を記録するツールであり、 結果的にドキュメントの違ったバージョンを作成する事ができます。 このツールを活用 する事によって、次のバージョンに加える変更点(個々の変更点は 「commit(コミット)」と呼びます)を決める事ができ、変更点に関するメタデータも一緒に保存する事ができます。 特定のプロジェクトのコミット履歴とそれに関するメタデータを総じて 「repository(リポジトリ)」と呼びます。 リポジトリは 別々のコンピュータと同期させる事が出来るので、他人との共同作業を潤滑に進めることが可能になります。
バージョン管理システムの長い歴史
自動化されたバージョン管理システムは最近発明されたものではありません。 RCS、CVS、Subversionなどのツールは1980年前半から存在しており、多くの会社に使われていました。 しかし、これらのツールでは出来る事に制限があり、多くはもう時代遅れとされています。 現代使われているシステム、例えばGitやMercurial、は _分散_されています。というのは、特定のサーバーを必要とせずにシステムをホストする事が出来るという事です。 現代のシステムには大変便利で効果的な「merge(マージ)」機能が備われており、同じファイルを 複数人で作業する事が可能になりました。
論文を書くにあたって
例えば、論文のために数百行書いたとします。しばらくして、間違えてその文章を編集してしまいます。 どうしたら以前書いた文章を取り戻すことができるのでしょう? そもそも、可能なのでしょうか?
五人の共著者がいるとします。 どうやって全員の変更やコメントを管理すれば良いのでしょう? LibreOffice WriterやMicrosoft Wordの場合、こういった変更やコメントを変更履歴機能で受け入れると どうなるのでしょう? 変更点は記録されるのでしょうか?
以前書いた数百行の回復は、古いバージョンの論文のコピーを作成した場合にのみ可能です。 前に書いた文章を失う危険性は、このページの上にある漫画に描かれているような問題のあるワークフローになることが多いです。
従来のワープロを使った共同執筆は面倒です。 すべての共同作業者が文書に順番に書く(執筆のプロセスを遅らせる)か、一つのバージョンをすべての全員に送り、手作業で彼らのコメントをあなたの文書にマージしなければなりません。 「変更の追跡」または「変更の記録」オプションは、変更をハイライトし、マージを簡略化することができますが、変更を受け入れるとすぐにその履歴が失われます。 そうなると、誰がその変更を提案したのか、なぜそれが提案されたのか、いつ文書にマージされたのか、わからなくなります。 Google DocsやMicrosoft Office Onlineのようなオンライン・ワープロでさえ、こうした問題を完全に解決することはできません。
まとめ
- バージョン管理とは、制限無く「元に戻す」ことができる機能。
- バージョン管理を使えば、複数の人と同時進行で作業をする事ができます。
Content from Gitの設定
最終更新日:2024-11-24 | ページの編集
概要
質問
- Git を使うために必要な設定は何ですか?
目的
- コンピュータで初めて
gitを使うための設定が出来るようになりましょう。 -
--global設定フラグの意味を理解しましょう。
Git を新しいパソコンで初めて使う場合、いくつかの設定を変更しなければなりません。 Git を始めるにあたって、私達が変更する設定をいくつか表記します:
- 名前とメールアドレス、
- 使用したいテキストエディタ、
- 以上の設定をグローバル設定として使う(つまり、全てのプロジェクトに反映させる)。
コマンドラインでは、Git コマンドは
git <動詞> <オプション>
と入力します。ここでの「動詞」は、Git
に何をさせたいのかを表し、「オプション」はその動詞にとって必要とされる追加の情報です。
ドラキュラが新しいユーザーの場合、以下のようにコンピュータを設定します:
BASH
$ git config --global user.name "Vlad Dracula"
$ git config --global user.email "vlad@tran.sylvan.ia"
ここでは、ドラキュラの代わりに自分の名前とメールアドレスを使いましょう。 ここで入力した名前とメールアドレスは、これから行う Git での作業に関わってきます。というのも、これからのレッスンでGitHub、BitBucket、GitLab、またはその他のGit をホストするサーバーに変更箇所を「プシュ」した(送った)際に、これらの情報が使われるからです。
これらのレッスンでは、GitHub に接続するので、GitHub アカウントと同じメールアドレスに設定してください。 プライバシーについて気になる方は、GitHub のメールアドレスをプライベートにするための説明 を参照してください。
電子メールの非公開
GitHubでプライベートメールアドレスを使用する場合は、GitHubのno-replyメールアドレスをuser.emailの値として使用してください。
それは、ID+username@users.noreply.github.comの形式になります。
自分のアドレスはGitHubのメール設定で確認できます。
改行コード
他のキーと同様に、キーボードで Enter または ↵ (またはMacでは Return)を押すと、コンピュータはそれを文字として入力します。 話が長くなるので詳しい説明は省きますが、行末に使われる文字はオペレーティングシステム(OS)よって違います。 (行末に使われる文字を「改行コード」と呼びます。) Git は、改行コードを使ってファイルの違いを確かめるため、違うパソコンでファイルを編集した時に思わぬ問題が起こるかもしれません。 このレッスンの範囲外ですが、この問題については Pro Git book を読んでください。
Git がどのように改行コードを理解・変換するかは、
git config の core.autocrlf
コマンドを使って変更できます。 以下の設定をおすすめします:
macOS および Linux:
またはWindowsの場合:
以下の表を参考に、ドラキュラはテキストエディタも設定しました:
| エディタ | 設定コマンド |
|---|---|
| Atom | $ git config --global core.editor "atom --wait" |
| nano | $ git config --global core.editor "nano -w" |
| BBEdit(Mac、コマンドラインツール付き) | $ git config --global core.editor "bbedit -w" |
| Sublime Text (Mac) | $ git config --global core.editor "/Applications/Sublime\ Text.app/Contents/SharedSupport/bin/subl -n -w" |
| Sublime Text (Win、32ビットインストール) | $ git config --global core.editor "'c:/program files (x86)/sublime text 3/sublime_text.exe' -w" |
| Sublime Text (Win、64ビットインストール) | $ git config --global core.editor "'c:/program files/sublime text 3/sublime_text.exe' -w" |
| メモ帳(Win) | $ git config --global core.editor "c:/Windows/System32/notepad.exe" |
| Notepad++ (Win、 32 ビットインストール) | $ git config --global core.editor "'c:/program files (x86)/Notepad++/notepad++.exe' -multiInst -notabbar -nosession -noPlugin" |
| Notepad++ (Win、 64 ビットインストール) | $ git config --global core.editor "'c:/program files/Notepad++/notepad++.exe' -multiInst -notabbar -nosession -noPlugin" |
| Kate (Linux) | $ git config --global core.editor "kate" |
| Gedit (Linux) | $ git config --global core.editor "gedit --wait --new-window" |
| Scratch (Linux) | $ git config --global core.editor "scratch-text-editor" |
| Emacs | $ git config --global core.editor "emacs" |
| Vim | $ git config --global core.editor "vim" |
| VS Code | $ git config --global core.editor "code --wait" |
設定したテキストエディタもいつでも変更することができます。
Vim の終了の仕方
多くのソフトの初期設定では、Vim
がデフォルトのテキストエディタに設定されています。 保存せずに Vim
を終了するには、Escを押した後に :q!
と入力してからEnterまたは↵(Macの場合はReturn)を押してください。
保存してから終了するには、Escを押してから :wq
と入力してEnterまたは↵(Mac の場合は
Return)を押してください。
Git (2.28以上)
では、新しいリポジトリを初期化したときに作成されるブランチの名前を設定できます。
ドラキュラはその機能を使って、最終的に使うクラウドサービスと一致するようにmainに設定することにします。
Gitブランチ名の設定
ソースファイルのどんな変更でも、ある「ブランチ」に属しています。
このレッスンの新しい学習者にとっては、ブランチが存在し、このレッスンでは1つのブランチを使うことを知っていれば十分です。
デフォルトでは、git init
で新しいリポジトリを作成すると、Git がmaster
というブランチを作成します (次のエピソードで説明します)。 この用語は、
人身売買という人種差別的慣習を想起させ、 ソフトウェア開発コミュニティ
は、 より包括的な言葉を採用するように動いています。
2020年には、ほとんどのGit
ホスティングサービスは、mainをデフォルトの
ブランチとして使うように移行しました。 例として、GitHub やGitLab
で新規に開いたリポジトリのデフォルトは mainです。
しかし、Gitはまだ同じ変更を行っていません。
その結果、ローカル・リポジトリは、ほとんどのクラウド・サービスと同じブランチ名を手動で設定する必要があります。
2.28より前のバージョンのGitでは、個々のリポジトリで変更が可能です。
そのためのコマンドは次回のエピソードで紹介します。 ローカルのGit
の設定でこの値が設定されていない場合、init.defaultBranch
のデフォルト値は master になることに注意しましょう。
上記の5つのコマンドは、一度実行するだけで十分です。--global
フラグは Git に、
今使っているパソコン内にある自分のアカウントに関連する全てのプロジェクトに同じ設定をするように指示しています。
さっそくこれらの設定を確認し、core.editorをテストしてみましょう:
追加の変更を加えずにファイルを閉じましょう。 設定ファイルのタイプミスは問題を引き起こすため、以下のように設定を表示する方が安全です。
また、必要であれば、同じコマンドを使えば、違うエディタやメールアドレスに変えることができます。 これは何度でもできます。
プロキシ
ネットワーク環境によってはプロキシ を使わなければならないかもしれません。 この場合、プロキシの設定が必要です:
プロキシを無効にするには:
Git のヘルプとマニュアル
git のコマンドを忘れた時は、-h
を使えばコマンドの一覧を、--help
を使えばマニュアルを見ることができます:ある git
コマンドのサブコマンドやオプションを忘れてしまった場合は、
git <command> -h
とタイプすることによって関連するオプションのリストを見るか、git <command> --help
とタイプすることによって対応する Git
マニュアルを見ることができます:
マニュアルを見ている間、:はコマンドを待っているプロンプトであり、
Q
を押してマニュアルを終了できることを覚えておいてください。
より一般的には、利用可能な git コマンドのリストや、Git
マニュアルを入手することができます:
まとめ
-
git configと--globalオプションを使い、ユーザー名、メールアドレス、エディタ、その他の設定を行う。
Content from リポジトリの作成
最終更新日:2024-11-24 | ページの編集
概要
質問
- Gitはどこに情報を格納しますか?
目的
- ローカルのGitリポジトリを作成する。
-
.gitディレクトリの目的を説明する。
Gitの設定ができたら、 それを使い始めることができます。
火星に惑星着陸船を送ることが可能かどうかを調査しているウルフマンとドラキュラの話に戻りましょう。
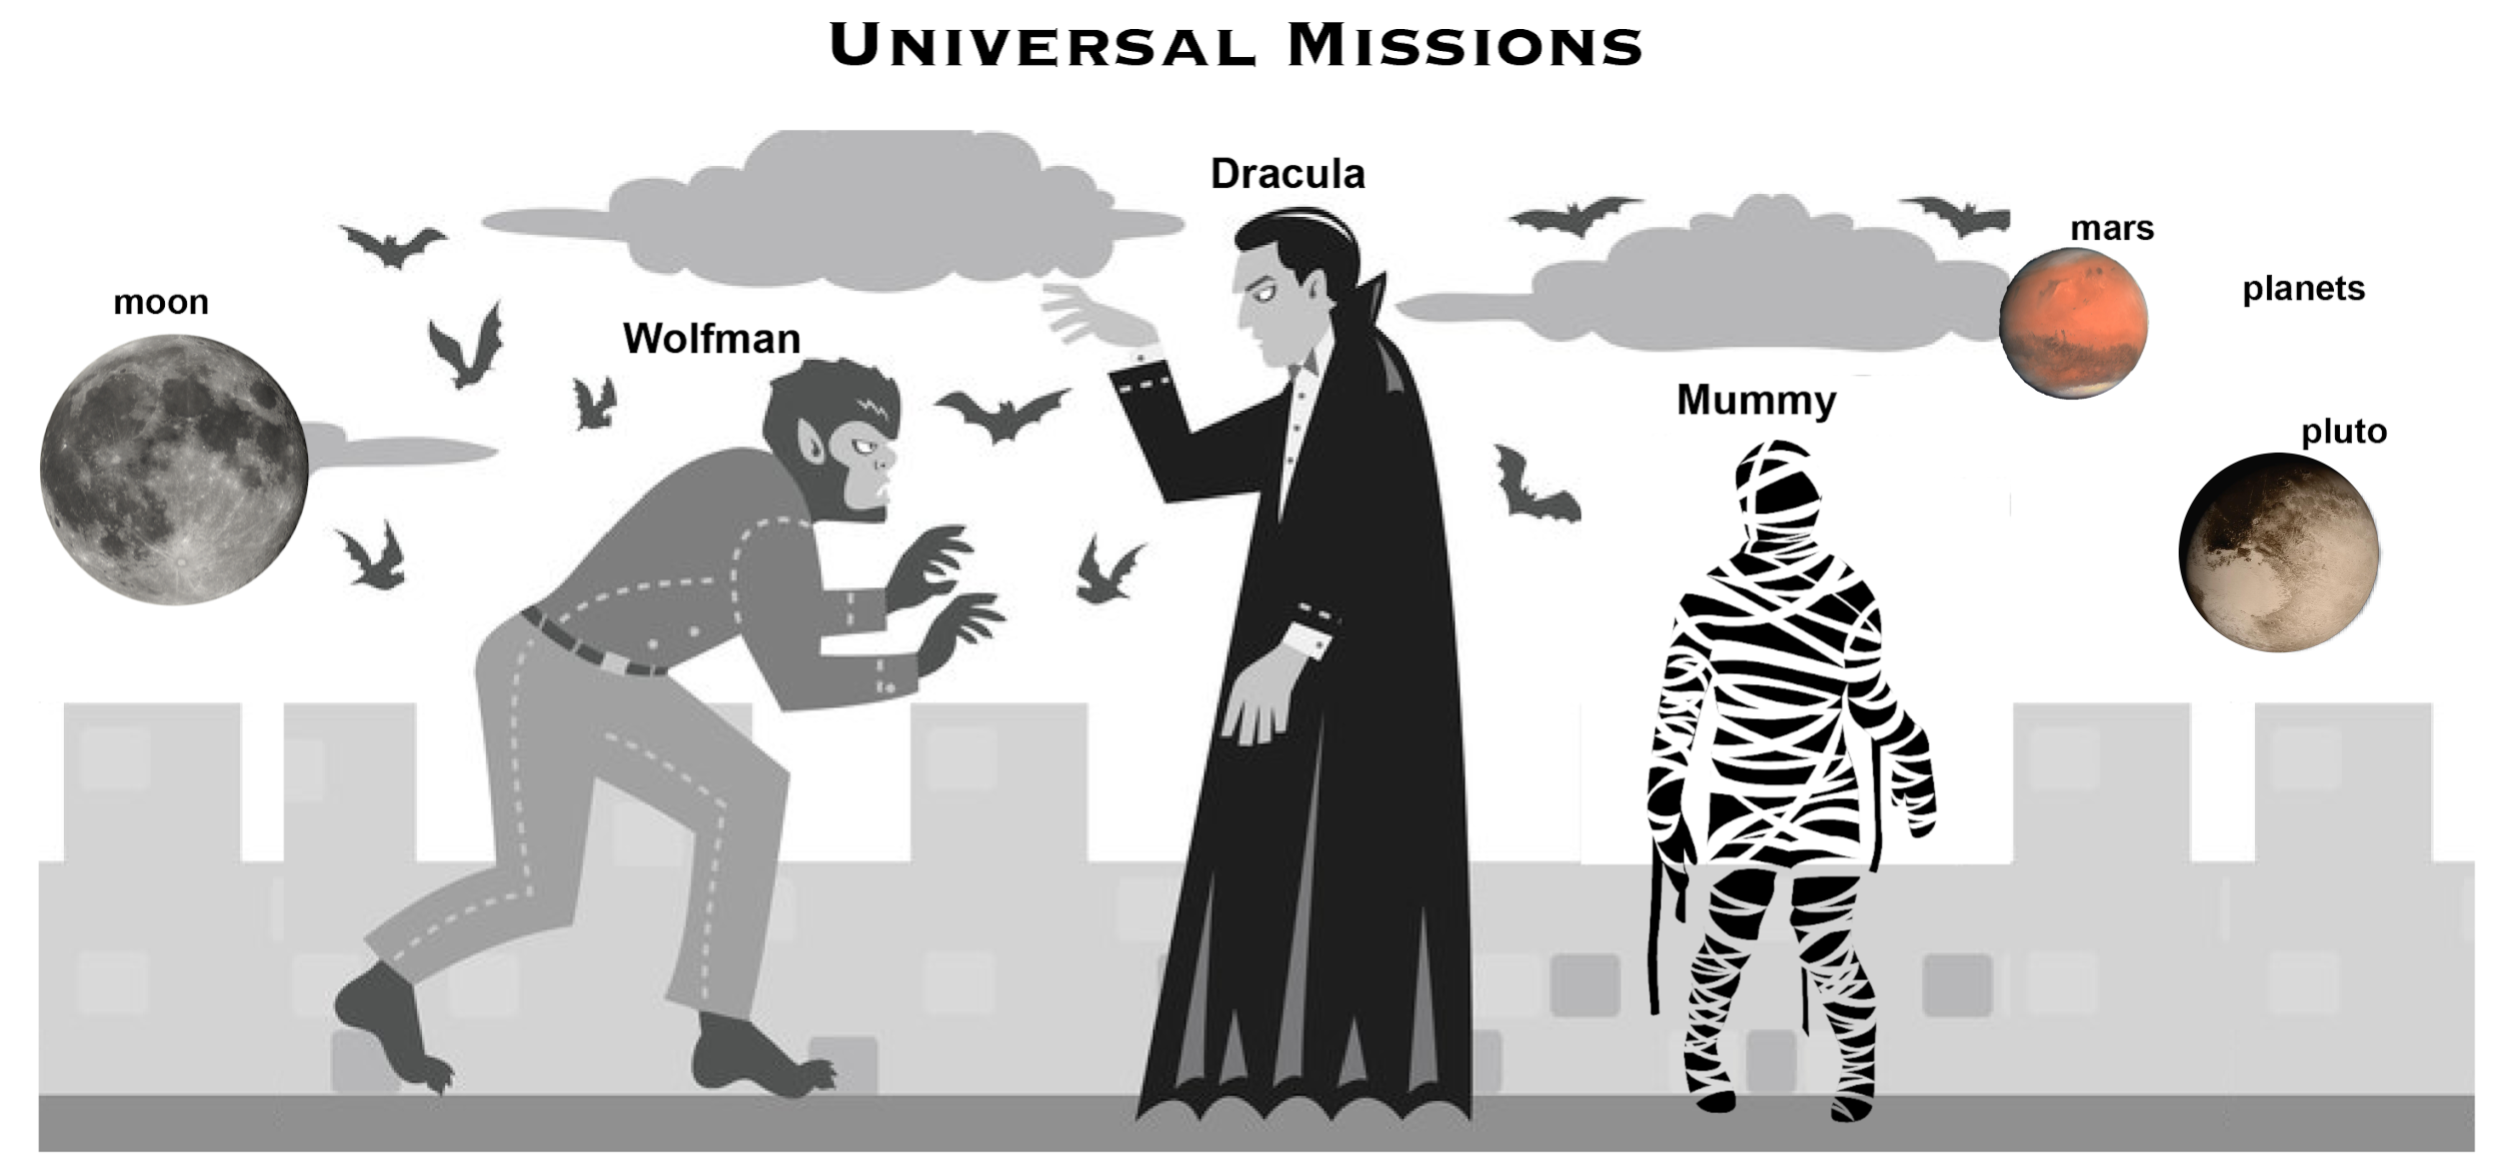 Werewolf
vs dracula by b-maze
/ Deviant Art. 火星
by European Space Agency / CC-BY-SA 3.0
IGO. 冥王星
/ Courtesy NASA/JPL-Caltech. ミイラ
© Gilad Fried / The Noun
Project / CC BY
3.0. 月 © Luc
Viatour / https://lucnix.be / CC BY-SA
3.0.
Werewolf
vs dracula by b-maze
/ Deviant Art. 火星
by European Space Agency / CC-BY-SA 3.0
IGO. 冥王星
/ Courtesy NASA/JPL-Caltech. ミイラ
© Gilad Fried / The Noun
Project / CC BY
3.0. 月 © Luc
Viatour / https://lucnix.be / CC BY-SA
3.0.
まず、Desktopフォルダーに作業用のディレクトリを作成し、そのディレクトリに移動しましょう:
次に、Gitにplanetsをリポジトリ(Gitがファイルのバージョンを保存できる場所)にするように伝えます。
重要なのは、git init
はサブディレクトリとそのファイルを含むことができるリポジトリを作成するということです。サブディレクトリが最初から存在する場合でも、後から追加された場合でも、planets
リポジトリの中に入れ子になった別のリポジトリを作成する必要はありません。
また、
planetsディレクトリの作成と、リポジトリとしての初期化はまったく別の処理であることに注意してください。
ls を使ってディレクトリの内容を表示すると、
何も変更されていないように見えます:
ですが -a フラグを追加してすべてを表示すると、Git が
.gitという隠しディレクトリを planets
の中に作ったことがわかります:
出力
. .. .gitGit
はプロジェクトのディレクトリ内にあるすべてのファイルとサブディレクトリを含む、プロジェクトに関するすべての情報を格納するためにこの特別なサブディレクトリを使用します。
.git
サブディレクトリを削除すると、プロジェクトの履歴を失うことになります。
次に、デフォルトのブランチを main
という名前に変更します。
あなたの設定やgitのバージョンによっては、これが既にデフォルトになっているかもしれません。
この変更の詳細については、「セットアップ」
を参照してください。
出力
Switched to a new branch 'main'We can now start using one of the most important git commands, which
is particularly helpful to beginners. git status tells us
the status of our project, and better, a list of changes in the project
and options on what to do with those changes. We can use it as often as
we want, whenever we want to understand what is going on.
出力
On branch main

No commits yet

nothing to commit (create/copy files and use "git add" to track)使用しているgitのバージョンによって、出力の表現が少し異なるかもしれません。
Git リポジトリを作る場所
planets
(すでに作成したプロジェクト)についての情報を追跡すると共に、
ドラキュラは moons についての情報も追跡したいと考えています。
ウルフマンの心配にもかかわらず、ドラキュラは次の一連のコマンドを使って、彼の
planetsプロジェクト内に moons
プロジェクトを作ります:
BASH
$ cd ~/Desktop   # Desktop ディレクトリに戻る
$ cd planets     # すでに Git リポジトリである planets ディレクトリに移動する
$ ls -a          # .git サブディレクトリがまだ planets ディレクトリに存在することを確認する
$ mkdir moons    # サブディレクトリ planets/moons を作る
$ cd moons       # moons サブディレクトリに移動する
$ git init       # moons サブディレクトリをGitリポジトリにする
$ ls -a          # .git サブディレクトリが存在し新しいGitリポジトリが作られたと示していることを確認する
git init コマンドは、moons
サブディレクトリ内で実行され、moons
サブディレクトリに保存されているファイルを追跡するために必要でしょうか?
いいえ。 ドラキュラは moons サブディレクトリを Git
リポジトリにする必要はありません。planets
リポジトリは、planets
ディレクトリの下のすべてのファイル、サブディレクトリ、およびサブディレクトリファイルを追跡するからです。
従って、moons
についてのすべての情報を追跡するのは、ドラキュラが moons
サブディレクトリをplanets
ディレクトリに追加するだけで済みます。
それと、Git
リポジトリが「入れ子」にされている場合、Gitリポジトリは互いに干渉する可能性があります:外側のリポジトリは内側のリポジトリのバージョン管理をしようとします。
したがって、新しいGitリポジトリはそれぞれ別のディレクトリに作るのがベストです。
ディレクトリに競合するリポジトリががないことを確認するには、git statusの出力を確認します。
次のような場合は、上の方で示したように新しいリポジトリを作ることをお勧めします:
出力
fatal: Not a git repository (or any of the parent directories): .git
git init の間違いを修正する
ウルフマンはドラキュラに、「入れ子」状態になっているリポジトリがいかに冗長で、混乱を引き起こす可能性があるかを説明しました。
Dracula would like to go back to a single git repository.
moonsサブディレクトリの最後のgit initを、ドラキュラはどうやって、元に戻すことができるのでしょうか?
背景
Gitリポジトリからのファイルの削除は、慎重に行う必要があります。 しかし、特定のファイルを追跡するようにGitに指示する方法については、まだ学んでいません(次のエピソードで学びます)。 Gitによって追跡されていないファイルは、他の「普通の」ファイルと同じように、次のようにして簡単に削除できます:
Similarly a directory can be removed using
rm -r dirname.
この方法で削除されるファイルやフォルダがGitによって追跡されているなら、次のエピソードで見られるように、それらの削除が、追跡する必要がある別の変更になります。
解答
Gitはすべてのファイルを.gitディレクトリに保存します。 To
recover from this little mistake, Dracula can remove the
.git folder in the moons subdirectory by running the
following command from inside the planets directory:
しかし、気をつけてください!
間違ったディレクトリでこのコマンドを実行すると、残しておきたいプロジェクトのGit履歴がすべて削除されてしまいます。
In general, deleting files and directories using rm from
the command line cannot be reversed. したがって、常に pwd
コマンドを使用してカレントディレクトリを確認してください。
まとめ
-
git initはリポジトリを初期化する。 - Gitはリポジトリデータのすべてを
.gitディレクトリに格納する。
Content from 変更内容の記録
最終更新日:2024-11-24 | ページの編集
概要
質問
- どうやって変更点を Git で記録出来ますか?
- どうやってリポジトリの状態をチェック出来ますか?
- 何を変更して、なぜ変えたのかをメモするにはどうすればよいですか?
目的
- 一つ以上のファイルにおいて、「変更・追加・コミット」の作業を行いましょう。
- 「変更・追加・コミット」を行っている際、情報がどこに保管されているのか説明しましょう。
- わかりやすいコミットメッセージと、そうでないメッセージの違いを区別できるようになりましょう。
まずはじめに、正しいディレクトリにいるかどうか確かめましょう。
planets ディレクトリに入っているはずです。
赤い惑星(火星)が基地に最適かどうかについてのノートを書くためにmars.txt
というファイルを作成しましょう。 nano
(もしくは好きなテキストエディタ)でファイルを編集しましょう。 以前
core.editor
で設定したエディタとは別のエディタで編集しても大丈夫です。
ですが、新しくファイルを作成・編集するコマンドはエディタによって違うということを覚えておいてください(nano
ではないかもしれません)。 テキストエディタについて復習したい方は、Unix シェル の どのエディタ?
のレッスンを見てみてください。
以下の文を mars.txt に記入してください:
出力
Cold and dry, but everything is my favorite colorまず、listコマンド(ls)を実行して、ファイルが正しく作成されたことを確認しましょう:
出力
mars.txtこれで mars.txt
は一文だけ入ってる状態になりました。確認してみましょう:
出力
Cold and dry, but everything is my favorite colorプロジェクトの状態をもう一度確認してみると、 Git は新しいファイルがあることに気づきます:
出力
On branch main

No commits yet

Untracked files:
   (use "git add <file>..." to include in what will be committed)

	mars.txt

nothing added to commit but untracked files present (use "git add" to track)
“untracked files” (追跡されていないファイル)というメッセージは、
Git
が追跡していないファイルがこのディレクトリに存在していることを意味します。
git add を使って、Git
にこのファイルを追跡してもらいましょう: git add
を使って、Git にこのファイルを追跡してもらいましょう:
そして、正しく動作したか確認してみましょう:
出力
On branch main

No commits yet

Changes to be committed:
  (use "git rm --cached <file>..." to unstage)

	new file:   mars.txt
これで Git は mars.txt
を追跡するように設定することができました。
ですが、まだ変更点をコミットとして記録していません。
これをするには、もう一つコマンドを使う必要があります:
出力
[main (root-commit) f22b25e] Start notes on Mars as a base
 1 file changed, 1 insertion(+)
 create mode 100644 mars.txt
git commit を使うと、 Git は git add
によって一時的に保存されたデータを .git
ディレクトリにコピー、そして永久保存します。 永久保存されたコピーを コミット (または リビジョン))と呼び、f22b25e
はコミットの省略されたIDです。
あなたのコミットには別のIDが使われているかもしれません。
-m
フラグ(「メッセージ」の略)を使い、何を変えて、なぜ変えたのかが後からでも分かるように、簡潔で分かりやすいメッセージを書きましょう。
-m を使わずに git commit を使った場合、Git は
nano (または core.editor
として設定したエディタ)を開き、もっと長いメッセージを書くことができます。
良いコミットメッセージ
は、どのような変更が行われたのかが分かる短い文(50字以下)
で始まります。
大抵のメッセージは、「このコミットを適用すると・・
今の状態で git status を走らせると:
出力
On branch main
nothing to commit, working tree clean
といったように、最新の状態であることを教えてくれます。
つい先程、何をしたのかを見たい場合は git log を使って、 Git
にプロジェクトの履歴を表示してもらいましょう:
出力
commit f22b25e3233b4645dabd0d81e651fe074bd8e73b
Author: Vlad Dracula <vlad@tran.sylvan.ia>
Date:   Thu Aug 22 09:51:46 2013 -0400

    Start notes on Mars as a base
git log
は、リポジトリに施された全てのコミットを最新のものから順に表示します。
各コミットには、省略されていないコミットID(以前 git commit
で表示された省略IDと同じ字列で始まります)、コミットの著者、作成日時、そして、コミットが作られた時につけられたログメッセージが含まれています。
変更点は何処にあるの?
ここで ls を使用すると、mars.txt
ファイル一つしかありません。 なぜかと言うと、Git
はファイルの変更履歴を、以前触れた .git
という特別なディレクトリに保存します。これをする事によって、ファイルシステムが散らからないようにし、うっかり古いバージョンのファイルを変更、または削除できないようにしています。
それでは、ドラキュラがファイルに新しい情報を加えたとしましょう。
(以前と同様に、nano を使い、cat
でファイルの中身を表示させます。違うエディタを使ってもいいし、cat
を使わなくても構いません。)
出力
Cold and dry, but everything is my favorite color
The two moons may be a problem for Wolfman
git status
を使うと、追跡しているファイルが変更されたことを知らせてくれます:
出力
On branch main
Changes not staged for commit:
  (use "git add <file>..." to update what will be committed)
  (use "git checkout -- <file>..." to discard changes in working directory)

	modified:   mars.txt

no changes added to commit (use "git add" and/or "git commit -a")
最後に表示された文が一番重要です:“no changes added to commit”
(「変更点はコミットに追加されていません」)。
私達はファイルを編集したのですが、まだ Git
にこの変更点を保存したいということを(git add
で)伝えていないし、それを(git commit
で)保存もしていません。 というわけで、これらをやってみましょう。
変更点を保存する前に見直すのは、習慣づけると良いでしょう。 見直すには
git diff を使いましょう。
これによって、今のファイルの状態と、一つ前までのファイルの状態との違いを確かめることができます:
出力
diff --git a/mars.txt b/mars.txt
index df0654a..315bf3a 100644
--- a/mars.txt
+++ b/mars.txt
@@ -1 +1,2 @@
 Cold and dry, but everything is my favorite color
+The two moons may be a problem for Wolfman
すると、暗号のようなメッセージが出力されます。
これらのメッセージは、エディタや patch
といったプログラムで使われる
一連のコマンドで、ファイルをどうやって再構成するのかが書かれています。
分かりやすいように、一文ずつ見てみましょう:
- 最初の文は、Git が古いバージョンと新しいバージョンのファイルをUnix
の
diffコマンドと同じように、二つのファイルを比べていることを表しています。 - 次に、Git
が比べているファイルの正確なバージョンを表示しています。
df0654aと315bf3aはコンピュータが作成した、各バージョン”につけられたIDです。 - 3・4つ目の文章は、変更されているファイルの名前を表示しています。
- 残りの文章が一番重要です。ここに、何が変わり、どの行が変更されたのかが記されています。
特に、この
+マークは、どこに文章が加えられたのかを表しています。
変更点を確認したら、コミットしましょう:
出力
On branch main
Changes not staged for commit:
  (use "git add <file>..." to update what will be committed)
  (use "git checkout -- <file>..." to discard changes in working directory)

	modified:   mars.txt

no changes added to commit (use "git add" and/or "git commit -a")
おっと、 初めに git add を使わなかったので、 Git
はコミットさせてくれませんでした。 直しましょう:
出力
[main 34961b1] Add concerns about effects of Mars' moons on Wolfman
 1 file changed, 1 insertion(+)
Git は変更をコミットする前に、コミットしたいファイルを 追加するように要求してきます。 これによって、変更点をこまめに、そして論理的に分割して保存ができ、大きな変更をひとまとめに保存しなくてもよくなります。 例えば、論文にいくつか引用源を加えるとします。 これらの引用源、そして使われた参考文献の目録を、まだ書き終わっていない結論とは_別に_保存したい場合はどうすればいいのでしょう。
Git には、まだコミットされていないchangeset(一連の変更点)を一時的に保存・把握するために使われる、staging area(ステージング・エリア)と呼ばれる特殊な場所が存在します。
ステージングエリア
仮にGit
を、プロジェクトの一生の間に起こった変更内容を「スナップショット」として保存するものとして考えると、git add
は_何が_スナップショットに含まれる(ステージングエリアに入れる)のかを指定して、git commit
は_実際にスナップショットを撮り_、コミットとして永久保存します。
git commit
と入力した際にステージングエリアに何もなかった場合、Git
はgit commit -a もしくは git commit --all
を入力するように言ってきます。このコマンドは、写真を撮る時の「全員集合!」のようなもので、全ての変更点を強制的にコミットできます。
ですが、大抵は、コミットしたい変更点のみをステージングエリアに入れるほうが良いでしょう。これによって、不要な変更点を間違えてコミットすることもありません。
(集合写真の例に例えると、メイクの不完全なエキストラがステージの上を横断しているのを一緒に撮ってしまった、みたいなものです。)
ですので、ステージングエリアにどの変更点を入れるかは自分で管理しましょう。さもないと、必要以上に「git
コミットやり直す」で検索をかけることになるでしょう。

それでは、ファイルの変更点がエディタからステージングエリア、そして長期保存に移る過程を見てみましょう。 初めに、新しい文章をファイルに加えましょう:
出力
Cold and dry, but everything is my favorite color
The two moons may be a problem for Wolfman
But the Mummy will appreciate the lack of humidity出力
diff --git a/mars.txt b/mars.txt
index 315bf3a..b36abfd 100644
--- a/mars.txt
+++ b/mars.txt
@@ -1,2 +1,3 @@
 Cold and dry, but everything is my favorite color
 The two moons may be a problem for Wolfman
+But the Mummy will appreciate the lack of humidity
いい感じです。
これでファイルの最後に新しく文章を足すことができました。 (左にある
+ マークで記されています。)
それでは変更点をステージングエリアに入れて git diff
がなにを表示するのかを見てみましょう:
何も表示されませんでした。Git が見た限りでは、保存したい変更点と今ディレクトリ内にあるファイルには、これといった違いは無いということになります。 ですが、こう入力すると:
出力
diff --git a/mars.txt b/mars.txt
index 315bf3a..b36abfd 100644
--- a/mars.txt
+++ b/mars.txt
@@ -1,2 +1,3 @@
 Cold and dry, but everything is my favorite color
 The two moons may be a problem for Wolfman
+But the Mummy will appreciate the lack of humidity
以前コミットされた状態のファイルとステージングエリアにある変更点の違いが表示されます。 変更内容を保存しましょう:
出力
[main 005937f] Discuss concerns about Mars' climate for Mummy
 1 file changed, 1 insertion(+)
状態をチェックしましょう:
出力
On branch main
nothing to commit, working tree clean
そして、今までの変更履歴も見てみましょう:
出力
commit 005937fbe2a98fb83f0ade869025dc2636b4dad5 (HEAD -> main)
Author: Vlad Dracula <vlad@tran.sylvan.ia>
Date:   Thu Aug 22 10:14:07 2013 -0400

    Discuss concerns about Mars' climate for Mummy

commit 34961b159c27df3b475cfe4415d94a6d1fcd064d
Author: Vlad Dracula <vlad@tran.sylvan.ia>
Date:   Thu Aug 22 10:07:21 2013 -0400

    Add concerns about effects of Mars' moons on Wolfman

commit f22b25e3233b4645dabd0d81e651fe074bd8e73b
Author: Vlad Dracula <vlad@tran.sylvan.ia>
Date:   Thu Aug 22 09:51:46 2013 -0400

    Start notes on Mars as a base
文字ごとの違いを表示する
時折、例えばテキストドキュメントなど、列ごとの違いを表示するのは大雑把すぎる場合があります。
こういう時は、git diff の --color-words
オプションを使えば、色で文字ごとの違いを表示してくれるので、大変便利です。
ログをめくる
git log の出力がスクリーンよりも長いと、git
はスクリーンに収まるようにログを分割して表示するプログラムを使います。
この “pager”
(ページャ)というプログラムが開くと、一番下の列がプロンプトではなく、:
になります。
- ページャを閉じるには Q を押してください。
- 次のページを表示するには Spacebarを押してください。
- ある
<文字>を全ページの中から検索する時は、/ を押し、<文字>を入力してください。 Nを押すと次の一致場所に行けます。
ログの出力を制限する
git log
の出力がスクリーン全体を埋めないようにするために、Gitが表示するコミットの数を
-N で変えることができます。この
Nは、表示したいコミットの数を表しています。
例えば、最新のコミットの情報だけを表示したい場合は、こう入力します:
出力
commit 005937fbe2a98fb83f0ade869025dc2636b4dad5 (HEAD -> main)
Author: Vlad Dracula <vlad@tran.sylvan.ia>
Date:   Thu Aug 22 10:14:07 2013 -0400

   Discuss concerns about Mars' climate for Mummy
--oneline
オプションを使うことによって、表示する情報を制限する事ができます:
出力
005937f (HEAD -> main) Discuss concerns about Mars' climate for Mummy
34961b1 Add concerns about effects of Mars' moons on Wolfman
f22b25e Start notes on Mars as a base
--oneline
オプションを他のオプションと組み合わせることもできます。
便利な組み合わせの一つとして、 --graph
を追加すると、コミット履歴をテキストベースのグラフとして表示し、どのコミットが現在の
HEAD、現在のブランチ main、あるいはその他の
Git リファレンスに関連しているかを示すことができます:
出力
* 005937f (HEAD -> main) Discuss concerns about Mars' climate for Mummy
* 34961b1 Add concerns about effects of Mars' moons on Wolfman
* f22b25e Start notes on Mars as a base
ディレクトリ
Git でディレクトリを使用する際は、以下の二点を覚えておきましょう。
- Git はディレクトリ単体を追跡することはなく、ディレクトリ内のファイルのみを追跡します。 自分で試してみてください:
注目してほしいのは、新しく作った directory
ディレクトリは git add
でリポジトリに追加したにも関わらず、追跡されてないファイルのリストに表示されていません。
たまに .gitkeep
ファイルが空のディレクトリ内にあるのは、このためです。
.gitignoreとは違って、このファイルは特別でも何でもなく、空のディレクトリを
Git のリポジトリに追加、そして追跡させるためだけに置いてあるだけです。
なので、別の名前のファイルでも同じことができます。
- Git リポジトリ内でディレクトリを作成し、複数のファイルをそのディレクトリに入れたい場合、ディレクトリ内のファイルをひとまとめに追加する事ができます:
自分で試してみてください:
BASH
$ touch spaceships/apollo-11 spaceships/sputnik-1
$ git status
$ git add spaceships
$ git status
次に進む前に、これらの変更をコミットしましょう。
まとめると、変更内容をリポジトリに追加したい時はgit add
で変更点をステージングエリアに移してから、git commit
でステージングエリアの変更点をリポジトリに保存します:

コミットメッセージを決める
以下のコミットメッセージの内、最後の mars.txt
のコミットに最適なメッセージはどれでしょう?
- “Changes”
- “Added line ‘But the Mummy will appreciate the lack of humidity’ to mars.txt”
- “Discuss effects of Mars’ climate on the Mummy”
1つ目のメッセージは短すぎてコミットの内容が何なのかわかりにくいです。2つ目はgit diffで何が変わったのかが分かるので、長い割にはあまり意味がありません。3つ目は、短く、簡潔で、分かりやすいメッセージです。
ファイルがステージングエリアにない限り、コミットできません。
新しくリポジトリを作ろうとします。
正しい回答です。まずファイルをステージングエリアに追加し、それからコミットします。
“my recent changes” というファイルを myfile.txt というメッセージでコミットしようとします。
複数のファイルをコミットする
一つのコミットに対し、ステージングエリアは複数のファイルの変更点を保持する事ができます。
- Add some text to
mars.txtnoting your decision to consider Venus as a base - Create a new file
venus.txtwith your initial thoughts about Venus as a base for you and your friends - Add changes from both files to the staging area, and commit those changes.
以下のcat mars.txtの出力は、この課題で追加された内容のみを反映しています。
出力は異なる場合があります。
まずは mars.txt と venus.txt
を編集しましょう:
出力
Maybe I should start with a base on Venus.出力
Venus is a nice planet and I definitely should consider it as a base.これで二つのファイルをステージングエリアに追加することができます。 二つのファイルを一気に追加するには:
一つずつ追加するには:
これでファイルをコミットする準備ができました。
git status でチェックしましょう。 コミットをするには:
出力
[main cc127c2]
 Write plans to start a base on Venus
 2 files changed, 2 insertions(+)
 create mode 100644 venus.txt
bio リポジトリ
-
bioという Git リポジトリ新しく作りましょう。 -
me.txtというファイルに自分について3文書いて、変更点をコミットしてください。 - すでに書いた文章の内、ひとつだけ編集して、更にもう一文加えてください。
- 編集した後の状態とその前の違いを表示してください。
必要であれば、planets から出ましょう:
新しく bio
というディレクトリを作り、中に移動しましょう:
リポジトリを作りましょう:
nano か他のテキストエディタで me.txt
を作りましょう。 作ったら、変更点を追加してコミットしてください:
指示通りにファイルを編集してください(一文だけ変えて、もう一文足す)。
オリジナルと編集後のファイルの違いを表示させるために、git diff
を使います:
まとめ
-
git statusはリポジトリの状態を表示する。 - ファイルはプロジェクトの作業ディレクトリ、ステージング・エリア(次のコミットに含まれる変更点が蓄積される場所)、そしてローカル・リポジトリ(コミットが永久に記録される場所)に保存される。
-
git addはファイルをステージング・エリアに移動させる。 -
git commitはステージされた内容をローカル・リポジトリに保存する。 - コミットメッセージは、変更点がわかりやすいように書きましょう。
Content from 履歴の探索
最終更新日:2024-11-24 | ページの編集
概要
質問
- ファイルの古いバージョンを復元するにはどうすればよいでしょうか?
- 変更内容を再調査するにはどうすればよいでしょうか?
- ファイルの古いバージョンを復元するにはどうすればよいでしょうか?
目的
- リポジトリのHEADとは何か、またその使い方を説明出来るようになりましょう。
- Gitのコミット番号を特定して使ってみましょう。
- 追跡調査されるファイルのいろいろなバージョンを比較してみましょう。
- ファイルの古いバージョンを復元してみましょう。
前のレッスンで見たように、コミットを識別子で参照できます。 識別子
HEAD を使うことで作業ディレクトリの 最新のコミット
を参照できます。
mars.txt
に一度に1行ずつ追加しているので、進展を見て確認することは簡単です。それでは
HEAD を使ってそれを行ってみましょう。 始める前に、
mars.txt にもう1行加えることで変更を加えてみましょう。
出力
Cold and dry, but everything is my favorite color
The two moons may be a problem for Wolfman
But the Mummy will appreciate the lack of humidity
An ill-considered change
それでは、何が得られるか見てみましょう。
出力
diff --git a/mars.txt b/mars.txt
index b36abfd..0848c8d 100644
--- a/mars.txt
+++ b/mars.txt
@@ -1,3 +1,4 @@
 Cold and dry, but everything is my favorite color
 The two moons may be a problem for Wolfman
 But the Mummy will appreciate the lack of humidity
+An ill-considered change.
これは、 HEAD を省略した場合 (試してみてください)
に得られるものと同じです。
これの本当の利点は、以前のコミットを参照できることです。
それを行うには、HEAD より前のコミットを参照するために
~1 (「~」は「チルダ」、発音は [til-d_uh_])
を追加します。
古いコミット間の違いを確認したい場合は、git diff
を再度使用できますが、HEAD~1、HEAD~2
などの表記を使用して、それらを参照するには下記を行います:
出力
diff --git a/mars.txt b/mars.txt
index df0654a..b36abfd 100644
--- a/mars.txt
+++ b/mars.txt
@@ -1 +1,4 @@
 Cold and dry, but everything is my favorite color
+The two moons may be a problem for Wolfman
+But the Mummy will appreciate the lack of humidity
+An ill-considered change
git diff
を使用して表示されるコミットと作業ディレクトリの 違い
ではなく、古いコミットで行った変更だけでなくコミットメッセージも表示する
git showを使用することもできます。
出力
commit f22b25e3233b4645dabd0d81e651fe074bd8e73b
Author: Vlad Dracula <vlad@tran.sylvan.ia>
Date:   Thu Aug 22 09:51:46 2013 -0400

    Start notes on Mars as a base

diff --git a/mars.txt b/mars.txt
new file mode 100644
index 0000000..df0654a
--- /dev/null
+++ b/mars.txt
@@ -0,0 +1 @@
+Cold and dry, but everything is my favorite color
このようにして、コミットのチェーンを構築できます。
チェーンの最新の終わりは HEAD と呼ばれます; ~
表記を使用して以前のコミットを参照できるため、HEAD~1
は「以前のコミット」を意味し、HEAD~123
は現在の場所から123個前のコミットに戻ります。
git log および git show
が表示する、数字と文字の長い文字列を使用してコミットを参照することもできます。
これらは一個一個の変更に対するユニークなIDであり、「ユニーク」は本当に唯一であることを意味します:
どのコンピューターのどのファイルの変更の組み合わせに対しても、ユニークな40文字の
ID があります。 最初のコミットにはID
f22b25e3233b4645dabd0d81e651fe074bd8e73b
が与えられたので、これを試してみましょう:
出力
diff --git a/mars.txt b/mars.txt
index df0654a..93a3e13 100644
--- a/mars.txt
+++ b/mars.txt
@@ -1 +1,4 @@
 Cold and dry, but everything is my favorite color
+The two moons may be a problem for Wolfman
+But the Mummy will appreciate the lack of humidity
+An ill-considered change
これは正しい答えですが、ランダムな40文字の文字列を入力するのは面倒なので、Gitは最初の数文字だけを使えばよいようにしてくれています:
出力
diff --git a/mars.txt b/mars.txt
index df0654a..93a3e13 100644
--- a/mars.txt
+++ b/mars.txt
@@ -1 +1,4 @@
 Cold and dry, but everything is my favorite color
+The two moons may be a problem for Wolfman
+But the Mummy will appreciate the lack of humidity
+An ill-considered change
やりました! こんなわけで
ファイルへの変更を保存して、何が変更されたかを確認できます。
では、どうすれば古いバージョンのものを復元できるでしょうか?
mars.txtへの最後の更新(「熟考を欠いた変更」)について気が変わったとしましょう。
git status
は、ファイルが変更されたことを示しますが、それらの変更はステージングされていません:
出力
On branch main
Changes not staged for commit:
  (use "git add <file>..." to update what will be committed)
  (use "git restore <file>..." to discard changes in working directory)

    modified:   mars.txt

no changes added to commit (use "git add" and/or "git commit -a")
git restoreを使うと、元の状態に戻すことができます:
出力
Cold and dry, but everything is my favorite color
The two moons may be a problem for Wolfman
But the Mummy will appreciate the lack of humidityその名前から推測できるように、git restore
はファイルの古いバージョンを復元します。
この場合、最後に保存されたコミットである HEAD
に記録されたファイルのバージョンを復元することをGitに伝えています。
さらに遡りたい場合は、-sオプションとコミット Id
を使うことができます:
出力
Cold and dry, but everything is my favorite color出力
On branch main
Changes not staged for commit:
  (use "git add <file>..." to update what will be committed)
  (use "git restore <file>..." to discard changes in working directory)
        modified:   mars.txt

no changes added to commit (use "git add" and/or "git commit -a")
変更はステージング領域にあることに注意してください。
繰り返しますが、git restore
を使うと、元の状態に戻すことができます:
出力
Cold and dry, but everything is my favorite color
The two moons may be a problem for Wolfman
But the Mummy will appreciate the lack of humidity取り消したい変更の一個前のコミット番号を使う必要があることを覚えておくことが重要です。
よくある間違いは、破棄しようとしている変更を行ったコミットの番号を使用することです。
以下の例では、最新のコミットの前 (HEAD~1)
、すなわちf22b25eから状態を取得したいと考えています:
このとき、.
を使用することで、全てのファイルを対象にします。

つまり、すべてをまとめると、Gitがどのように機能するかは次の漫画のようになります:

ファイルを1つずつ元に戻すことができるという事実は 人々が研究を整理する方法を変えることがあります。 すべての変更が1つの大きなドキュメントに含まれている場合、 後で結論に加えられた変更を元に戻さずに、 序論への変更を元に戻すことは困難です(不可能ではありませんが)。 一方、序論と結論を別々のファイルに保存すると、時間を前後に移動するのがはるかに簡単になります。
ファイルの古いバージョンの復元
ジェニファーは、数週間取り組んできたPythonスクリプトに変更を加えました。そして今朝行った変更により、スクリプトが “壊れ”、動作しなくなりました。 彼女はそれを修正しようとして約1時間費やしましたが、うまく機能しません…
幸い、彼女はGitを使用してプロジェクトのバージョンを追跡していました!
以下のどのコマンドで、data_cruncher.py
と呼ばれるPythonスクリプトの最後にコミットされたバージョンを復元できるでしょうか?
$ git restore$ git restore data_cruncher.py$ git restore -s HEAD~1 data_cruncher.py$ git restore -s <unique ID of last commit> data_cruncher.py2番と4番の両方
答えは (5) - 2 と 4 の両方です。
restore
コマンドはリポジトリからファイルを復元し、作業ディレクトリのファイルを上書きします。
2番と4番のコマンドはどちらもリ_ポジトリにある_
data_cruncher.py の_最新バージョン_を復元します。 2番は
HEAD を使って_最新バージョン_を指定し、4番は
HEAD と同じ意味の最後のコミットIDを使います。
3番のコマンドは、data_cruncher.py の HEAD
_より前_のコミットから復元するため、今回の目的とは異なります。
1番はエラーになります。 復元するファイルを指定する必要があります。
すべてのファイルを復元したい場合は、git restore .
を使用するべきです。
コミットを戻すことについて
ジェニファーは同僚とPythonスクリプトで共同作業を行っており、グループのリポジトリへの彼女の最新のコミットが間違っていることに気付き、それを元に戻したいと思っています。
ジェニファーは、グループリポジトリのみんなが正しい変更を取得できるように、正しく元に戻す必要があります。
ジェニファーは、グループリポジトリのみんなが正しい変更を取得できるように、正しく元に戻す必要があります。
git revert [wrong commit ID]
は、ジェニファーの誤ったコミットを元に戻す新しいコミットを作ります。
git revert は git restore -s [commit ID] .
とは異なります。git restore
は、ローカルリポジトリ内でまだコミットされていないファイルを以前の状態に戻すために使用されるのに対して、git revert
はローカルリポジトリおよびプロジェクトリポジトリにコミットされた変更を取り消すために使用されます。
以下は、ジェニファーがgit revertを使用するための正しい手順と説明ですが、不足しているコマンドは何でしょうか?
________ # コミットIDを見つけるために、プロジェクトのgitの 履歴を見ますそのIDをコピーします (IDの最初の数文字は例えば 0b1d055)。
git revert [commit ID]新しいコミットメッセージを入力します。
保存して閉じます。
git log
コマンドは、コミットIDを含むプロジェクトの履歴を一覧表示します。
git show HEAD
は、最新のコミットで行われた変更を表示し、コミットIDも確認できます。ただし、ジェニファーはこれが正しいコミットであることを再確認し、他の人がリポジトリに変更をコミットしていないか確認する必要があります。
ワークフローと履歴の理解
最後のコマンドの出力は何でしょうか?
BASH
$ cd planets
$ echo "Venus is beautiful and full of love" > venus.txt
$ git add venus.txt
$ echo "Venus is too hot to be suitable as a base" >> venus.txt
$ git commit -m "Comment on Venus as an unsuitable base"
$ git restore venus.txt
$ cat venus.txt #this will print the contents of venus.txt to the screen
出力
Venus is too hot to be suitable as a base
2. ```output
Venus is beautiful and full of love
出力
Venus is beautiful and full of love Venus is too hot to be suitable as a base
4. ```output
Error because you have changed venus.txt without committing the changes答えは2です。
The command git add venus.txt places the current version
of venus.txt into the staging area. The changes to the file
from the second echo command are only applied to the
working copy, not the version in the staging area.
So, when
git commit -m "Comment on Venus as an unsuitable base" is
executed, the version of venus.txt committed to the
repository is the one from the staging area and has only one line.
At this time, the working copy still has the second line (and
git status will show that the file is modified). However,
git restore venus.txt replaces the working copy with the
most recently committed version of venus.txt.
So, cat venus.txt will output
出力
Venus is beautiful and full of love.
git diff の理解のチェック
このコマンドをよく考えてみてください:
git diff HEAD~9 mars.txt。
このコマンドを実行したらどうなるだろうと予測しますか?
実行すると何が起こっていますか? またそれはなぜでしょうか?
別のコマンド git diff [ID] mars.txt
を試しましょう、ここでの [ID] は最新のコミットのユニークな ID
で置き換えられます。 あなたは何が起こるだろうと思いますか?
ステージされた変更の除去
git restore は、ステージされていない変更があったときに
以前のコミットを復元するために使用できます。しかしそれはステージされているがコミットされていない変更に対しても機能するでしょうか?
mars.txt
に変更を用意し、その変更を加え(git addを使い)、git restore
を使い変更を取り除くことができるかどうか確かめましょう。
変更を追加した後、git restore は直接使用できません。
次に、git status の出力を確認してみましょう。
出力
On branch main
Changes to be committed:
  (use "git restore --staged <file>..." to unstage)
        modified:   mars.txt
この出力が表示されない場合、ファイルの変更を忘れているか、すでにファイルを追加してコミットした可能性があります。
この時点で、git restore mars.txt
コマンドを実行してもエラーは発生しませんが、ファイルは元に戻りません。
Gitは、まず git restore --staged
を使用してステージングエリアからファイルを戻す必要があることを教えてくれます。
次に、git status の出力を確認します。
出力
On branch main
Changes not staged for commit:
  (use "git add <file>..." to update what will be committed)
  (use "git git restore <file>..." to discard changes in working directory)

        modified:   mars.txt

no changes added to commit (use "git add" and/or "git commit -a")ここで、git restore
コマンドを使ってファイルを前のコミットの状態に戻すことができます。
出力
On branch main
nothing to commit, working tree clean
履歴を探索し、要約する
履歴の探索はgitの重要な要素であり、特にそのコミットが数ヶ月前のものである場合は、適切なコミットIDを見つけるのが難しいことがよくあります。
planets
プロジェクトに50を超えるファイルがあると考えてください。 あなたは
mars.txt
中の特定のテキストが変更されたコミットを見つけたいとします。
git log と入力すると、非常に長いリストが表示されました。
どうやって探す範囲を限定しますか?
git diff
コマンドを使用すると、1つの特定のファイルを探索できることを思い出してください、
例えば、git diff mars.txt 。
ここでも同様のアイデアを適用できます。
残念ながら、一部のコミットメッセージは
update files(「ファイルを更新する」)などのように非常に曖昧です。
これらのファイルをどうやって調べたら良いでしょうか?
git diff と git log
はどちらも非常に便利で、それぞれリポジトリの異なる部分の履歴を要約してくれます。
これらを組み合わせることは可能でしょうか?
次のコマンドを試してみましょう:
長い出力が表示され、各コミットメッセージと、そのコミット間での違い(差分)が確認できるはずです。
質問: 次のコマンドは何をしますか?
まとめ
-
git diffは、コミット間の違いを表示します。 -
git checkoutは、ファイルの古いバージョンを復元します。
Content from ファイルを無視する
最終更新日:2024-11-24 | ページの編集
概要
質問
- Git で追跡したくないファイルを指定するにはどうすればよいですか?
目的
- Git で追跡したくないファイルを指定しましょう
- ファイルを無視する利点を理解しましょう
Git に追跡して欲しくないファイル、例えばエディタが作成したバックアップファイルやデータ解析中に作られた中間ファイルなどは、どう対処すればいいのでしょう? 例として、いくつかファイルを作ってみましょう:
そして Git が何と言うか見てみましょう:
出力
On branch main
Untracked files:
  (use "git add <file>..." to include in what will be committed)

	a.csv
	b.csv
	c.csv
	results/

nothing added to commit but untracked files present (use "git add" to track)
これらのファイルをバージョンコントロールで保存するのはディスク容量の無駄になります。 さらに、これら全てが表示されると、本当に必要な変更点に集中できなくなってしまうかもしれないので、 Git にこれらのファイルを無視してもらいましょう。
これをするには、.gitignore
というファイルをルートディレクトリに作ります:
出力
*.csv
results/
入力したパターンは、 Git に .dat
で終わるファイル名とresults
ディレクトリ内にあるファイルを無視するように指示しています。 (Git
がすでに追跡しているファイルは、引き続き追跡されます。)
このファイルを作った後git status
の出力を見てみると、大分綺麗になっています:
出力
On branch main
Untracked files:
  (use "git add <file>..." to include in what will be committed)

	.gitignore

nothing added to commit but untracked files present (use "git add" to track)
Git は新しく作られた .gitignore
ファイルしか表示していません。
このファイルは追跡しなくても良いかと思うでしょうが、リポジトリを共有する際に、他の人達も私達が無視したものを同じように無視したいでしょう。
なので、.gitignore を追加してコミットしましょう:
出力
On branch main
nothing to commit, working tree clean
.gitignore
を作った事によって、間違えて不要なファイルをリポジトリに追加する事を防ぐことができます:
出力
The following paths are ignored by one of your .gitignore files:
a.csv
Use -f if you really want to add them.この設定を強制的に無視してファイルを追加するには、git add -f
を使います。 例えば、git add -f a.csv と入力します。
もちろん、無視されたファイルの状況はいつでも見ることができます:
出力
On branch main
Ignored files:
 (use "git add -f <file>..." to include in what will be committed)

        a.csv
        b.csv
        c.csv
        results/

nothing to commit, working tree cleanresults/plots
内のファイルのみを無視するのであれば、.gitignore に
/plots/ サブフォルダを無視するように.gitignore
に以下の文を加えれば解決できます:
出力
results/plots/この行によって、results/plotsの内容だけが無視され、results/dataの内容は無視されません。
様々なプログラミングの問題と同様に、この無視ルールが守られるようにする回答方法はいくつかありま。 「ネストされたファイルを無視する:バリエーション」の演習は、わずかに異なるディレクトリ構造を持っており、別の解決策を提示しています。「ネストされたファイルを無視する:バリエーション」の演習は、わずかに異なるディレクトリ構造を持っており、別の解決策を提示しています。 Further, the discussion page has more detail on ignore rules.
無視の対象に特定のファイルを含める
final.csv以外の、ルートディレクトリ内にある他の
.data
ファイルを全て無視したい場合はどうすればいいのでしょう? ヒント:
! (感嘆符)が何をするのか調べてみましょう。
以下二文を .gitignore に加えましょう:
出力
*.data           # 全ての data ファイルを無視する
!final.data      # final.data は対象から除外する
感嘆符は、無視してあったファイルを対象から外します。
このレッスンで.csvファイルをコミットしたことがあるので、この新しいルールでは無視されません。
ルートディレクトリに追加された .csv
ファイルの以後の追記のみが無視されます。
results/ のコンテンツは無視したいが、
results/data/ のコンテンツは無視したくない場合、
.gitignore を変更して、 results
フォルダの内容は無視する、しかし results/data
サブフォルダのコンテンツは例外として設定することができます。 あなたの
.gitignore は次のようになるでしょう:
出力
results/*               # ignore everything in results folder
!results/data/          # do not ignore results/data/ contents
ディレクトリ内の全てのデータファイルを無視する
results/data/position/gps/*.data を使えば
results/data/position/gps 内にある全ての .data
ファイルを無視できます。 results/data/position/gps/info.txt
ファイルは無視されません。
Ignoring all data Files in the repository
Let us assume you have many .csv files in different
subdirectories of your repository. For example, you might have:
BASH
results/a.csv
data/experiment_1/b.csv
data/experiment_2/c.csv
data/experiment_2/variation_1/d.csv
How do you ignore all the .csv files, without explicitly
listing the names of the corresponding folders?
In the .gitignore file, write:
出力
**/*.csvThis will ignore all the .csv files, regardless of their
position in the directory tree. You can still include some specific
exception with the exclamation point operator.
感嘆符 !
は無視してあったファイルを対象から除外する効果があります。
!*.csv は、その前に入力されている .csv
ファイルを対象から外すので、全ての .csv
ファイルは引き続き追跡されることになります。
ログファイル
仮に log_01、 log_02、
log_03、というように、中間的にログファイルを作成するスクリプトを書いたとします。
これらのログファイルは取っておきたいのですが、git
で追跡したくありません。
log_01、log_02、などのファイルを無視するためのルールを一つだけ.gitignoreに入力してください。入力したパターン正常に動作しているか確認するために
log_01などのファイルを作成してください。最終的に
log_01ファイルがものすごく重要であることが分かりました。.gitignoreを編集せずに、このファイルを追跡しているファイルに加えてください。隣の人と、追跡したくないファイルは他にどのようなものがあるのか、そして
.gitignoreに何を入力すればこれらのファイルを無視できるのかを話し合ってください。
log_*もしくはlog*を .gitignore に加えます。git add -f log_01を使ってlog_01を追跡しましょう。
まとめ
-
.gitignoreで無視するファイルを指定する
Content from GitHub におけるリモート
最終更新日:2024-11-24 | ページの編集
概要
質問
- 自分の変更をウェブ上で他の人と共有するにはどうすればよいですか?
目的
- リモートリポジトリとは何なのか、そしてなぜそれが役立つのかを説明します。
- リモートリポジトリへのプッシュまたはリモートリポジトリからのプル。
バージョン管理が真価を発揮するのは、他の人々と共同作業を始めるときです。 これを行うために必要な機構のほとんどはすでに揃っています。 唯一欠けているのは、あるリポジトリから別のリポジトリに変更をコピーすることです。
Git のようなシステムを使用すると、任意の 2 つのリポジトリ間で作業結果を動かすことができます。 ただし、実際には、1 つのコピーを中央ハブとして使用し、それを誰かのラップトップではなくウェブ上に 保管するのが最も簡単です。 ほとんどのプログラマーは、GitHub や Bitbucket、あるいは GitLab のようなホスティングサービス に、これらのメインコピーを保持しています。この長所と短所については、後のエピソード で探ります。
まずは、現在のプロジェクトに加えた変更を世界と共有することから始めましょう。 この目的のために、ローカル リポジトリにリンクされる リモート リポジトリを作成します。
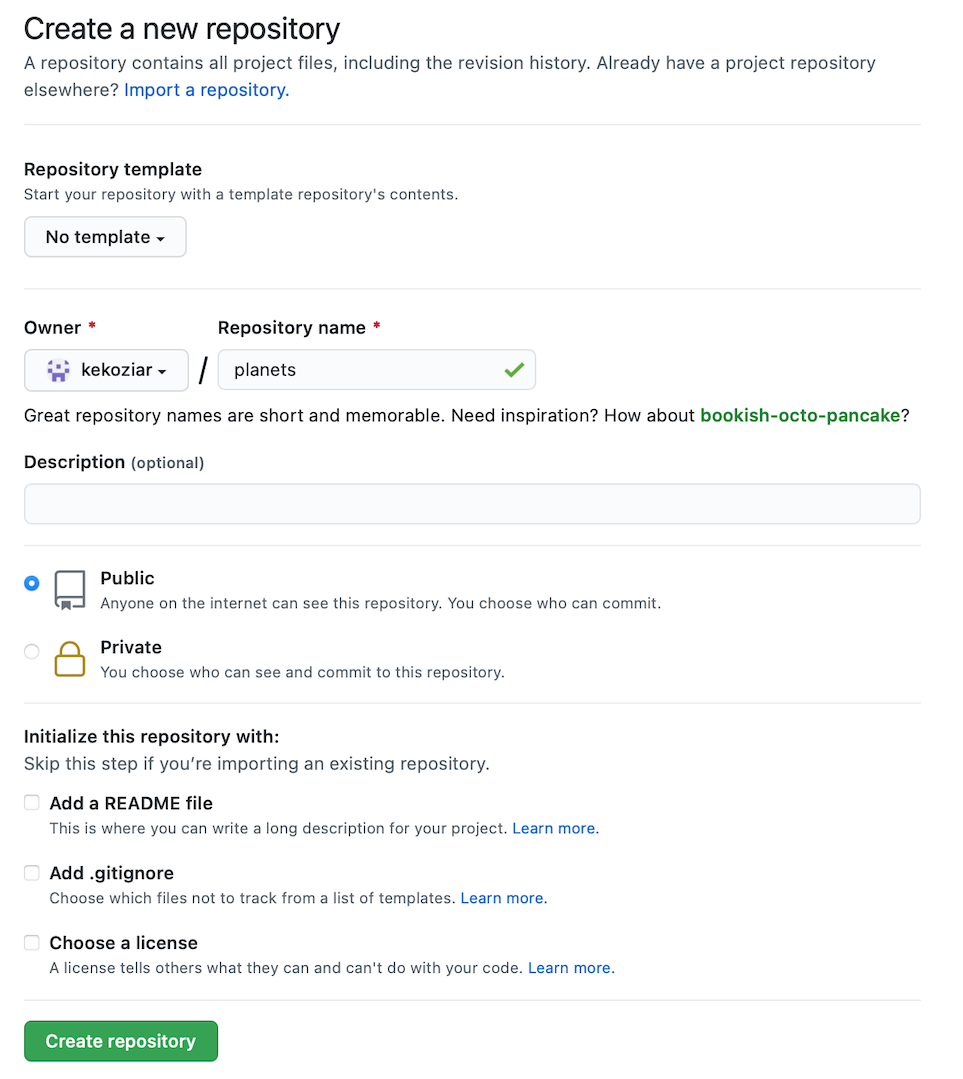
1. リモートリポジトリを作成する。
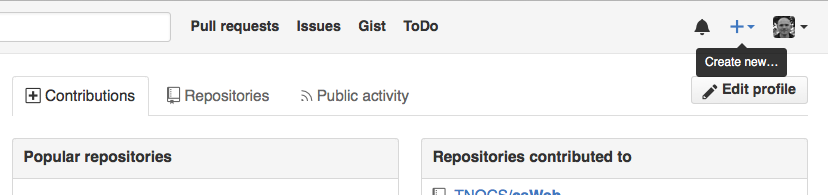
GitHub
にログインし、右上隅のアイコンをクリックして planets
という名前の新しいリポジトリを作成してみましょう:
リポジトリに「planets」という名前を付けて、「Create Repository」をクリックします。
注: このリポジトリはローカルのリポジトリに接続されるため、空にしておく必要があります。 「Initialize this repository with a README」のチェックを外したままにし、「Add .gitignore」と「Add a license.」の両方のオプションを「None」のままにします。 リポジトリを空にしておく必要がある理由の完全な説明については、以下の「GitHub ライセンスと README ファイル」の演習を参照してください。
リポジトリが作成されるとすぐに、GitHub には ある URL と、ローカルのリポジトリの構成方法に関する情報が記載されたページが表示されます。
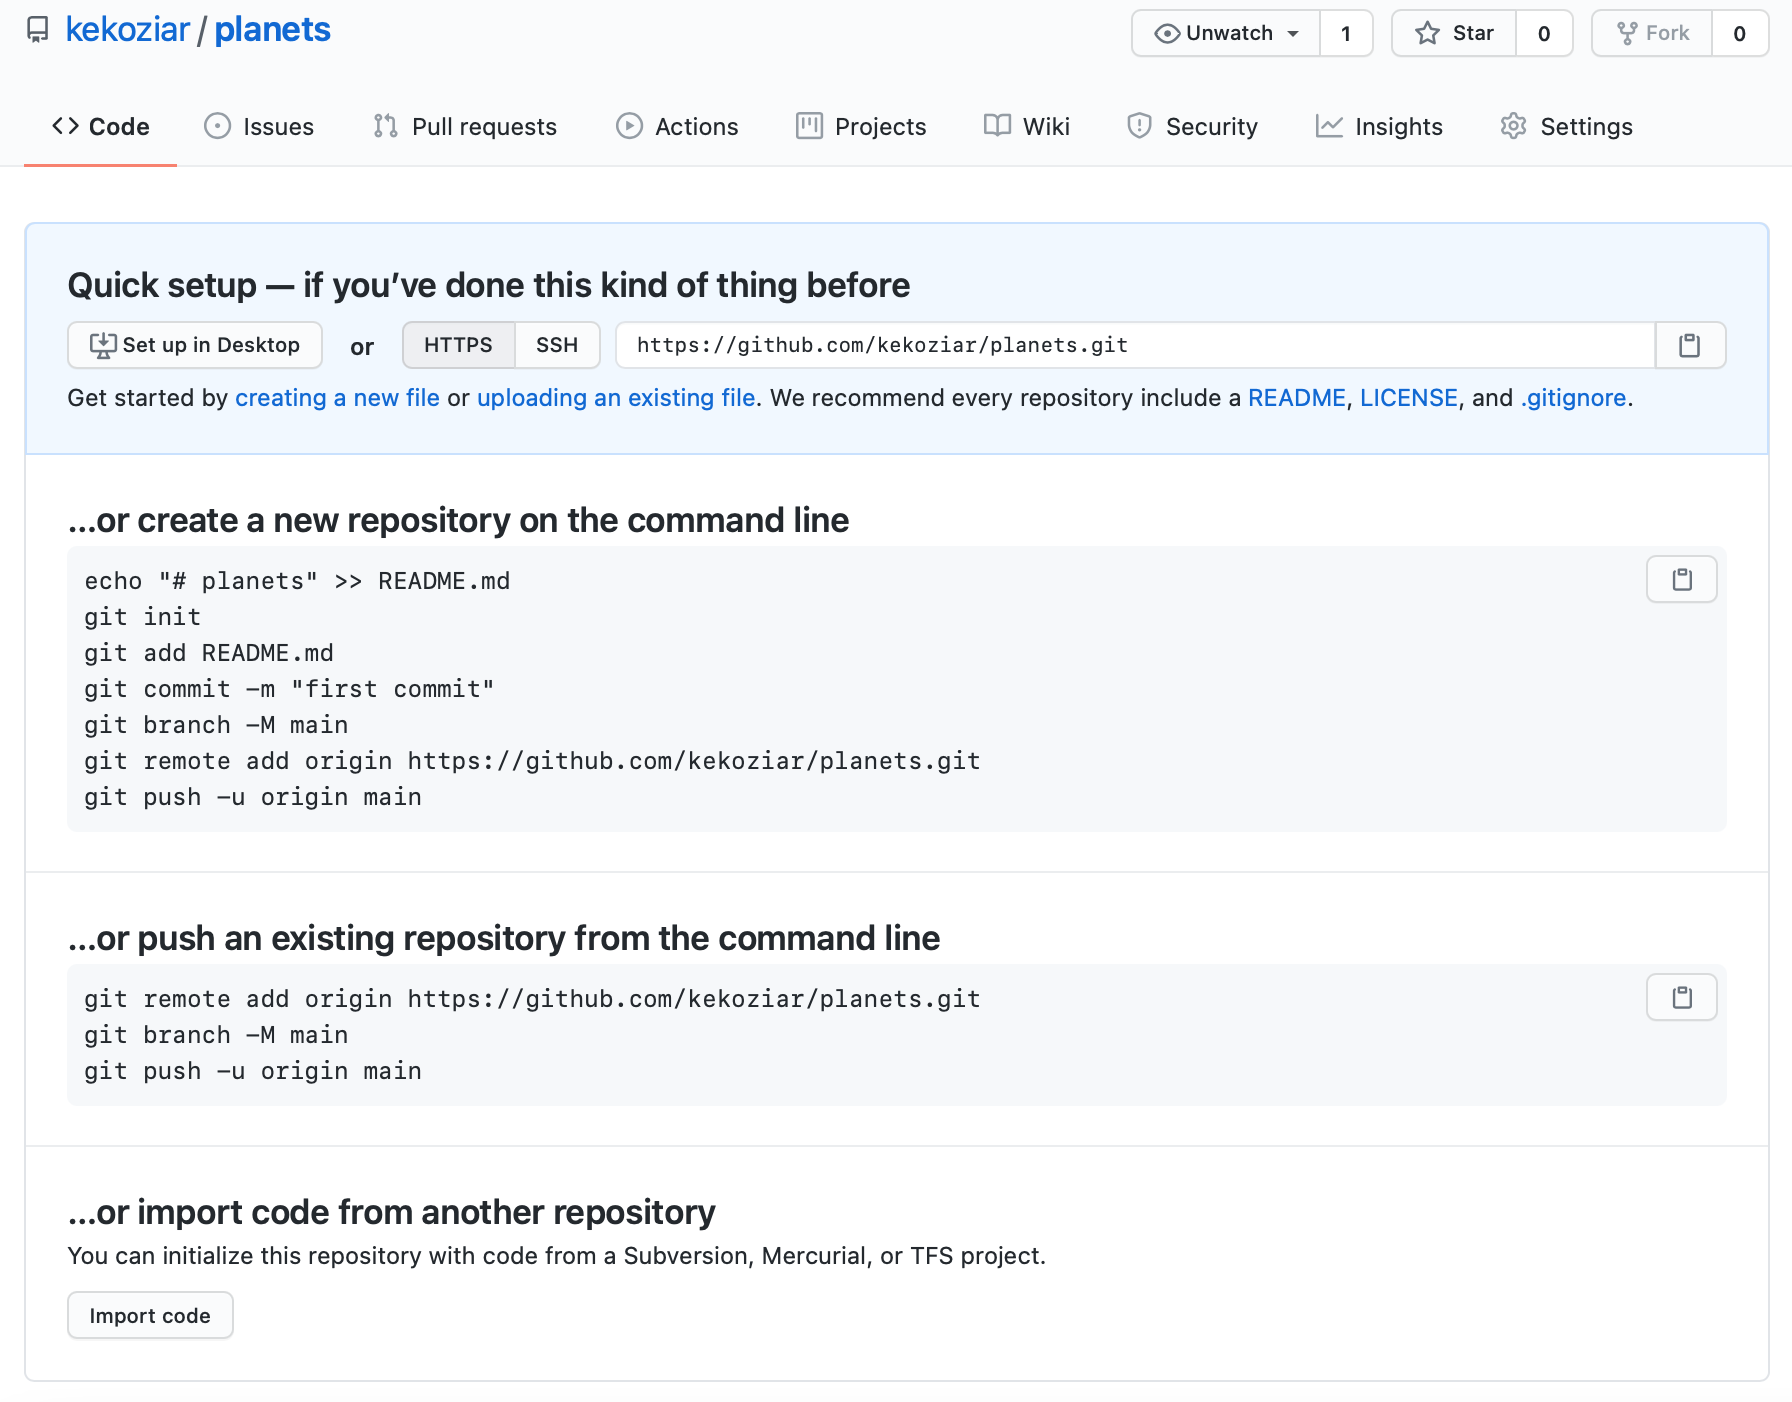
これにより、GitHub のサーバー上で次のことが効果的に行われます。
もしあなたが以前の エピソード
を覚えていれば、私達は mars.txt
に以前の作業を追加してコミットしました。
ローカルリポジトリのダイアグラムは次のようになります:
現在、2つのリポジトリを持っているので、このような図が必要です:

ローカルリポジトリには先ほど作成した mars.txt
に関する作業がまだ含まれていますが、
GitHub上のリモートリポジトリはまだファイルが含まれていないため空に見えます。
2. ローカルリポジトリとリモートリポジトリを接続する
次に、2つのリポジトリを接続します。これを行うには、GitHubリポジトリをローカルリポジトリのリモートとして設定します。
GitHub上のリポジトリのホームページには、それを特定するために必要なURL文字列が含まれています:

’SSH’リンクをクリックして、プロトコルをHTTPSからSSHに変更してください。
HTTPS 対 SSH
ここではSSHを使用します。SSHは追加の設定が必要ですが、多くのアプリケーションで広く使用されているセキュリティプロトコルです。以下の手順は、GitHubでのSSHの基本的な使い方について説明しています。

そのURLをブラウザからコピーし、ローカルの planets
リポジトリに移動して、次のコマンドを実行します:
自分のリポジトリのURLを使用することを忘れないでください。vlad
の代わりに自分のユーザー名に変更するだけです。
origin
はリモートリポジトリを指すローカル名です。他の名前を付けても構いませんが、origin
はGitやGitHubでデフォルトとしてよく使われる慣例的な名前です。特別な理由がない限り、この名前を使用するのが便利です。
コマンドが正しく動作したかどうかを確認するには、次のコマンドを実行します:
出力
origin   git@github.com:vlad/planets.git (fetch)
origin   git@github.com:vlad/planets.git (push)
リモートについては、次のエピソードでコラボレーションでの活用方法を説明しながら詳しく議論します。
3. SSH の背景と設定
ドラキュラがリモートリポジトリに接続するには、GitHubが彼のコンピュータで認証されていることを確認する方法を設定する必要があります。 これから説明する方法は、コマンドラインでアクセスを認証するために多くのサービスで一般的に使用されている方法です。この方法は「Secure Shell Protocol(SSH)」と呼ばれます。 SSHは暗号化ネットワークプロトコルで、安全でないネットワークを使用しても、コンピュータ間で安全な通信を可能にします。
SSHは「鍵ペア」というものを使用します。鍵ペアは、アクセスを検証するために一緒に動作する2つの鍵です。1つは「公開鍵」と呼ばれる公開される鍵で、もう1つは秘密にされる「秘密鍵」です。それぞれの名前の通りの役割を持っています。
公開鍵を南京錠、秘密鍵をその南京錠を開ける鍵と考えることができます。公開鍵をGitHubのような安全な通信を必要とする場所に提供します。これにより、「この南京錠(公開鍵)を使って私のアカウントへの通信をロックしてください。私の秘密鍵を持っているコンピュータだけが通信を解除し、Gitコマンドを私のGitHubアカウントとして送信できます」と指示することができます。
ここでは、SSH鍵を設定し、公開鍵をGitHubアカウントに追加するために必要な最小限の手順を説明します。
SSH(上級編)
このレッスンの補足エピソードでは、SSHと鍵ペアについてさらに深く詳しく説明しています。
まず最初に、この作業が現在使用しているコンピュータで既に行われているかどうかを確認します。一般的に、この設定は一度行えば、それ以降は再設定する必要はありません。
鍵を安全に保つ
SSH鍵はアカウントのセキュリティを守るためのものなので、本当に「忘れる」べきではありません。定期的にSSH鍵を監査するのは良い習慣です。特に複数のコンピュータからアカウントにアクセスしている場合は注意が必要です。
以下のリストコマンドを実行して、既に存在する鍵ペアを確認します。
使用しているコンピュータでSSHが設定されているかどうかによって、出力は異なります。
ドラキュラのコンピュータではSSHがまだ設定されていないため、出力は次のようになります:
出力
ls: cannot access '/c/Users/Vlad Dracula/.ssh': No such file or directoryもしSSHが設定済みの場合、公開鍵と秘密鍵がリストされます。鍵ペアは設定方法に応じて、id_ed25519/id_ed25519.pub
または id_rsa/id_rsa.pub
という名前になっています。
ドラキュラのコンピュータには鍵が存在しないため、次のコマンドを使って鍵を作成します。
3.1 SSH鍵ペアを作成する
SSH鍵ペアを作成するには、以下のコマンドを使用します。-t
オプションでアルゴリズムの種類を指定し、-C
で鍵にコメントを追加します(ここではドラキュラのメールアドレスを使用しています)。
もし古いシステムでEd25519アルゴリズムがサポートされていない場合は、次のコマンドを使用してください:
$ ssh-keygen -t rsa -b 4096 -C "your_email@example.com"
出力
Generating public/private ed25519 key pair.
Enter file in which to save the key (/c/Users/Vlad Dracula/.ssh/id_ed25519):デフォルトのファイルを使用するので、Enter を押してください。
出力
Created directory '/c/Users/Vlad Dracula/.ssh'.
Enter passphrase (empty for no passphrase):
ここでパスフレーズの入力を求められます。他の人がアクセスする可能性のある研究室のラップトップを使用しているため、ドラキュラはパスフレーズを作成します。 覚えやすいものを使うか、どこかに保存してください。パスワードリセットオプションはありません。 ターミナルでパスフレーズを入力しても、入力内容が画面に表示されないのは正常です。
出力
Enter same passphrase again:2回目のパスフレーズ入力後、次の確認メッセージが表示されます:
出力
Your identification has been saved in /c/Users/Vlad Dracula/.ssh/id_ed25519
Your public key has been saved in /c/Users/Vlad Dracula/.ssh/id_ed25519.pub
The key fingerprint is:
SHA256:SMSPIStNyA00KPxuYu94KpZgRAYjgt9g4BA4kFy3g1o vlad@tran.sylvan.ia
The key's randomart image is:
+--[ED25519 256]--+
|^B== o.          |
|%*=.*.+          |
|+=.E =.+         |
| .=.+.o..        |
|....  . S        |
|.+ o             |
|+ =              |
|.o.o             |
|oo+.             |
+----[SHA256]-----+
「identification(識別情報)」とは秘密鍵を指します。これは絶対に共有しないでください。公開鍵はその名の通り公開して問題ありません。 「key fingerprint(鍵のフィンガープリント)」は、公開鍵の短縮版です。
SSH鍵を生成したので、再度確認してみましょう。
出力
drwxr-xr-x 1 Vlad Dracula 197121   0 Jul 16 14:48 ./
drwxr-xr-x 1 Vlad Dracula 197121   0 Jul 16 14:48 ../
-rw-r--r-- 1 Vlad Dracula 197121 419 Jul 16 14:48 id_ed25519
-rw-r--r-- 1 Vlad Dracula 197121 106 Jul 16 14:48 id_ed25519.pub
3.2 公開鍵をGitHubにコピーする
SSH鍵ペアができたので、GitHubが認証情報を読み取れるか確認します。
出力
The authenticity of host 'github.com (192.30.255.112)' can't be established.
RSA key fingerprint is SHA256:nThbg6kXUpJWGl7E1IGOCspRomTxdCARLviKw6E5SY8.
This key is not known by any other names
Are you sure you want to continue connecting (yes/no/[fingerprint])? y
Please type 'yes', 'no' or the fingerprint: yes
Warning: Permanently added 'github.com' (RSA) to the list of known

 hosts.
git@github.com: Permission denied (publickey).
ここで公開鍵をGitHubに渡すのを忘れていることに気付きます!
まず、公開鍵をコピーします。.pub
を含めて指定してください。そうしないと秘密鍵を見てしまいます。
出力
ssh-ed25519 AAAAC3NzaC1lZDI1NTE5AAAAIDmRA3d51X0uu9wXek559gfn6UFNF69yZjChyBIU2qKI vlad@tran.sylvan.ia次にGitHub.comにアクセスし、右上のプロフィールアイコンをクリックしてドロップダウンメニューを開きます。「Settings(設定)」をクリックし、設定ページの左側メニューから「SSH and GPG keys」を選択します。右側の「New SSH key」ボタンをクリックします。 ここで、タイトルを入力し(ドラキュラは「Vlad’s Lab Laptop」と名付け、元の鍵ペアファイルの場所を覚えられるようにしました)、SSH鍵をフィールドに貼り付け、「Add SSH key」をクリックして設定を完了します。
設定が完了したので、再度認証を確認してみましょう。
出力
Hi Vlad! You've successfully authenticated, but GitHub does not provide shell access.よし!この出力はSSH鍵が正常に機能していることを確認しています。これでリモートリポジトリに作業をプッシュする準備が整いました。
4. ローカルの変更をリモートにプッシュする
認証設定が完了したので、リモートリポジトリに戻りましょう。このコマンドを使用して、ローカルリポジトリの変更をGitHubのリポジトリにプッシュします:
ドラキュラがパスフレーズを設定している場合、入力を求められます。高度な認証設定を完了している場合は、パスフレーズを求められることはありません。
出力
Enumerating objects: 16, done.
Counting objects: 100% (16/16), done.
Delta compression using up to 8 threads.
Compressing objects: 100% (11/11), done.
Writing objects: 100% (16/16), 1.45 KiB | 372.00 KiB/s, done.
Total 16 (delta 2), reused 0 (delta 0)
remote: Resolving deltas: 100% (2/2), done.
To https://github.com/vlad/planets.git
 * [new branch]      main -> main
プロキシ
もし接続しているネットワークがプロキシを使用している場合、最後のコマンドが「ホスト名を解決できません」というエラーメッセージで失敗することがあります。この問題を解決するには、Gitにプロキシ情報を伝える必要があります:
BASH
$ git config --global http.proxy http://user:password@proxy.url
$ git config --global https.proxy https://user:password@proxy.url
プロキシを使用していないネットワークに接続した際には、次のコマンドを使ってプロキシを無効化する必要があります:
パスワードマネージャー
ローカルリポジトリとリモートリポジトリの状態は次のようになります:

リモートリポジトリの変更をローカルリポジトリにプルすることもできます:
出力
From https://github.com/vlad/planets
 * branch            main     -> FETCH_HEAD
Already up-to-date.
この場合、両方のリポジトリが既に同期されているため、プルしても影響はありません。しかし、他の誰かがGitHubのリポジトリに変更をプッシュしていた場合、このコマンドはその変更をローカルリポジトリにダウンロードします。
GitHub GUI
GitHub上の planets リポジトリをブラウズしてください。
「Code」ボタンの下で「XX
commits」(XXは数値)というテキストを見つけてクリックしてください。
各コミットの右側にある3つのボタンにカーソルを合わせたりクリックしてください。
これらのボタンからどのような情報を収集/探索できますか?
シェルで同じ情報を取得するにはどうすればよいですか?
最も左のボタン(クリップボードの画像)は、コミットの完全な識別子をクリップボードにコピーします。
シェルでは、git log
を使用すると各コミットの完全な識別子を確認できます。
中央のボタンをクリックすると、その特定のコミットで行われたすべての変更が表示されます。緑色のラインは追加を、赤色のラインは削除を示します。
シェルでは、git diff
コマンドを使用して同じ情報を確認できます。特に、git diff ID1..ID2(例:git diff a3bf1e5..041e637)を使用すると、2つのコミット間の差分を表示できます。
最も右のボタンは、そのコミット時点でのリポジトリ内のすべてのファイルを表示します。
シェルで同じ操作を行うには、その特定の時点でリポジトリをチェックアウトする必要があります。git checkout ID(IDは見たいコミットの識別子)を使用します。その後、リポジトリを元の状態に戻すことを忘れないようにしてください!
GitHubブラウザでの直接アップロード
GitHubでは、コマンドラインをスキップしてブラウザから直接リポジトリにファイルをアップロードすることもできます。2つの方法があります。 1つ目は、ファイルツリーの上部ツールバーにある「Upload files」ボタンをクリックすることです。2つ目は、デスクトップからファイルツリーにファイルをドラッグ&ドロップすることです。詳細はGitHubのこのページで確認できます。
GitHubのタイムスタンプ
GitHubでリモートリポジトリを作成します。ローカルリポジトリの内容をリモートにプッシュします。ローカルリポジトリを変更して、その変更をプッシュします。作成したGitHubリポジトリに移動して、ファイルのタイムスタンプを確認してください。GitHubはどのように時刻を記録しており、その理由は何ですか?
GitHubはタイムスタンプを人間が読みやすい相対形式(例:“22 hours ago” や “three weeks ago”)で表示します。ただし、タイムスタンプにカーソルを合わせると、ファイルの最後の変更が行われた正確な時刻を確認できます。
プッシュとコミットの違い
このエピソードでは「git push」コマンドを紹介しました。 「git push」は「git commit」とどのように異なりますか?
プッシュではリモートリポジトリに変更を送信します。これにより、リモートリポジトリを更新し、しばしば他の人と変更を共有します。 コミットはローカルリポジトリのみを更新します。
GitHubのライセンスとREADMEファイル
このエピソードではGitHub上でリモートリポジトリを作成する方法を学びましたが、GitHubリポジトリを初期化する際にREADME.mdやライセンスファイルを追加しませんでした。もし追加していた場合、ローカルリポジトリ
とリモートリポジトリをリンクしようとした際に何が起こったでしょうか?
この場合、無関係な履歴のためにマージコンフリクトが発生します。GitHubがREADME.mdファイルを作成すると、リモートリポジトリでコミットが行われます。リモートリポジトリをローカルリポジトリにプルしようとすると、Gitは共通の起源を持たない履歴を検出し、マージを拒否します。
出力
warning: no common commits
remote: Enumerating objects: 3, done.
remote: Counting objects: 100% (3/3), done.
remote: Total 3 (delta 0), reused 0 (delta 0), pack-reused 0
Unpacking objects: 100% (3/3), done.
From https://github.com/vlad/planets
 * branch            main     -> FETCH_HEAD
 * [new branch]      main     -> origin/main
fatal: refusing to merge unrelated histories
--allow-unrelated-histories
オプションを使用して、2つのリポジトリを強制的にマージすることができます。このオプションを使用する際は注意が必要で、マージする前にローカルリポジトリとリモートリポジトリの内容を慎重に確認してください。
出力
From https://github.com/vlad/planets
 * branch            main     -> FETCH_HEAD
Merge made by the 'recursive' strategy.
README.md | 1 +
1 file changed, 1 insertion(+)
create mode 100644 README.md
まとめ
- ローカルGitリポジトリは1つ以上のリモートリポジトリに接続できます。
- リモートリポジトリへの接続にはSSHプロトコルを使用します。
-
git pushはローカルリポジトリからリモートリポジトリに変更をコピーします。 -
git pullはリモートリポジトリからローカルリポジトリに変更をコピーします。
Content from コラボレーション
最終更新日:2024-11-24 | ページの編集
概要
質問
- バージョン管理をどのように使って他の人と共同作業できますか?
目的
- リモートリポジトリをクローンする。
- 共通リポジトリにプッシュしてコラボレーションする。
- 基本的な共同作業のワークフローを説明する。
次のステップでは、ペアになって進めてください。一人は「オーナー」、もう一人は「コラボレーター」となります。 目的は、コラボレーターがオーナーのリポジトリに変更を加えることです。最後に役割を交代するので、両方がオーナーとコラボレーターの両方を体験します。
一人で練習する場合
このレッスンを一人で進めている場合は、2つ目のターミナルウィンドウを開くことで続行できます。 この新しいウィンドウが、別のコンピュータで作業しているパートナーを表します。 GitHubで誰かにアクセスを許可する必要はありません。なぜなら、両方の「パートナー」は自分だからです。
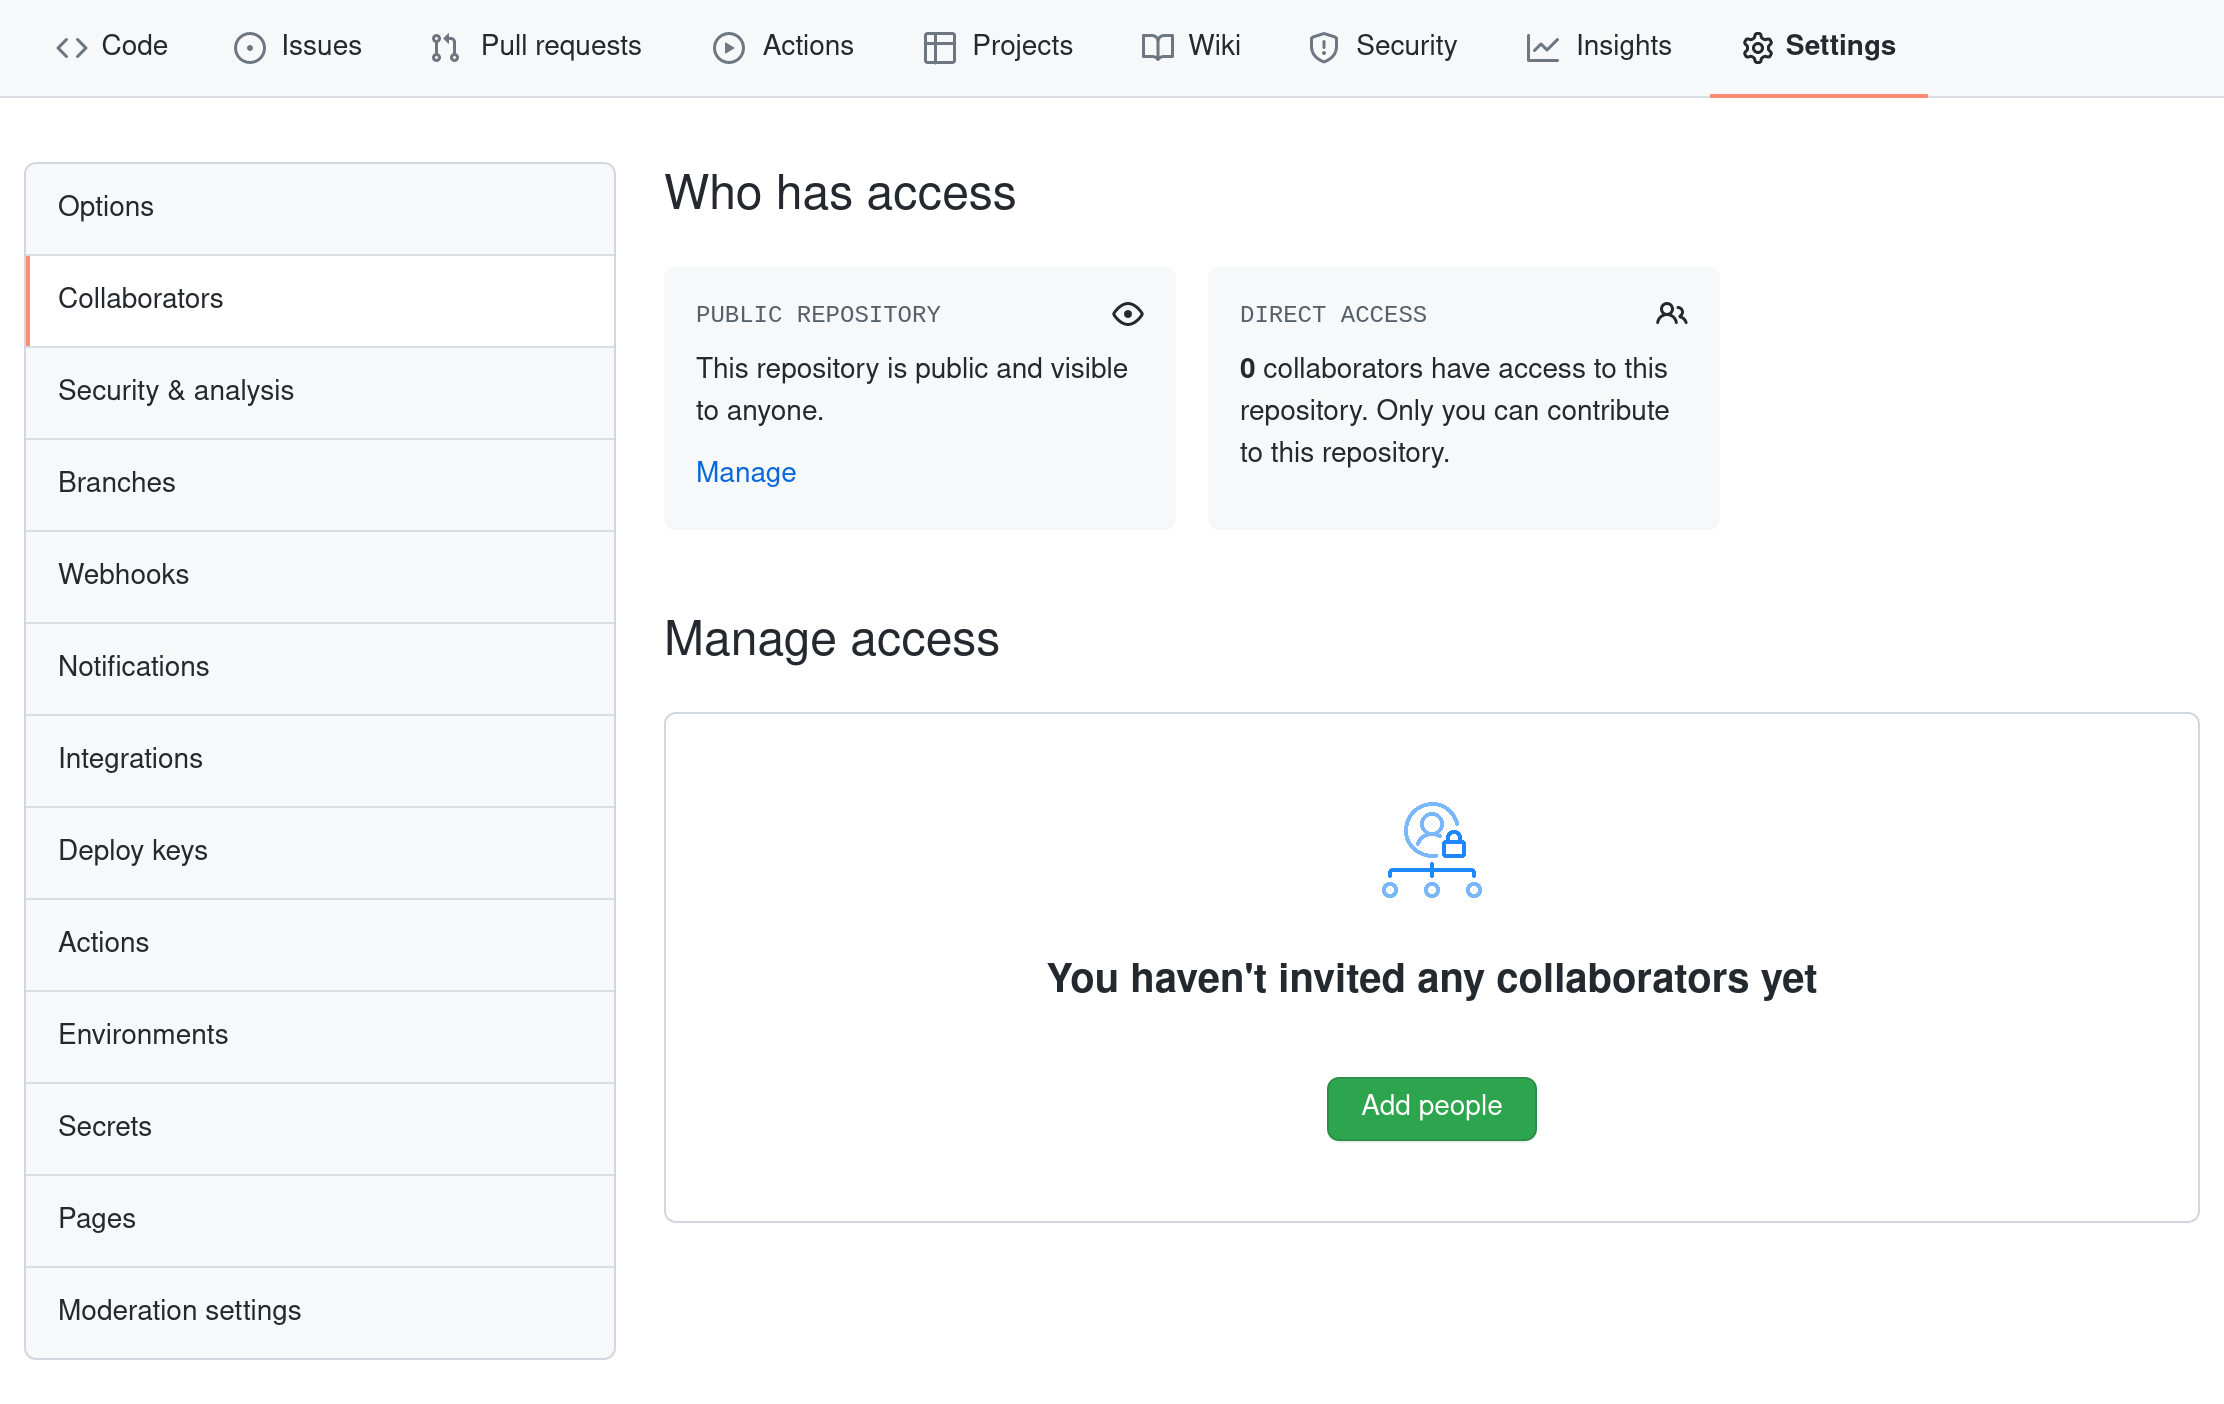
オーナーはコラボレーターにアクセス権を与える必要があります。GitHubのリポジトリページで、「Settings」ボタンをクリックし、「Collaborators」を選択し、「Add people」をクリックして、パートナーのユーザー名を入力します。
コラボレーターは、オーナーのリポジトリへのアクセスを受け入れる必要があります。https://github.com/notifications にアクセスするか、メール通知を確認します。そこでオーナーのリポジトリへのアクセスを承認できます。
次に、コラボレーターはオーナーのリポジトリのコピーを自分のマシンにダウンロードします。これを「リポジトリをクローンする」と呼びます。
コラボレーターは自分の planets.git
バージョンを上書きしたくないため、同じ名前のリポジトリを持つ自分のリポジトリとは異なる場所にオーナーのリポジトリをクローンする必要があります。
コラボレーターがオーナーのリポジトリを自分の Desktop
フォルダにクローンするには、次のコマンドを入力します:
‘vlad’ をオーナーのユーザー名に置き換えてください。
クローンパス(~/Desktop/vlad-planets)を指定せずにクローンを実行すると、自分の
planets フォルダ内にクローンされてしまいます! 必ず最初に
Desktop フォルダに移動してください。

コラボレーターは、オーナーのリポジトリのクローン内で、これまでと同じ方法で変更を加えることができます:
出力
It is so a planet!出力
 1 file changed, 1 insertion(+)
 create mode 100644 pluto.txt
その後、変更をGitHub上の_オーナーのリポジトリ_にプッシュします:
出力
Enumerating objects: 4, done.
Counting objects: 4, done.
Delta compression using up to 4 threads.
Compressing objects: 100% (2/2), done.
Writing objects: 100% (3/3), 306 bytes, done.
Total 3 (delta 0), reused 0 (delta 0)
To https://github.com/vlad/planets.git
   9272da5..29aba7c  main -> main
リモートを origin
と呼ぶ必要がなかったことに注目してください:Gitはリポジトリをクローンしたときにデフォルトでこの名前を使用します。
(これは、以前リモートを手動で設定した際に origin
を使用したのが妥当であった理由です。)
もう一度オーナーのリポジトリをGitHubで確認すると、コラボレーターによって作成された新しいコミットが表示されるはずです。ブラウザを更新して新しいコミットを確認してください。
リモートについてさらに詳しく
このエピソードと前のエピソードでは、ローカルリポジトリには
origin と呼ばれる単一の「リモート」が設定されていました。
リモートは、どこか別の場所にホストされているリポジトリのコピーであり、プッシュやプルを行うことができます。また、1つだけで作業する必要はありません。
たとえば、大規模なプロジェクトでは、自分のGitHubアカウントにあるコピー(おそらく
origin
と呼ぶ)と、メインの「上流」プロジェクトリポジトリ(例として
upstream と呼ぶ)を持つことがあります。
他の人がコミットした最新の更新を取得するために、時々
upstream からプルします。
リモートに付ける名前はローカルでのみ存在します。それはエイリアスであり、origin、upstream、fred
など、選んだ名前です。
リモートリポジトリ自体には固有の名前はありません。
git remote
ファミリーのコマンドを使用して、リモートの設定や変更を行います。以下は最も役立つコマンドです:
-
git remote -v: 設定されているすべてのリモートを一覧表示します(前のエピソードで使用しました)。 -
git remote add [name] [url]: 新しいリモートを追加します。 -
git remote remove [name]: リモートを削除します。これはリモートリポジトリ自体には影響せず、ローカルリポジトリからリンクを削除するだけです。 -
git remote set-url [name] [newurl]: リモートに関連付けられているURLを変更します。たとえば、別のGitHubアカウントやホスティングサービスに移動した場合、またはURLを追加時にタイプミスをした場合に使用します。 -
git remote rename [oldname] [newname]: リモートのローカルエイリアス(名前)を変更します。たとえば、upstreamをfredに変更できます。
コラボレーターの変更をGitHubからダウンロードするために、オーナーは次のコマンドを入力します:
出力
remote: Enumerating objects: 4, done.
remote: Counting objects: 100% (4/4), done.
remote: Compressing objects: 100% (2/2), done.
remote: Total 3 (delta 0), reused 3 (delta 0), pack-reused 0
Unpacking objects: 100% (3/3), done.
From https://github.com/vlad/planets
 * branch            main     -> FETCH_HEAD
   9272da5..29aba7c  main     -> origin/main
Updating 9272da5..29aba7c
Fast-forward
 pluto.txt | 1 +
 1 file changed, 1 insertion(+)
 create mode 100644 pluto.txt
これで3つのリポジトリ(オーナーのローカル、コラボレーターのローカル、オーナーのGitHub上のリポジトリ)が再び同期されました。
基本的な共同作業のワークフ
ロー
実際には、共同作業を行っているリポジトリの最新バージョンを取得していることを確認するのが良い習慣です。そのため、変更を加える前に
git pull
を実行してください。基本的な共同作業のワークフローは次のようになります:
-
git pull origin mainを使用してローカルリポジトリを更新する。 - 変更を加え、それらを
git addでステージする。 -
git commit -mを使用して変更をコミットする。 -
git push origin mainを使用して変更をGitHubにアップロードする。
1回の大規模な変更を含むコミットよりも、小さな変更を含む多くのコミットを行う方が望ましいです。小さなコミットの方が読みやすく、レビューしやすいからです。
役割を交代して再実行
役割を交代し、全プロセスを繰り返してください。
変更をレビューする
オーナーがコラボレーターに情報を与えずにリポジトリにコミットをプッシュしました。 コマンドラインでは、コラボレーターはどのようにして変更を確認できますか? また、GitHubではどうでしょうか?
コマンドラインでは、コラボレーターは
git fetch origin main
を使用してリモートの変更をローカルリポジトリに取得できます。ただし、マージは行われません。
その後、git diff main origin/main
を実行することで、変更をターミナルに表示できます。
GitHubでは、コラボレーターがリポジトリにアクセスして「commits」をクリックすると、リポジトリにプッシュされた最新のコミットを見ることができます。
GitHubで変更にコメントする
コラボレーターがオーナーによる1行の変更について質問があり、提案をしたいとします。
GitHubでは、コミットの差分にコメントを追加することが可能です。コメントを付けたいコード行の上に青いコメントアイコンが表示され、コメントウィンドウを開くことができます。
コラボレーターはGitHubインターフェースを使用してコメントと提案を投稿します。
バージョン履歴、バックアップ、バージョン管理
一部のバックアップソフトウェアは、ファイルのバージョン履歴を保持し、特定のバージョンを復元することができます。この機能はバージョン管理とはどのように異なりますか?また、バージョン管理(GitやGitHub)の利点は何ですか?
まとめ
-
git cloneはリモートリポジトリをコピーして、リモートが自動的にoriginとして設定されたローカルリポジトリを作成します。
Content from コンフリクト
最終更新日:2024-11-24 | ページの編集
概要
質問
- 自分の変更が他の人の変更と競合した場合、どうすればいいですか?
目的
- コンフリクトとは何か、いつ発生するのかを説明する。
- マージによるコンフリクトを解消する。
複数の人が並行して作業できるようになると、互いの作業が衝突する可能性が高まります。 これは一人で作業している場合でも起こり得ます。 例えば、ラップトップと研究室のサーバーで同じソフトウェアを作業している場合、それぞれのコピーに異なる変更を加える可能性があります。 バージョン管理は、コンフリクトを管理し、 重複する変更を解決するためのツールを提供します。
コンフリクトを作成してみる
まずコンフリクトを解決する方法を学ぶために、実際にコンフリクトを作成します。
現在、planets リポジトリの mars.txt
ファイルは、オーナーとコラボレーターの両方のコピーで次のようになっています:
出力
Cold and dry, but everything is my favorite color
The two moons may be a problem for Wolfman
But the Mummy will appreciate the lack of humidity
コラボレーターによる変更
コラボレーターが自分のコピーに次の行を追加します:
出力
Cold and dry, but everything is my favorite color
The two moons may be a problem for Wolfman
But the Mummy will appreciate the lack of humidity
This line added to Wolfman's copy
変更をGitHubにプッシュします:
出力
[main 5ae9631] Add a line in our home copy
1 file changed, 1 insertion(+)出力
Enumerating objects: 5, done.
Counting objects: 100% (5/5), done.
Delta compression using up to 8 threads
Compressing objects: 100% (3/3), done.
Writing objects: 100% (3/3), 331 bytes | 331.00 KiB/s, done.
Total 3 (delta 2), reused 0 (delta 0)
remote: Resolving deltas: 100% (2/2), completed with 2 local objects.
To https://github.com/vlad/planets.git
   29aba7c..dabb4c8  main -> main
オーナーによる別の変更
次に、オーナーがGitHubから更新せずに異なる変更を加えます:
出力
Cold and dry, but everything is my favorite color
The two moons may be a problem for Wolfman
But the Mummy will appreciate the lack of humidity
We added a different line in the other copy
ローカルでコミットします:
出力
[main 07ebc69] Add a line in my copy
 1 file changed, 1 insertion(+)
GitHubへのプッシュを試みるとエラーが発生します:
出力
To https://github.com/vlad/planets.git
 ! [rejected]        main -> main (fetch first)
error: failed to push some refs to 'https://github.com/vlad/planets.git'
hint: Updates were rejected because the remote contains work that you do
hint: not have locally. This is usually caused by another repository pushing
hint: to the same ref. You may want to first integrate the remote changes
hint: (e.g., 'git pull ...') before pushing again.
hint: See the 'Note about fast-forwards' in 'git push --help' for details.
Gitは、リモートリポジトリに新しい更新があり、それがローカルブランチに取り込まれていないことを検出したため、プッシュを拒否します。 この問題を解決するには、GitHubから変更をプルして現在作業しているコピーにマージし、それをプッシュする必要があります。
GitHubから変更をプルする
出力
remote: Enumerating objects: 5, done.
remote: Counting objects: 100% (5/5), done.
remote: Compressing objects: 100% (1/1), done.
remote: Total 3 (delta 2), reused 3 (delta 2), pack-reused 0
Unpacking objects: 100% (3/3), done.
From https://github.com/vlad/planets
 * branch            main     -> FETCH_HEAD
    29aba7c..dabb4c8  main     -> origin/main
Auto-merging mars.txt
CONFLICT (content): Merge conflict in mars.txt
Automatic merge failed; fix conflicts and then commit the result.
git pull
コマンドはローカルリポジトリを更新し、リモートリポジトリの変更を含むようにします。
リモートブランチからの変更がフェッチされた後、Gitはローカルコピーに加えられた変更がリモートリポジトリの変更と重なっていることを検出し、2つのバージョンをマージしません。
コンフリクトの内容を確認する
出力
Cold and dry, but everything is my favorite color
The two moons may be a problem for Wolfman
But the Mummy will appreciate the lack of humidity
<<<<<<< HEAD
We added a different line in the other copy
=======
This line added to Wolfman's copy
>>>>>>> dabb4c8c450e8475aee9b14b4383acc99f42af1dコンフリクトが発生した箇所がマーカーで示されています。<<<<<<< HEAD
はローカルの変更を示し、======= は変更の区切りを示します。
>>>>>>>
の後の文字列は、GitHubからダウンロードしたコミットを特定するための識別子です。
コンフリクトの解消
ファイルを編集してコンフリクトマーカーを削除し、両方の変更を調整します。 ここでは両方の変更を置き換えて次のようにします:
出力
Cold and dry, but everything is my favorite color
The two moons may be a problem for Wolfman
But the Mummy will appreciate the lack of humidity
We removed the conflict on this line
マージを完了する
出力
On branch main
All conflicts fixed but you are still merging.
  (use "git commit" to conclude merge)

Changes to be committed:

modified: mars.txt出力
[main 2abf2b1] Merge changes from GitHub最終的に変更をプッシュする
出力
Enumerating objects: 10, done.
Counting objects: 100% (10/10), done.
Delta compression using up to 8 threads
Compressing objects: 100% (6/6), done.
Writing objects: 100% (6/6), 645 bytes | 645.00 KiB/s, done.
Total 6 (delta 4), reused 0 (delta 0)
remote: Resolving deltas: 100% (4/4), completed with 2 local objects.
To https://github.com/vlad/planets.git
   dabb4c8..2abf2b1  main -> main
Gitは、何をどのようにマージしたかを記録しているため、最初に変更を加えたコラボレーターが再度プルする際には、手作業で修正する必要がありません:
出力
remote: Enumerating objects: 10, done.
remote: Counting objects: 100% (10/10), done.
remote: Compress

ing objects: 100% (2/2), done.
remote: Total 6 (delta 4), reused 6 (delta 4), pack-reused 0
Unpacking objects: 100% (6/6), done.
From https://github.com/vlad/planets
 * branch            main     -> FETCH_HEAD
    dabb4c8..2abf2b1  main     -> origin/main
Updating dabb4c8..2abf2b1
Fast-forward
 mars.txt | 2 +-
 1 file changed, 1 insertion(+), 1 deletion(-)
結果の確認
出力
Cold and dry, but everything is my favorite color
The two moons may be a problem for Wolfman
But the Mummy will appreciate the lack of humidity
We removed the conflict on this line
Gitは、誰かが既にマージを行ったことを認識しているため、再度マージする必要はありません。
Gitのコンフリクト解決機能は非常に便利ですが、コンフリクト解決には時間と労力がかかり、適切に解決されないとエラーが生じる可能性があります。プロジェクトで頻繁にコンフリクトを解決している場合、次のような技術的なアプローチを検討してください:
- 上流から頻繁にプルする、特に新しい作業を始める前に。
- トピックブランチを使用して作業を分離し、完了後にメインブランチにマージする。
- より小さく、より原子的なコミットを作成する。
- 作業が完了したらプッシュし、チームにも同じことを促すことで作業中の変更を減らし、結果としてコンフリクトの可能性を減らす。
- 論理的に適切であれば、大きなファイルをより小さなファイルに分割して、同じファイルを同時に変更する可能性を減らす。
プロジェクト管理の戦略でもコンフリクトを最小限に抑えることができます:
- 責任分担を明確にする。
- コラボレーターとタスクの順序を話し合い、同じ行に影響を与える可能性のあるタスクが同時に作業されないようにする。
- スタイルの変更によるコンフリクト(例:タブとスペースの違いなど)の場合、プロジェクトの規約を定め、必要に応じてコードスタイルツール(例:
htmltidy、perltidy、rubocopなど)を使用して規約を強制する。
自分でコンフリクトを解決する
インストラクターが作成したリポジトリをクローンしてください。 新しいファイルを追加し、既存のファイル(インストラクターが指定するもの)を変更します。 指示があったら、リポジトリからインストラクターの変更をプルしてコンフリクトを作成し、それを解決してください。
非テキストファイルのコンフリクト
画像やその他の非テキストファイルがバージョン管理に保存されている場合、コンフリクトが発生するとGitはどうしますか?
試してみましょう。ドラキュラが火星の表面を撮影し、その画像を
mars.jpg と名付けたとします。
火星の画像ファイルが手元にない場合は、次のようにダミーのバイナリファイルを作成できます:
出力
-rw-r--r-- 1 vlad 57095 1.0K Mar 8 20:24 mars.jpgls コマンドは、ランダムなバイトが
/dev/urandom
から読み取られた1キロバイトのファイルが作成されたことを示します。
次に、ドラキュラが mars.jpg
をリポジトリに追加したとします:
出力
[main 8e4115c] Add picture of Martian surface
 1 file changed, 0 insertions(+), 0 deletions(-)
 create mode 100644 mars.jpg
一方、ウルフマンが火星の空の写真を追加しましたが、こちらもファイル名が
mars.jpg です。
ドラキュラがプッシュを試みると、次のようなエラーが発生します:
出力
To https://github.com/vlad/planets.git
 ! [rejected]        main -> main (fetch first)
error: failed to push some refs to 'https://github.com/vlad/planets.git'
hint: Updates were rejected because the remote contains work that you do
hint: not have locally. This is usually caused by another repository pushing
hint: to the same ref. You may want to first integrate the remote changes
hint: (e.g., 'git pull ...') before pushing again.
hint: See the 'Note about fast-forwards' in 'git push --help' for details.
最初にプルしてコンフリクトを解決する必要があります:
画像やその他のバイナリファイルでコンフリクトが発生すると、Gitは次のようなメッセージを表示します:
出力
$ git pull origin main
remote: Counting objects: 3, done.
remote: Compressing objects: 100% (3/3), done.
remote: Total 3 (delta 0), reused 0 (delta 0)
Unpacking objects: 100% (3/3), done.
From https://github.com/vlad/planets
 * branch            main     -> FETCH_HEAD
   6a67967..439dc8c  main     -> origin/main
warning: Cannot merge binary files: mars.jpg (HEAD vs. 439dc8c08869c342438f6dc4a2b615b05b93c76e)
Auto-merging mars.jpg
CONFLICT (add/add): Merge conflict in mars.jpg
Automatic merge failed; fix conflicts and then commit the result.
バイナリファイルの場合、Gitはテキストファイルのようにコンフリクトマーカーを挿入することができません。 代わりに、保持したいバージョンを選択してチェックアウトし、それを追加してコミットします。
Gitは便利なことに、2つのバージョンの mars.jpg
のコミット識別子を提供します。 自分のバージョンは
HEAD、ウルフマンのバージョンは 439dc8c0 です。
自分のバージョンを使用したい場合、次のようにします:
BASH
$ git checkout HEAD mars.jpg
$ git add mars.jpg
$ git commit -m "Use image of surface instead of sky"
出力
[main 21032c3] Use image of surface instead of skyウルフマンのバージョンを使用したい場合、次のようにします:
BASH
$ git checkout 439dc8c0 mars.jpg
$ git add mars.jpg
$ git commit -m "Use image of sky instead of surface"
出力
[main da21b34] Use image of sky instead of surface両方の画像を保持したい場合、名前が重複しないようにそれぞれのバージョンをチェックアウトしてリネームします:
BASH
$ git checkout HEAD mars.jpg
$ git mv mars.jpg mars-surface.jpg
$ git checkout 439dc8c0 mars.jpg
$ mv mars.jpg mars-sky.jpg
次に、古い mars.jpg
を削除し、新しいファイルを追加します:
BASH
$ git rm mars.jpg
$ git add mars-surface.jpg
$ git add mars-sky.jpg
$ git commit -m "Use two images: surface and sky"
出力
[main 94ae08c] Use two images: surface and sky
 2 files changed, 0 insertions(+), 0 deletions(-)
 create mode 100644 mars-sky.jpg
rename mars.jpg => mars-surface.jpg (100%)これで、両方の画像がリポジトリにチェックインされ、mars.jpg
は存在しなくなります。
典型的な作業セッション
リモートGitリポジトリで管理されている共有プロジェクトに取り組むためにコンピュータに向かいます。作業セッション中に以下のアクションを実行しますが、順序は異なります:
- テキストファイル
numbers.txtに数値100を追記する。 - リモートリポジトリをローカルリポジトリに一致させる。
- 成功を祝う。
- ローカルリポジトリをリモートリポジトリに一致させる。
- 変更をステージングする。
- ローカルリポジトリに変更をコミットする。
コンフリクトの可能性を最小限に抑えるために、どの順序でこれらのアクションを実行すべきですか?
表の「アクション」列に順序を記入し、「コマンド」列に対応するコマンドを記述してください。
| order | action | command |
|---|---|---|
| 1 | git pull origin main |
|
| 2 | Make changes | echo 100 >> numbers.txt |
| 3 | Stage changes | git add numbers.txt |
| 4 | Commit changes | git commit -m "Add 100 to numbers.txt" |
| 5 | Update remote | git push origin main |
| 6 | Celebrate! |
まとめ
- コンフリクトは、2人以上が同じファイルの同じ行を変更したときに発生します。
- バージョン管理システムは、変更を無視して上書きすることを許さず、コンフリクトを強調表示して解決を促します。
Content from オープン サイエンス
最終更新日:2024-11-24 | ページの編集
概要
質問
- バージョン管理は、私の研究をよりオープンにするのにどのように役立ちますか?
目的
- バージョン管理システムを計算実験用の電子実験ノートとしてどのように活用できるか説明しましょう。
“open” の反対は “closed” ではありません。 “open” の反対は “broken” です。
-– John Wilbanks
科学では情報を自由に共有することが理想的かもしれませんが、現実はもっと複雑なことがよくあります。 最近のよくあるやり方は次のようになります。
- 科学者は何らかのデータを収集し、それを自分の部門によって時折バックアップされるマシンに保存します。
- 次に、科学者はそのデータを分析するために、いくつかの小さなプログラム(これもその科学者のマシンにあります)を作成または変更します。
- 結果が出たら、それを書き留めて論文を提出します。 科学者は自分のデータを含めるかもしれません – ますます多くのジャーナルがこれを必要としています – しかし科学者はおそらく自分のコードを含めていません。
- 時間が経過します。
- ジャーナルは、科学者の分野の他の少数の人々によって匿名で書かれたレビューを科学者に送信します。 科学者はレビューした人を納得させるために自分の論文を改訂し、その間に科学者は以前に書いたスクリプトを修正し、論文を再提出するかもしれません。
- さらに時間が経過します。
- ついに論文が出版されます。 科学者のデータのオンラインコピーへのリンクが含まれている可能性がありますが、論文自体はペイウォールの背後にあるでしょう:個人的または組織的なアクセス権を持つ人だけがそれを読むことができるでしょう。
しかし、ますます多くの科学者にとって、そのプロセスは次のようになります:
- figshareやZenodoなどのオープンアクセスリポジトリに保存され、独自のデジタルオブジェクト識別子 (DOI) が与えられます。 または、データはすでに公開されており、Dryad に保存されています。
- 科学者は、自分の研究を保持するためにGitHubに新しいリポジトリを作成します。
- 科学者は分析を行うときに、スクリプト (場合によってはいくつかの出力ファイルも) への変更をそのリポジトリにプッシュします。 科学者はまた、自分の論文用にそのリポジトリを使用します;そしてそのリポジトリは、同僚とのコラボレーションのハブになります。
- 論文の状態に満足したら、arXivまたはその他のプレプリントサーバーに版を投稿し、仲間からのフィードバックを求めます。
- そのフィードバックに基づいて、科学者は最終的に論文をジャーナルに投稿する前に、いくつかの改訂を投稿する可能性があります。
- 公開された論文には、科学者のプレプリントとコードそしてデータリポジトリへのリンクが含まれているため、他の科学者が論文の研究を自分の研究の出発点として使用するのがはるかに簡単になります。
このオープンモデルは発見を加速します:研究結果がオープンになっていればなっているほど、 広く引用され、再利用されます。 ただし、このように作業したい人は、正確に “オープン” が何を意味し、それをどのように行うかについて、いくつかの決定を下す必要があります。 この本では、オープンサイエンスのさまざまな側面について詳しく知ることができます。
これは、バージョン管理を教える (多くの) 理由の1つです。 コツコツと使うと、計算作業のための共有可能な電子ラボノートとして機能することによって、 バージョン管理は “どのように” の質問に答えてくれます:
- 誰がいつ何をしたかなど、作業の概念的な段階が文書化されています。 すべてのステップには、(ほとんどの場合)固有の識別子 (コミットID) がスタンプされています。
- 理論的根拠、アイデア、およびその他の知的作業の文書化を、それらから生じる変化に直接結び付けることができます。
- 独自の回復可能な方法で計算結果を取得するために、研究で使用したものを参照できるようになります。
- Gitなどのバージョン管理システムを使用すると、リポジトリの履歴全体を簡単にアーカイブして永続化できます。
コードを引用可能にすること
バージョン管理リポジトリでホストされているもの(データ、コード、論文など)はすべて、 引用可能なオブジェクトに変換できます。これを行う方法は、 これを行う方法は、レッスン 12: 引用で学習します。
私の仕事はどれくらい再現可能ですか?
ラボメイトの1人に、あなたの論文やウェブで見つけることができるものだけを使用して、あなたが最近得た結果を再現するように依頼してみましょう。 ラボメイトの結果の1つに対して同じことを行ってみてから、あなたの研究室由来の結果にそれを行ってみてください。
適切なデータリポジトリを見つける方法は?
数分間インターネットサーフィンして、次のデータリポジトリをチェックしてみましょう:Figshare, Zenodo、Dryad。 研究分野によっては、その分野でよく知られたコミュニティで認められたリポジトリが見つかるかもしれません。 Natureが推奨するこれらのデータリポジトリも便利かもしれません。 現在のプロジェクト用にどのデータリポジトリにアプローチしたいかを隣人と議論し、その理由を説明してみましょう。
How to Track Large Data or Image Files using Git?
Large data or image files such as .md5 or
.psd file types can be tracked within a github repository
using the Git Large File
Storage open source extension tool. This tool automatically uploads
large file contents to a remote server and replaces the file with a text
pointer within the github repository.
Try downloading and installing the Git Large File Storage extension tool, then add tracking of a large file to your github repository. Ask a colleague to clone your repository and describe what they see when they access that large file.
まとめ
- オープンな科学的研究は、クローズドよりも有用であり、引用数が多い。
Content from ライセンス
最終更新日:2024-11-24 | ページの編集
概要
質問
- 自分の作品にはどのようなライセンス情報を含めるべきですか?
目的
- リポジトリにライセンス情報を追加する重要性を説明する。
- 適切なライセンスを選ぶ。
- ライセンスの違いと社会的期待を説明する。
ソースコード、原稿、またはその他の創作物を含むリポジトリが公開されるときは、リポジトリのルートディレクトリに
LICENSE または LICENSE.txt
というファイルを含め、コンテンツがどのライセンスの下で利用可能かを明確に記載する必要があります。
これは、創作物が自動的に知的財産権(したがって著作権)の保護対象となるためです。ライセンスがない状態で創作物を再利用することは危険であり、著作権侵害で訴えられる可能性があります。
ライセンスはこの問題を解決します。ライセンスは、他者(ライセンシー)に本来は持たない権利を付与します。
付与される権利とその条件はライセンスごとに異なりますが、その違いはわずかです。実際には、いくつかのライセンスが特に人気であり、choosealicense.com
を使えば、自分のニーズに合った一般的なライセンスを見つけることができます。重要な考慮事項には以下が含まれます:
- 特許権に関する取り扱いを明記したいか。
- 派生物を配布する際にソースコードも配布することを要求するか。
- ライセンスするコンテンツがソースコードかどうか。
- コードをライセンスする意図があるかどうか。
一般的に使用されているライセンスを選ぶことで、貢献者や利用者にとっての利便性が向上します。
これらのライセンスに精通している可能性が高く、複雑な用語を読む手間が省けるからです。
Open Source Initiative と Free Software Foundation
の両方が、推奨されるライセンスのリストを維持しています。
この記事 は、科学者がコードを書く際の視点から見たライセンスとそのオプションについての優れた概要を提供しています。
最終的に重要なのは、ライセンスが明確に記載されていることです。また、リポジトリが公開されていなくても、ライセンスは早期に選定するのが最善です。決定を後回しにすると、後に複雑化する可能性があります。新しいコラボレーターが参加するたびに、その人も著作権を持つことになり、ライセンス選定時に承認を得る必要があるからです。
オープンライセンスを適用できますか?
自分のソフトウェアにオープンライセンスを適用できるかどうかを確認してください。
単独でこれを行うことができますか、それとも所属機関の誰かの許可が必要ですか?
もし許可が必要なら、それは誰ですか?
自分が既に受け入れているライセンスは?
私たちが日常的に使用している多くのソフトウェアツール(このワークショップでも使用されているものを含む)は、オープンソースソフトウェアとして公開されています。以下のリストからGitHubのプロジェクトを1つ選ぶか、自分で選んだプロジェクトを使ってください。そのライセンス(通常は
LICENSE または COPYING
というファイルに記載されています)を見つけ、そのライセンスがソフトウェアの使用方法をどのように制限しているかについて話し合ってください。そのライセンスはこのセッションで議論したものの1つですか?どう違いますか?
まとめ
- リポジトリの内容を他の人がどのように使用できるかを示すために、
LICENSE、LICENSE.md、またはLICENSE.txtファイルがよく使用されます。 - 一般公衆利用許諾契約書(GPL)ソフトウェアを自分のソフトウェアに組み込む場合、そのソフトウェアもGPLライセンスの下で公開する必要があります。他のほとんどのオープンライセンスにはこの要件がありません。
- Creative Commons のライセンスファミリーでは、帰属、派生作品の作成、さらなる共有、商業利用に関する要件と制限を組み合わせることができます。
- 法律の専門家でない人は、ライセンスを一から作成するべきではありません。
Content from 引用
最終更新日:2024-11-24 | ページの編集
概要
質問
- 自分の作品をどのようにすれば引用しやすくできますか?
目的
- 自分の作品を引用しやすくする方法を学ぶ
プロジェクトを参照する方法を記載した CITATION または
CITATION.txt というファイルを含めると良いでしょう。
Software Carpentry の場合、次のように記載されています:
To reference Software Carpentry in publications, please cite:

Greg Wilson: "Software Carpentry: Lessons Learned". F1000Research,
2016, 3:62 (doi: 10.12688/f1000research.3-62.v2).

@online{wilson-software-carpentry-2016,
  author      = {Greg Wilson},
  title       = {Software Carpentry: Lessons Learned},
  version     = {2},
  date        = {2016-01-28},
  url         = {http://f1000research.com/articles/3-62/v2},
  doi         = {10.12688/f1000research.3-62.v2}
}
さらに詳しいアドバイスや、コードを引用可能にする他の方法については、
Software
Sustainability Institute のブログ
や以下の文献に記載されています:
Smith AM, Katz DS, Niemeyer KE, FORCE11 Software Citation Working Group. (2016) Software citation
principles. [PeerJ Computer Science 2:e86](https://peerj.com/articles/cs-86/)
https://doi.org/10.7717/peerj-cs.8また、対象のプロジェクトに引用すべき論文や書籍が存在しない場合は、@software{...
BibTeX
エントリタイプを使用することも可能です。
まとめ
- リポジトリに CITATION ファイルを追加して、自分の作品をどのように引用してほしいかを説明する。
Content from ホスティング
最終更新日:2024-11-24 | ページの編集
概要
質問
- バージョン管理リポジトリはどこでホストすればよいでしょうか?
目的
- 科学研究のホスティングのためのさまざまなオプションについて説明します。
ライセンスを選択した後、作業を公開したいグループにとってのもう1つの大きな課題は、コードやデータをどこでホストするかです。
1つのオプションは、研究室、学部、または大学がサーバーを提供し、アカウントやバックアップなどを管理することです。
この方法の主な利点は、誰が何を所有しているかが明確になることです。
特に、ヒトを対象とする実験に関するデータや特許出願に使用される可能性がある機密性の高い題材の場合に重要です。
一方、主な欠点は、サービスの提供コストとその存続期間です。
10年を費やしてデータを収集した科学者は、さらに10年後もそのデータが利用可能であることを確認したいと考えますが、それは学術インフラに資金提供されるほとんどの助成金の存続期間を超えています。
もう1つのオプションは、自分でドメインを購入し、それをホストするためにインターネットサービスプロバイダー(ISP)に料金を支払うことです。
これにより、個人またはグループによる制御が強化され、ある機関から別の機関に移動するときに発生する可能性のある問題を回避できます。ただし、この方法は上記のオプションや以下のオプションよりもセットアップに多くの時間と労力を必要とします。
3つ目のオプションは、GitHub、GitLab、またはBitBucket
のようなパブリックホスティングサービスを利用することです。
これらの各サービスは、コードリポジトリを作成、閲覧、編集できるWebインターフェイスを提供します。
また、イシュートラッキング、Wikiページ、メール通知、コードレビューなど、コミュニケーションやプロジェクト管理ツールも備えています。
これらのサービスは規模の経済とネットワーク効果の恩恵を受けています。1つの大規模なサービスを適切に運営する方が、多くの小規模なサービスを同じ基準で運営するよりも簡単です。また、コラボレーションが容易になります。
人気のあるサービスを使用することで、既にそのサービスを使用しているコミュニティとプロジェクトをつなげることができます。
たとえば、Software Carpentry は GitHub 上にあります。
このページのソースコードもここにあります。GitHub
アカウントを持っていれば、誰でもこのテキストに変更を提案することができます。
GitHub リポジトリは、Zenodoと連携してリリースに DOI
を割り当てることも可能です。
たとえば、10.5281/zenodo.7908089
は、このGit入門書に「ミントされた」DOIです。
大規模で確立されたサービスを利用すると、強力なツールを迅速に利用できる場合もあります。
その1つが継続的インテグレーション(CI)です。CIは、コードがコミットされたりプルリクエストが送信されたりするたびにソフトウェアのビルドやテストを自動で実行します。
オンラインホスティングサービスとの直接統合により、この情報がすべてのプルリクエストに表示され、コードの整合性と品質基準の維持に役立ちます。
CIは自分でホストする場合でも利用可能ですが、オンラインサービスを使用する場合よりも設定や保守の手間が大きくなります。
さらに、こうしたツールはオープンソースプロジェクトには無料で提供されることが多く、プライベートリポジトリの場合は有料で利用可能です。
組織的な制約
科学において共有は理想ですが、多くの組織が共有に制限を設けています。
たとえば、特許出願が可能な知的財産を保護するためです。
こうした制約に直面した場合、その根本的な動機について問い合わせたり、特定のプロジェクトや分野に例外を求めたり、より広範囲にわたってオープンサイエンスを支援するための制度改革を推進することが有益な場合があります。
自分の作品を公開できますか?
自分の作品を公開リポジトリでオープンにホストできるかどうかを確認してください。
これを単独で行うことができますか、それとも所属機関の誰かの許可が必要ですか?
もし許可が必要なら、それは誰ですか?
まとめ
- プロジェクトは大学のサーバー、個人ドメイン、またはパブリックホスティングサービスでホストできます。
- 知的財産や機密情報の保存に関する規則は、コードやデータがホストされる場所にかかわらず適用されます。
Content from 補足: RStudio での Git の使用方法
最終更新日:2024-11-24 | ページの編集
概要
質問
- RStudio で Git をどのように使うことができますか?
目的
- RStudio を使用して Git を利用する方法を理解する。
データ分析スクリプトを開発する際にバージョン管理は非常に便利です。そのため、R
プログラミング言語用の人気開発環境である RStudio には、Git
と統合された機能が組み込まれています。
一部の高度な Git 機能はコマンドラインを必要としますが、RStudio
は多くの一般的な Git 操作に便利なインターフェイスを提供します。
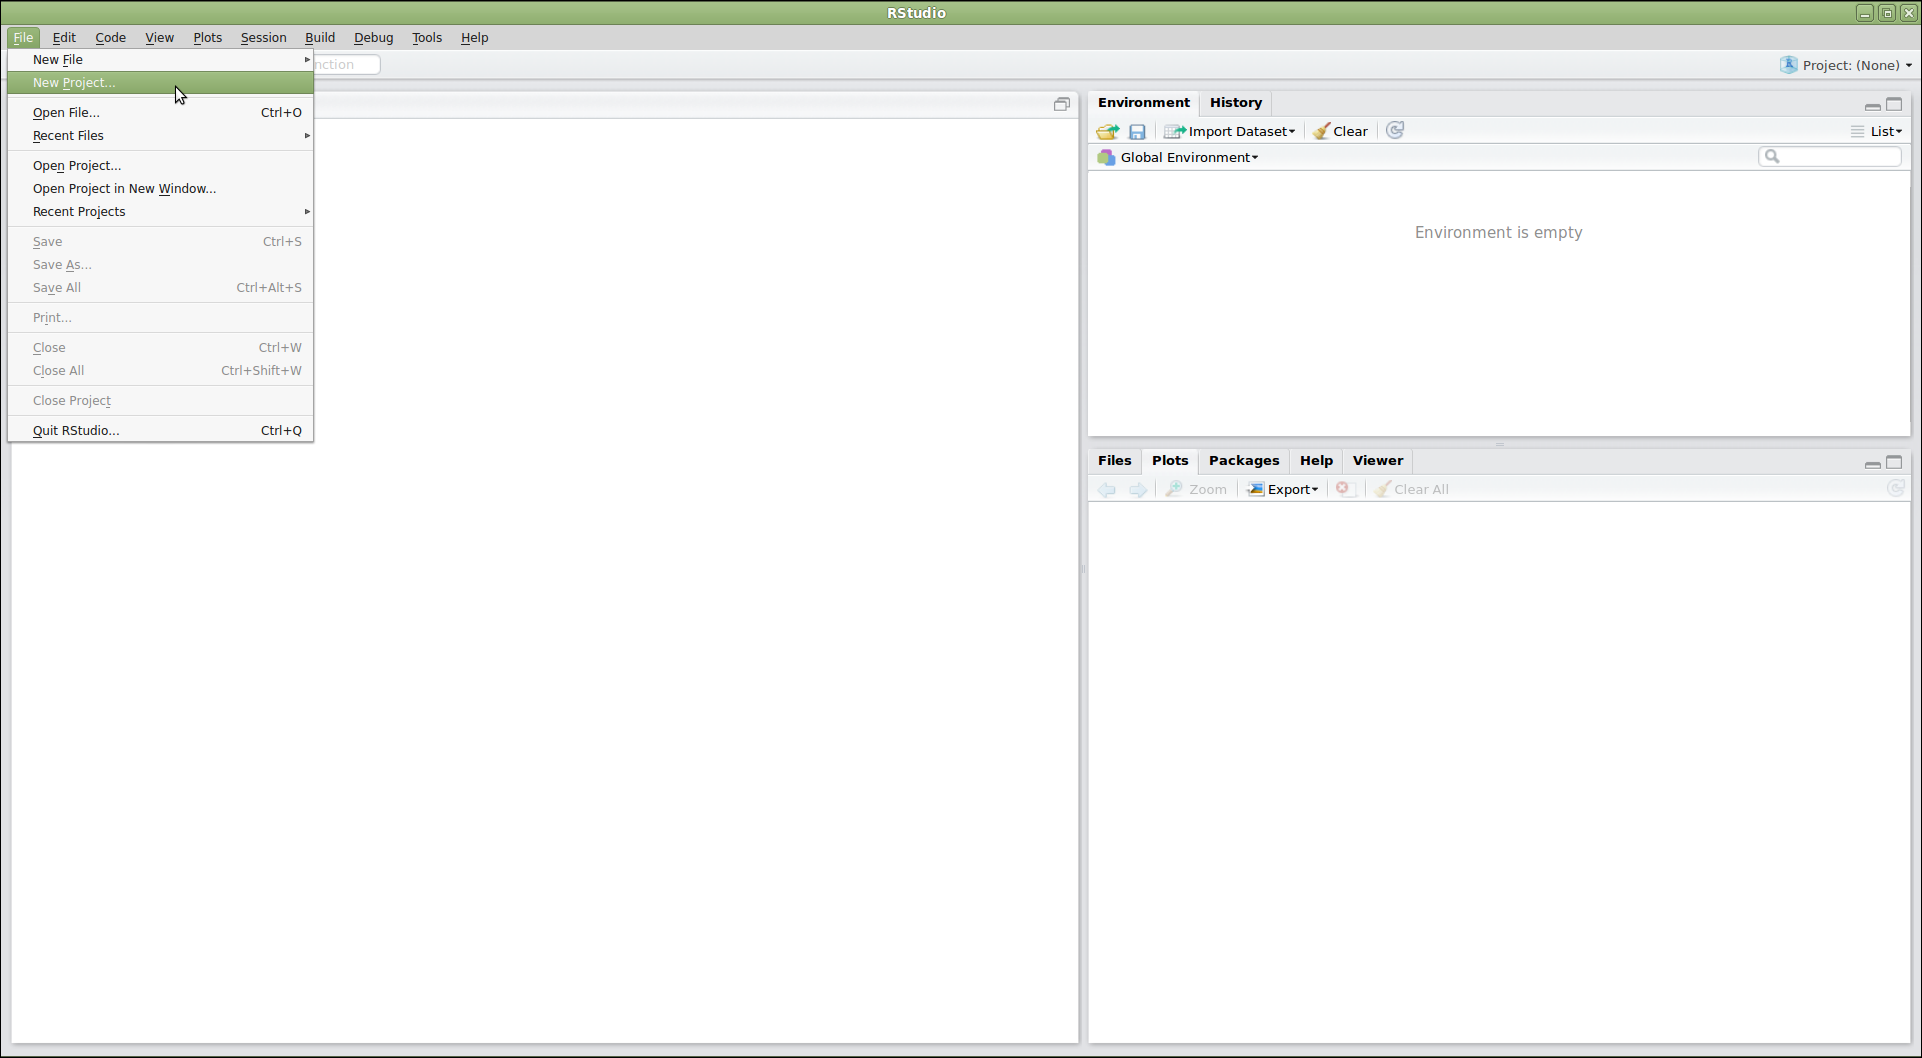
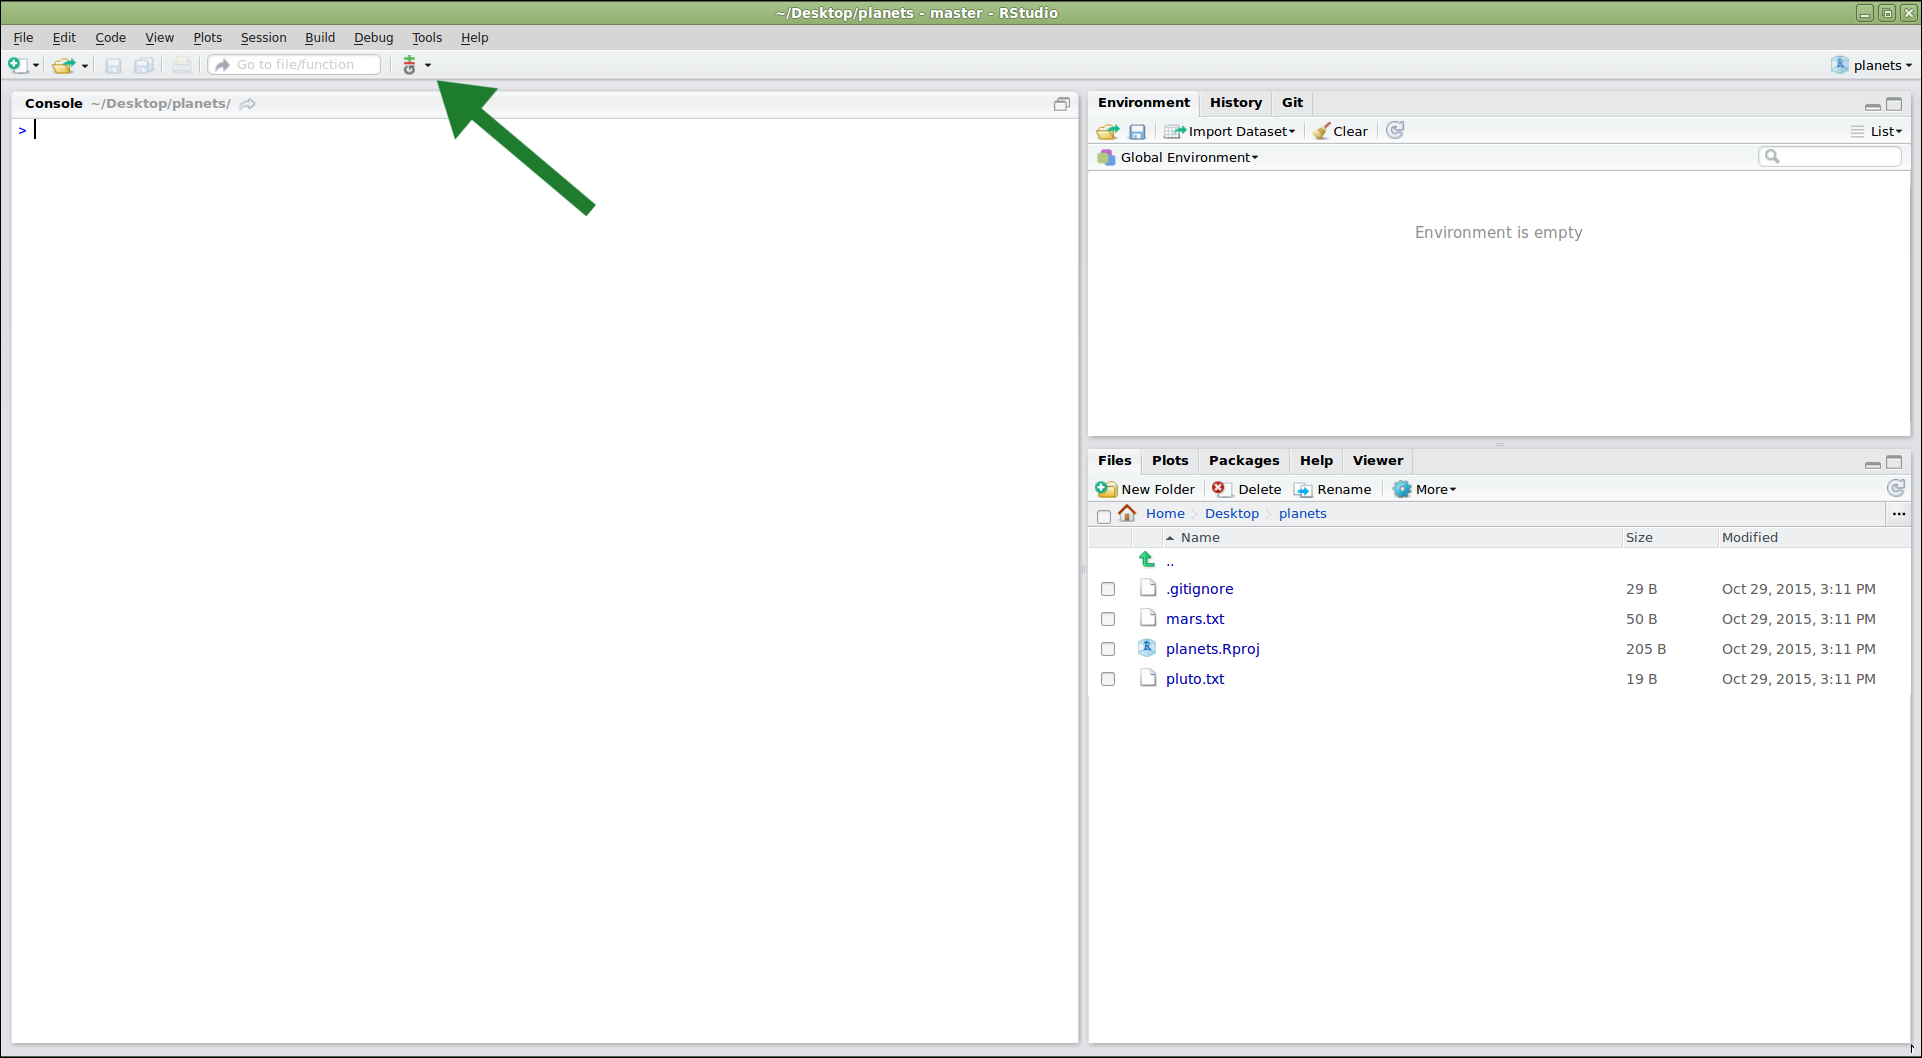
RStudio では、特定のディレクトリに関連するさまざまなファイルを管理するために プロジェクト を作成できます。プロジェクトの進行状況を追跡し、以前のバージョンに戻したり、他の人とコラボレーションしたりするために、RStudio プロジェクトを Git でバージョン管理します。RStudio で Git を使用するには、新しいプロジェクトを作成します:
この操作により、プロジェクトをどのように作成するかを尋ねるダイアログが開きます。いくつかのオプションがあります。ここでは、既に作成した
planets リポジトリを RStudio
で使用したいとします。そのリポジトリがコンピュータ上のディレクトリに存在するため、「Existing
Directory」オプションを選択します:
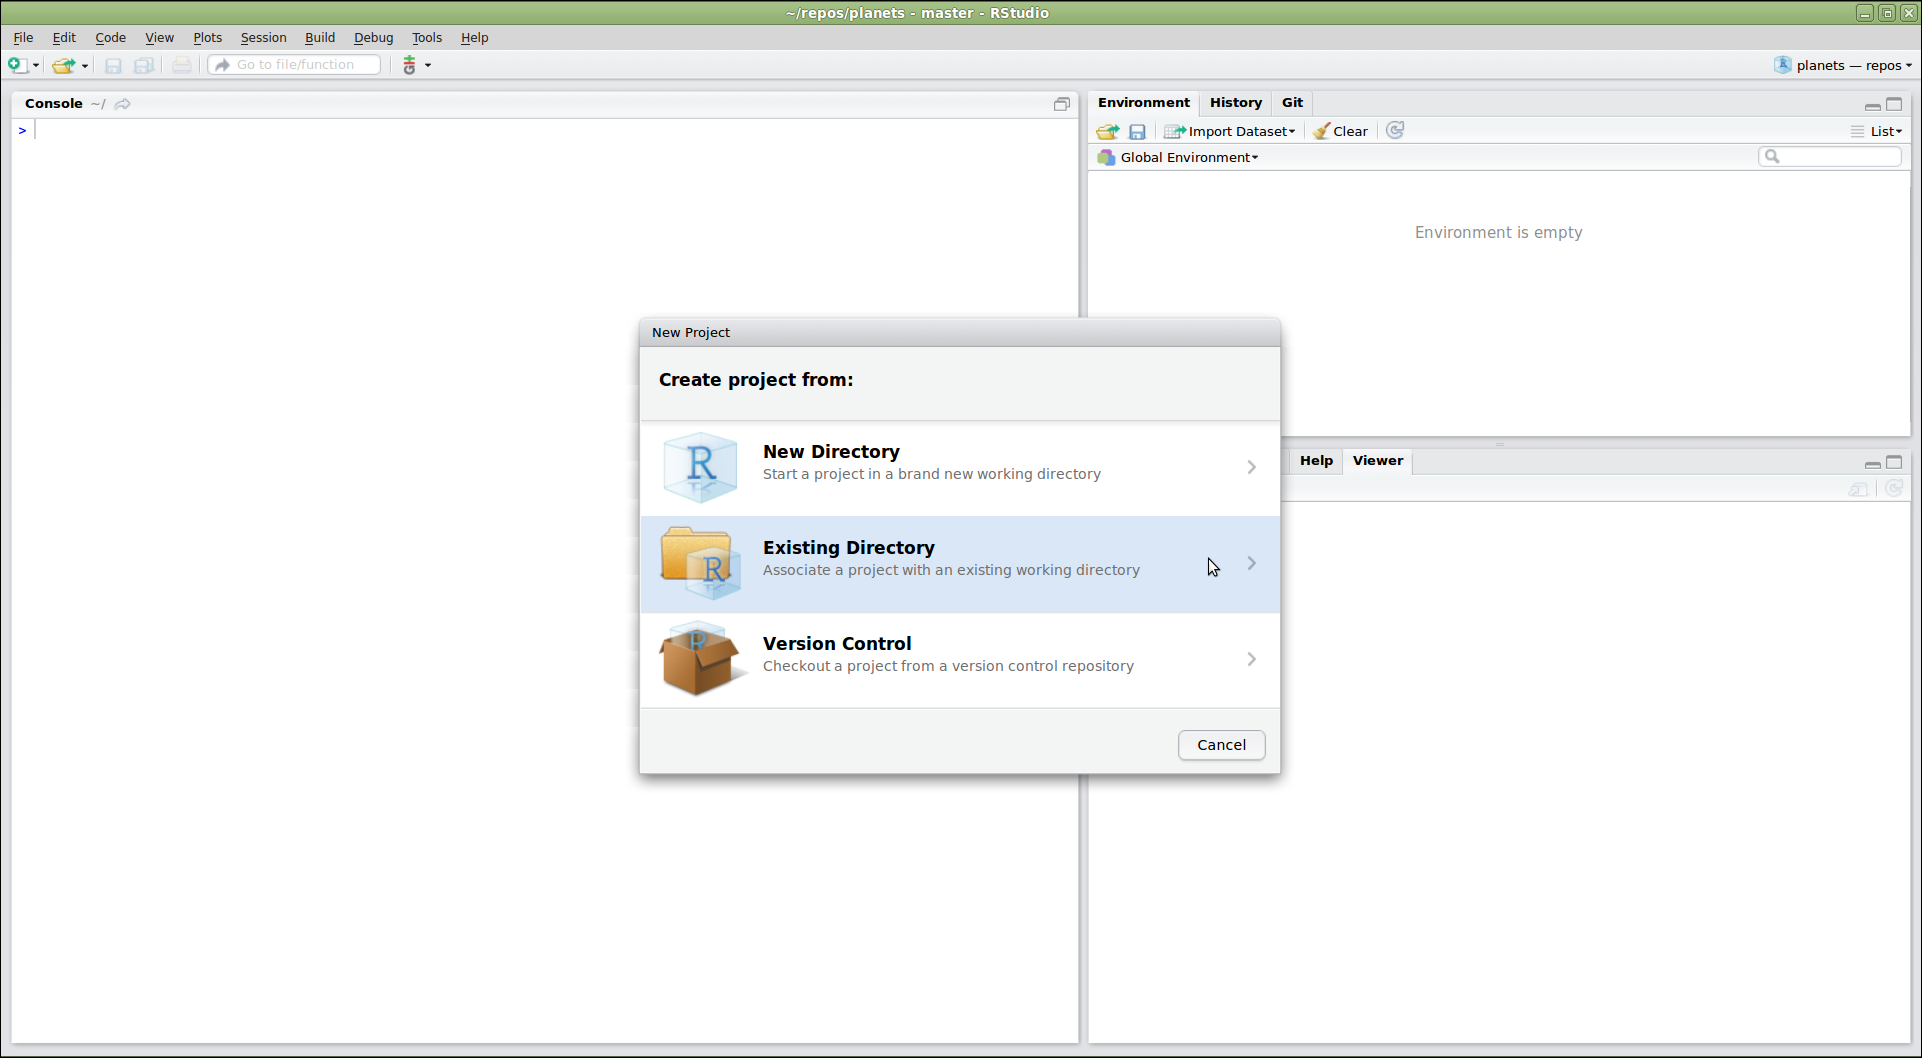
「Version Control」オプションが表示されていますか?
ここでは使用しませんが、このメニューには「Version
Control」オプションが表示されるはずです。このオプションは、GitHub
からリポジトリをクローンしてプロジェクトを作成する場合にクリックします。
このオプションが表示されない場合、RStudio が Git
実行可能ファイルの場所を認識していない可能性があります。このレッスンを進めるには、RStudio
に Git の場所を教える必要があります。
Git 実行可能ファイルを見つける
まず、Git がコンピュータにインストールされていることを確認します。macOS または Linux の場合はシェルを開き、Windows の場合はコマンドプロンプトを開いて次を入力します:
-
which git(macOS, Linux) -
where git(Windows)
コンピュータに Git がインストールされていない場合は、Git
のインストール手順 を参考にインストールしてください。その後、再度
which git(macOS, Linux)、または
where git(Windows)を入力して、Git
実行可能ファイルのパスをコピーします。
例:Windows で GitHub Desktop
がインストールされている場合、パスは次のようになります:C:/Users/UserName/AppData/Local/GitHubDesktop/app-1.1.1/resources/app/git/cmd/git.exe
次に、RStudio は使用する既存のディレクトリを尋ねます。「Browse…」をクリックして該当するディレクトリに移動し、「Create Project」をクリックします:
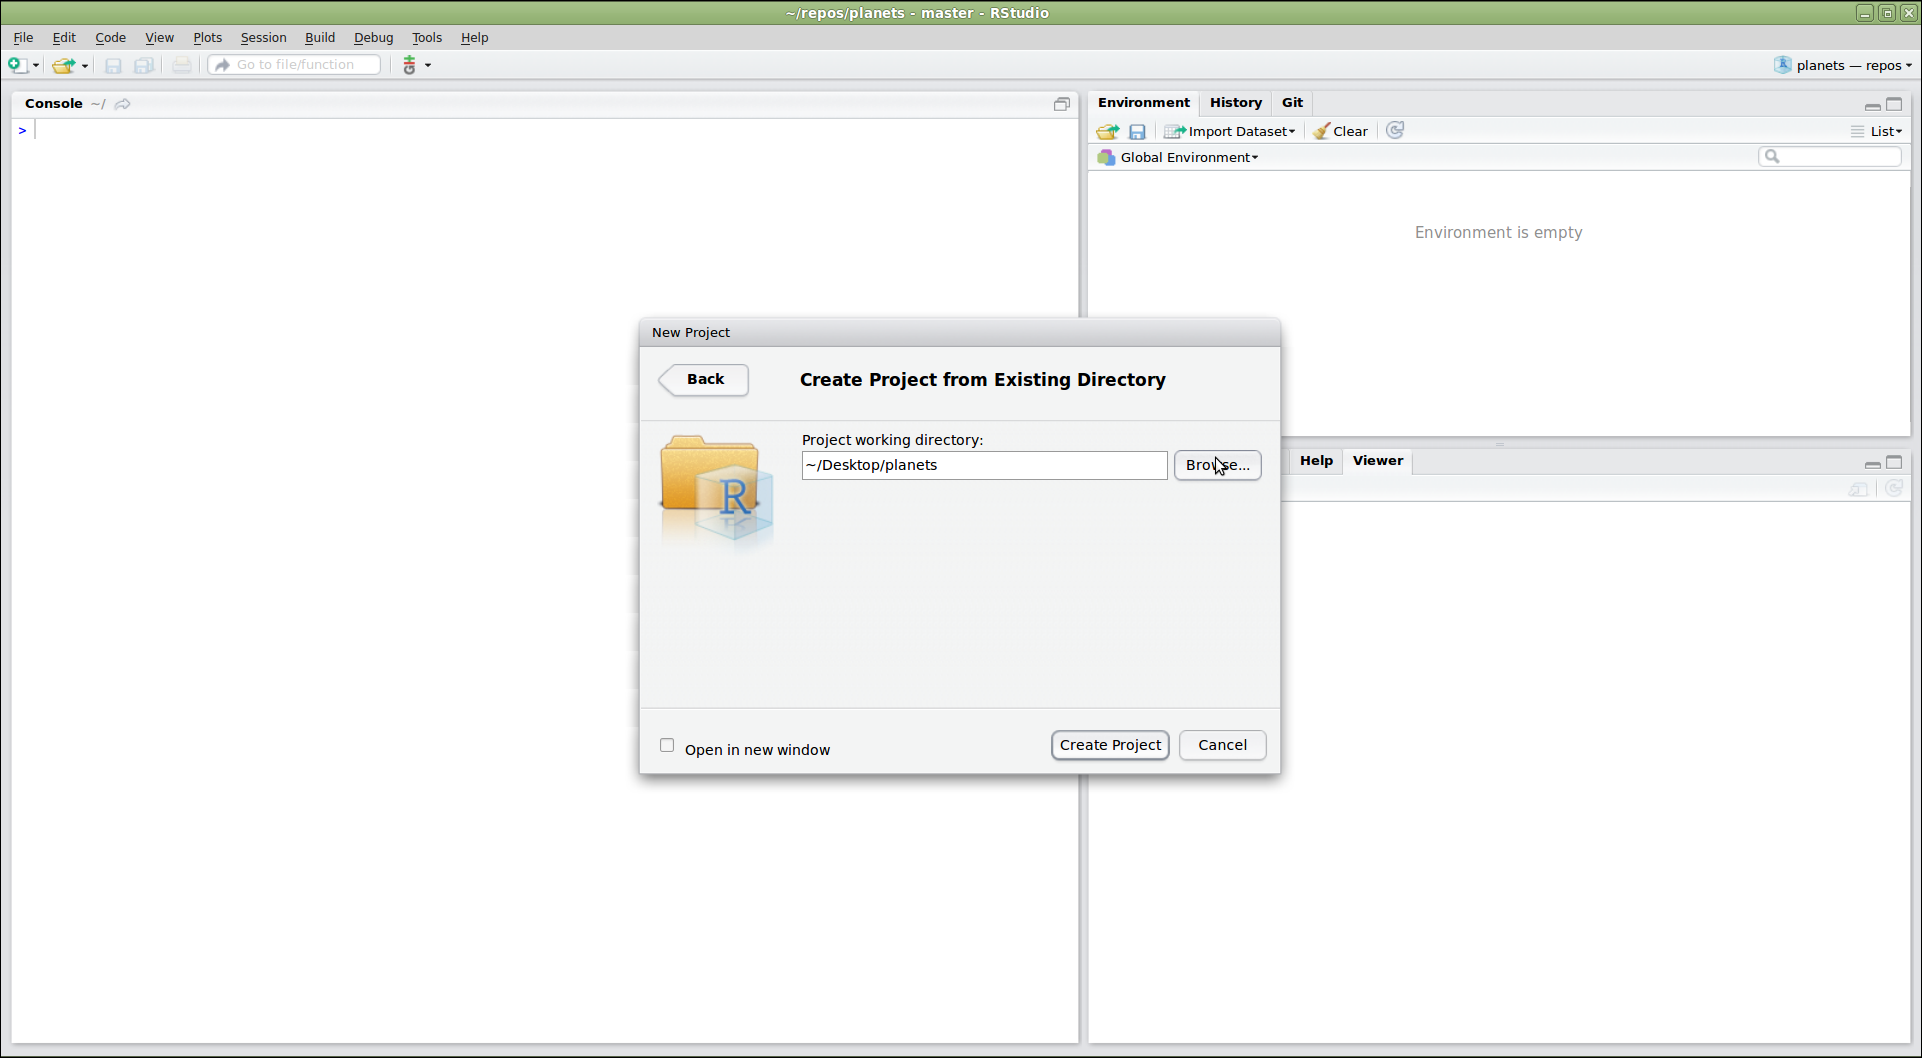
これで、既存の planets リポジトリ内に RStudio
の新しいプロジェクトが作成されました。メニューバーに縦型の「Git」メニューが表示されていることに注目してください。
RStudio は現在のディレクトリが Git リポジトリであることを認識し、Git
を操作するためのツールを提供します:
リポジトリ内の既存ファイルを編集するには、右下の「Files」パネルでファイルをクリックします。次に、冥王星に関する追加情報を追加してみましょう:
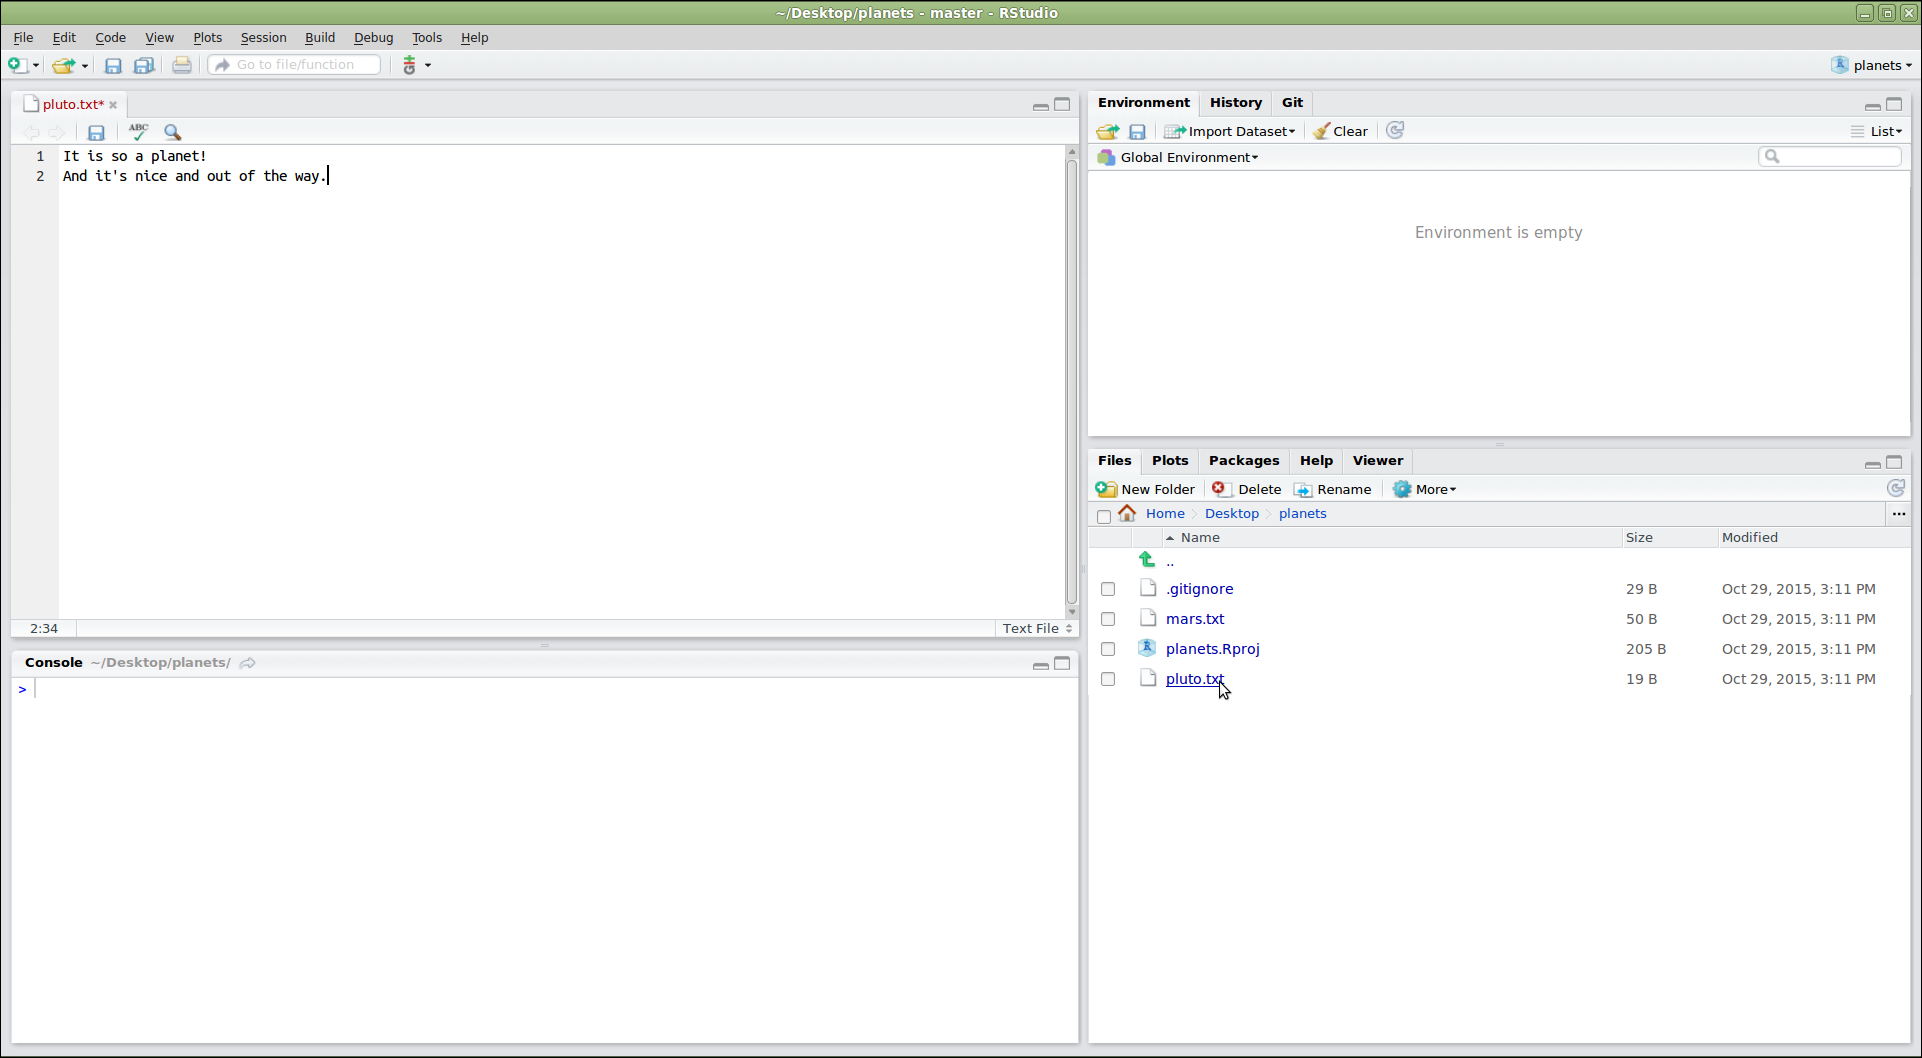
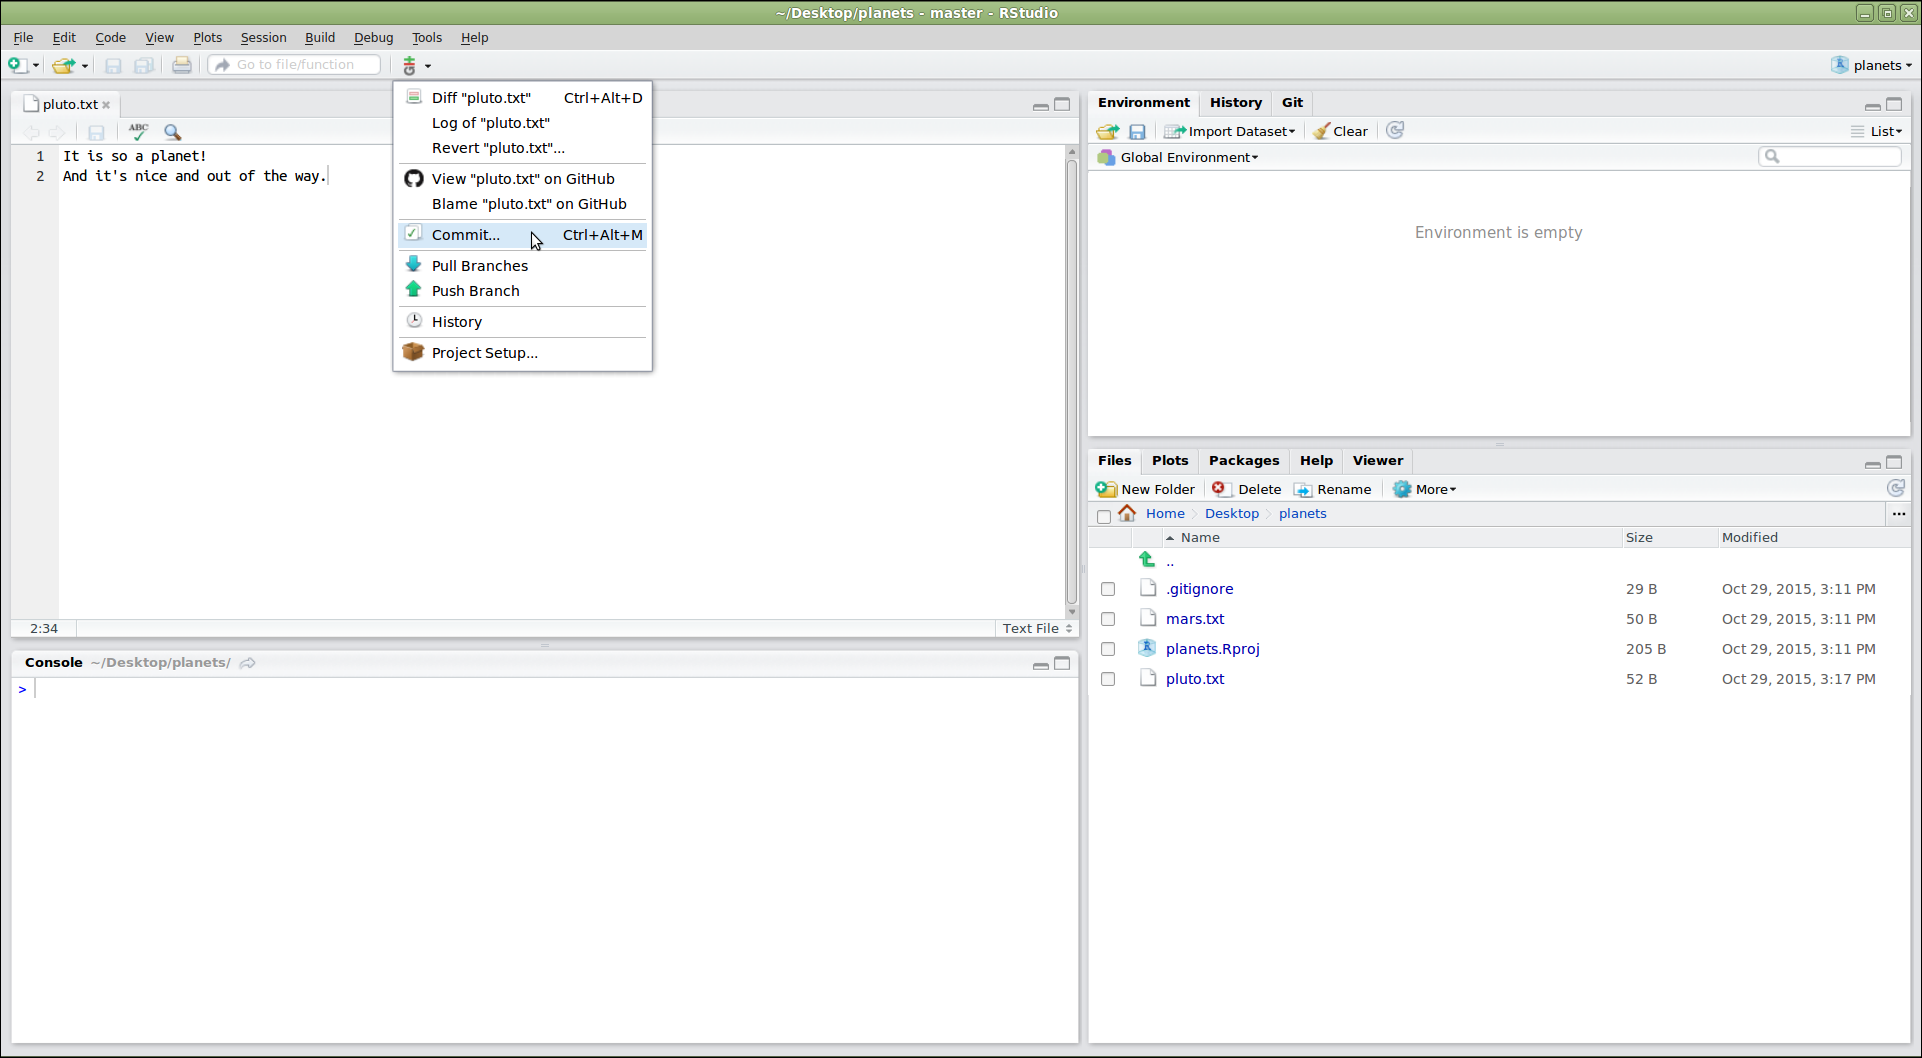
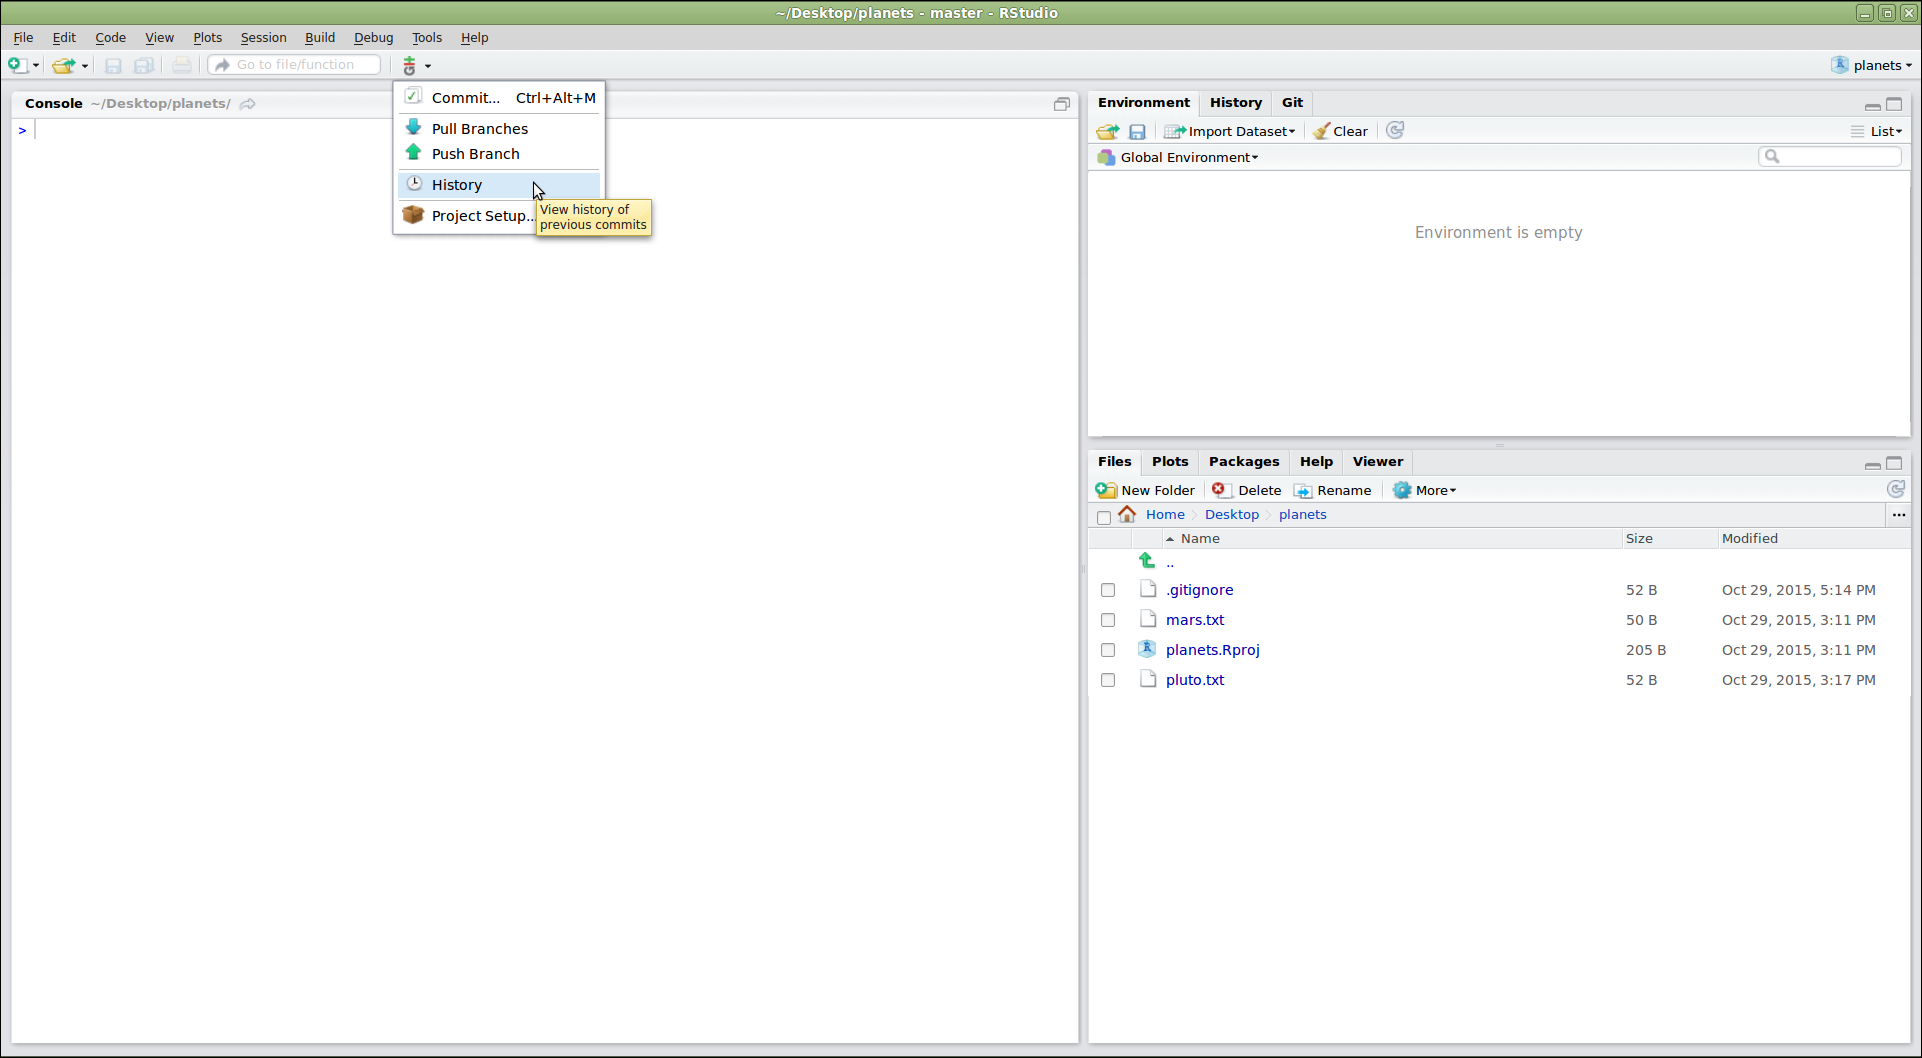
編集したファイルを保存した後、RStudio の Git メニューから「Commit…」をクリックして変更をコミットできます:
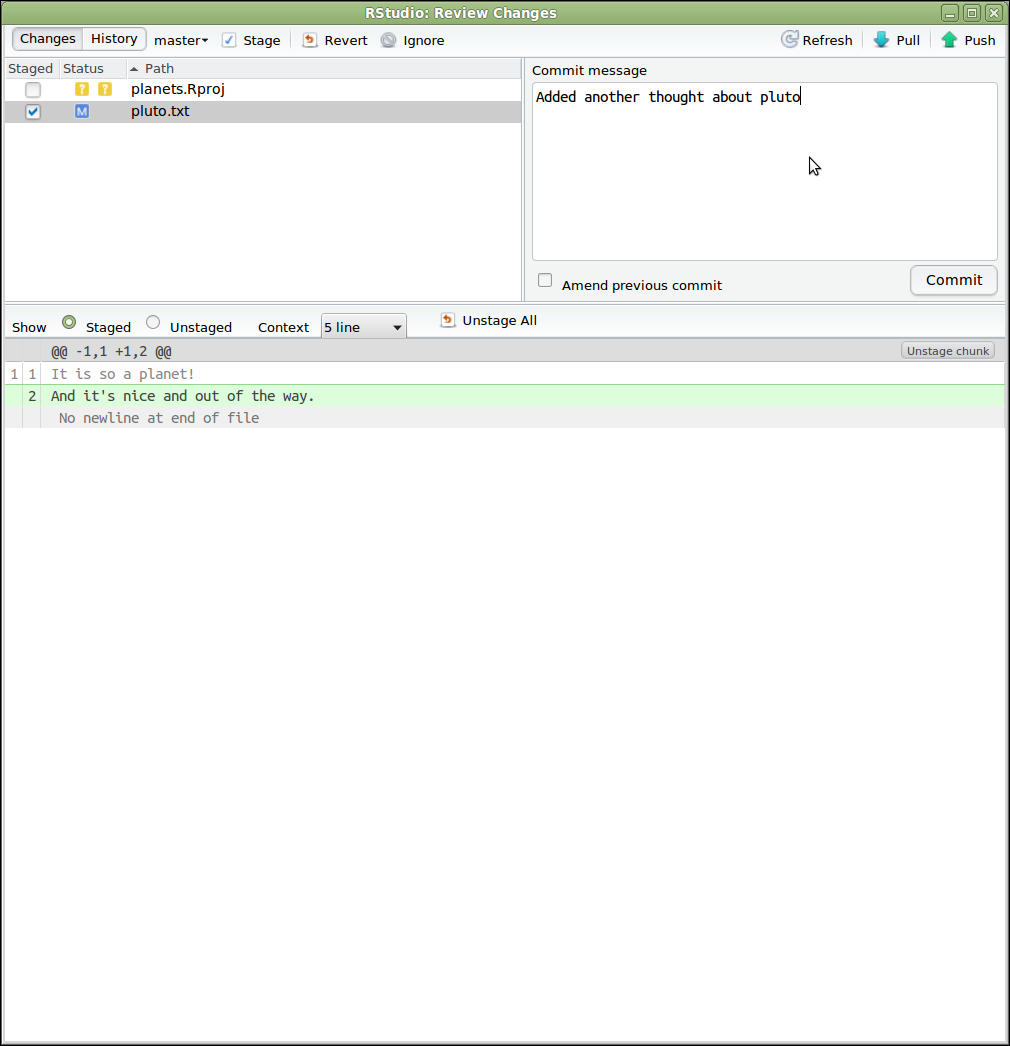
これにより、コミットするファイルを選択し(「Staged」列で該当するボックスをチェック)、コミットメッセージを入力するダイアログが開きます。
「Status」列のアイコンは各ファイルの現在の状態を示します。ファイルをクリックすると、下部パネルにその変更情報(git diff
の出力を使用)が表示されます。すべてが望み通りになったら、「Commit」をクリックします:
変更をプッシュするには、Git メニューから「Push Branch」を選択します。リモートリポジトリからのプルや、コミット履歴の表示オプションもあります:
Push/Pull コマンドがグレーアウトしている場合
Push/Pull コマンドがグレーアウトしている場合、RStudio
がリモートリポジトリ(例:GitHub)の場所を認識していない可能性があります。これを修正するには、リポジトリ内でターミナルを開き、次のコマンドを入力してください:git push -u origin main
その後、RStudio を再起動します。
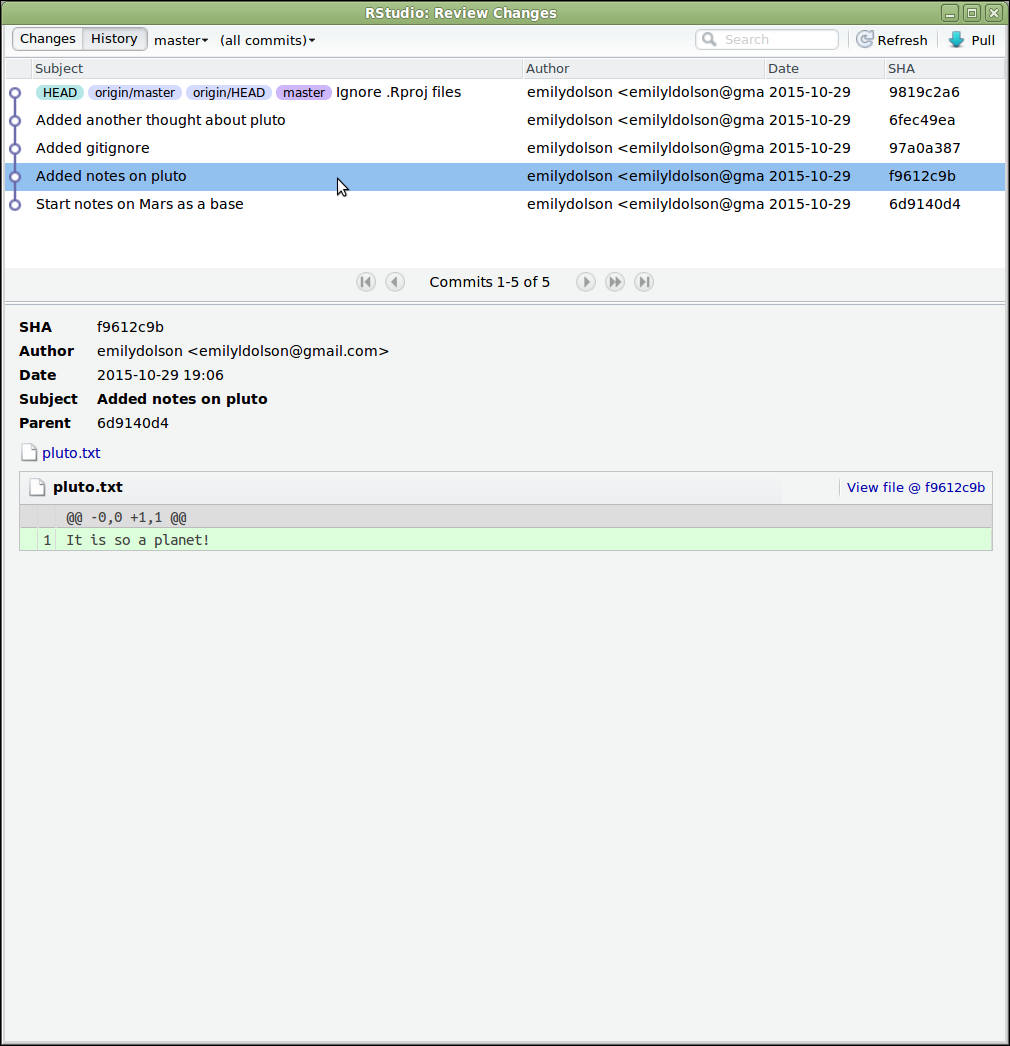
「History」をクリックすると、git log
が表示する内容をグラフィカルに確認できます:
RStudio
はプロジェクトを管理するためにいくつかのファイルを作成します。これらのファイルを追跡したくない場合は
.gitignore ファイルに追加します:
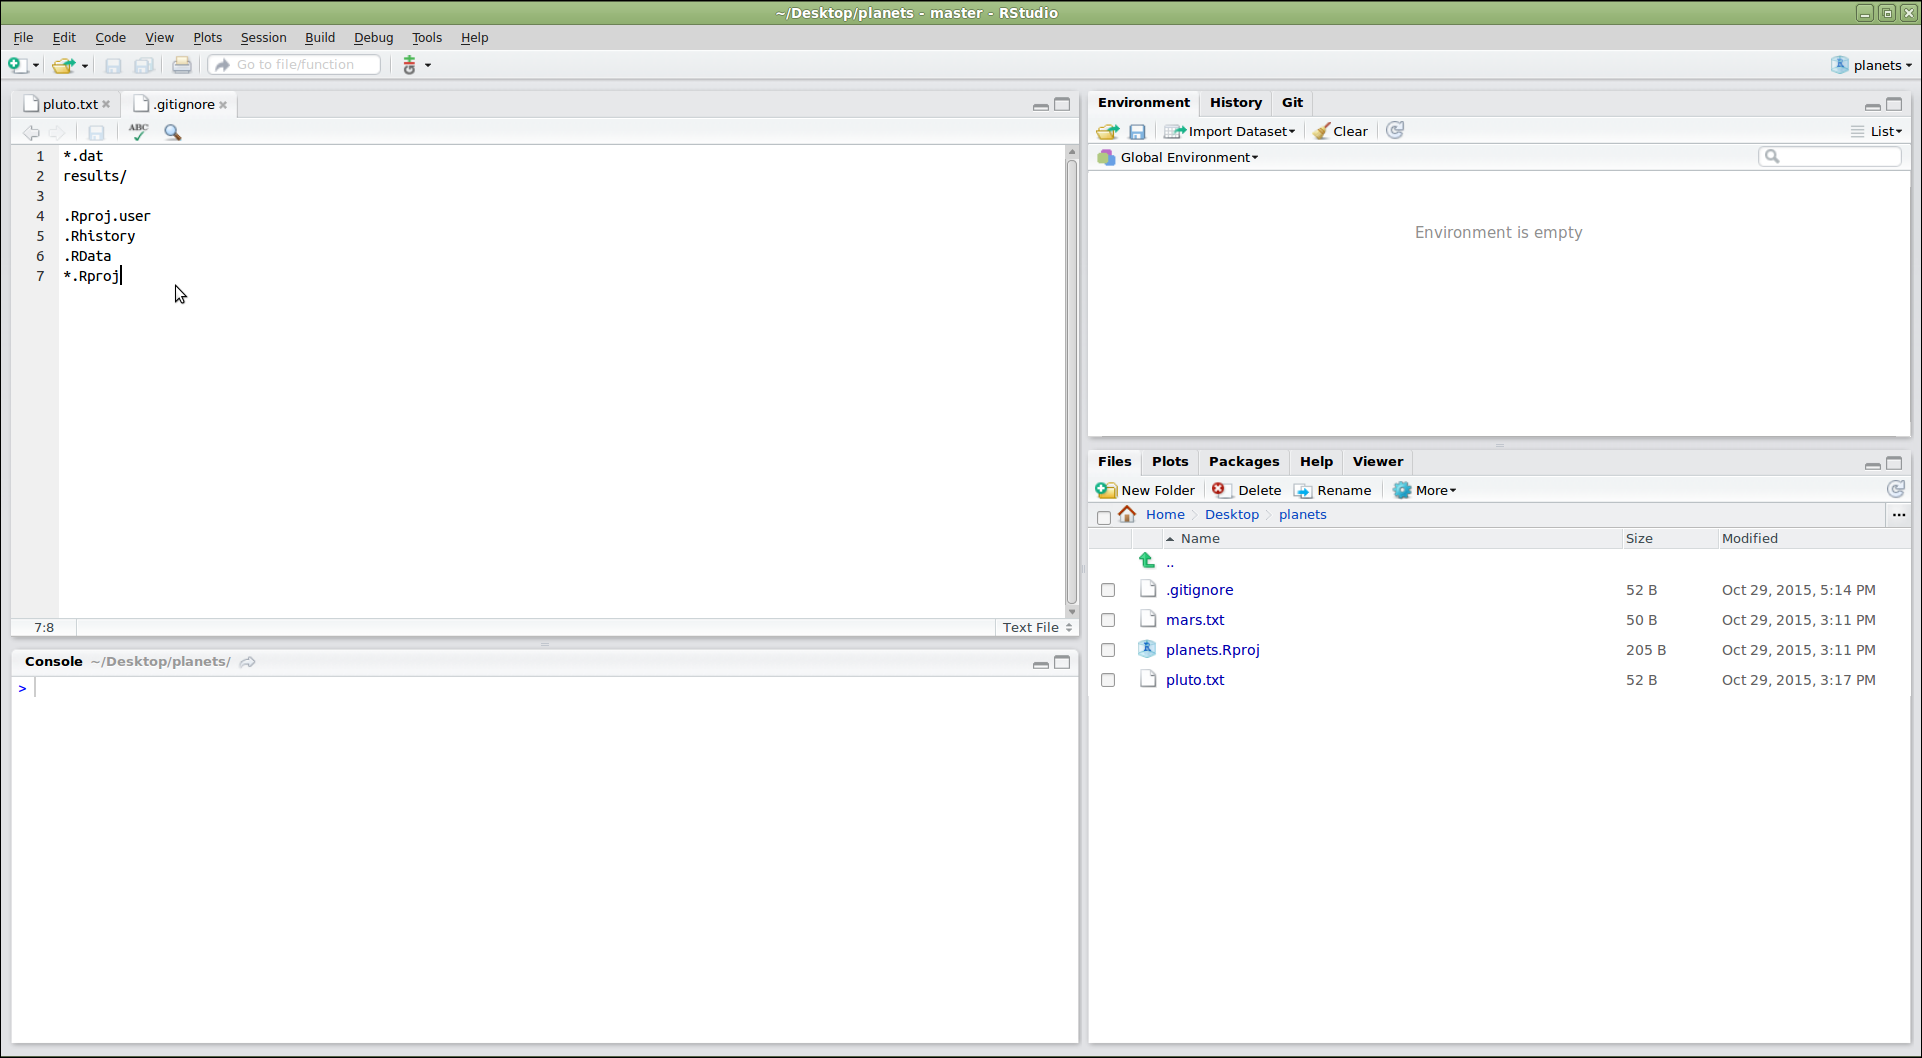
ヒント: 一時的な出力のバージョン管理
通常、一時的
な出力(または読み取り専用データ)をバージョン管理する必要はありません。
これらのファイルやディレクトリを Git に無視させるために
.gitignore ファイルを修正してください。
チャレンジ
- プロジェクト内に
graphsという新しいディレクトリを作成してください。 -
.gitignoreを修正してgraphsディレクトリをバージョン管理対象から除外してください。
RStudio 内で次のコマンドを実行します:
R
dir.create("./graphs")
その後、RStudio の右側パネルから .gitignore
ファイルを開き、リストに graphs/ を追加してください。
RStudio の Git メニューにはさらに多くの機能がありますが、これらの操作で基本的な使用方法を習得できるでしょう!
まとめ
- RStudio の Git 統合を使用すると、プロジェクトのバージョン管理を簡単に行えます。